
Scraping Dynamic Websites with Python - 2025 Guide
Most web scraping data comes from dynamic websites, such as Amazon, and YouTube. These websites provide an interactive and responsive user experience based on user input. For instance, when you access your YouTube account, the video content presented is tailored to your input. As a result, web scraping dynamic sites can be more challenging since the data is subject to constant modifications from user interactions.
In order to scrape data from dynamic sites, you need to use advanced techniques that will simulate a user’s interaction with the website, navigate and select specific content that’s generated by JavaScript, and handle Asynchronous JavaScript and XML (AJAX) requests.
In this guide, you’ll learn how to scrape data from a dynamic website using an open source Python library called Selenium.
Scraping Data from a Dynamic Website with Selenium
Before you start scraping data from a dynamic site, you need to understand the Python package that you’ll be using: Selenium.
What Is Selenium?
Selenium is an open source Python package and automated testing framework that allows you to execute various operations or tasks on dynamic websites. These tasks include things like opening/closing dialogs, searching for particular queries on YouTube, or filling out forms, all in your preferred web browser.
When you utilize Selenium with Python, you can control your web browser and automatically extract data from dynamic websites by writing just a few lines of Python code with the Selenium Python package.
Now that you know how Selenium works, let’s get started.
Create a New Python Project
The first thing you need to do is create a new Python project. Create a directory named
data_scraping_project
where all the collected data and source code files will be stored. This directory will have two subdirectories:
scripts
will contain all the Python scripts that extract and collect data from the dynamic website.
data
is where all the data extracted from a dynamic website will be stored.
Install Python Packages
After you create the
data_scraping_project
directory, you need to install the following Python packages to help you scrape, collect, and save data from a dynamic website:
Selenium
Webdriver Manager will manage binary drivers for different browsers. Webdriver gives you a set of APIs that lets you run different commands to interact with the sites, making it easier to parse, load, and change the content.
pandas will save scraped data from a dynamic website into a simple CSV file.
You can install the Selenium Python package by running the following
pip
command in your terminal:
pip install selenium
Selenium will use the binary driver to control the web browser of your choosing. This Python package provides binary drivers for the following supported web browsers: Chrome, Chromium, Brave, Firefox, IE, Edge, and Opera.
Then run the following
pip
command in your terminal to install
webdriver-manager
:
pip install webdriver-manager
To install pandas, run the following
pip
command:
pip install pandas
What You’ll Scrape
In this article, you’re going to scrape YouTube channel called Programming with Mosh and Hacker News:
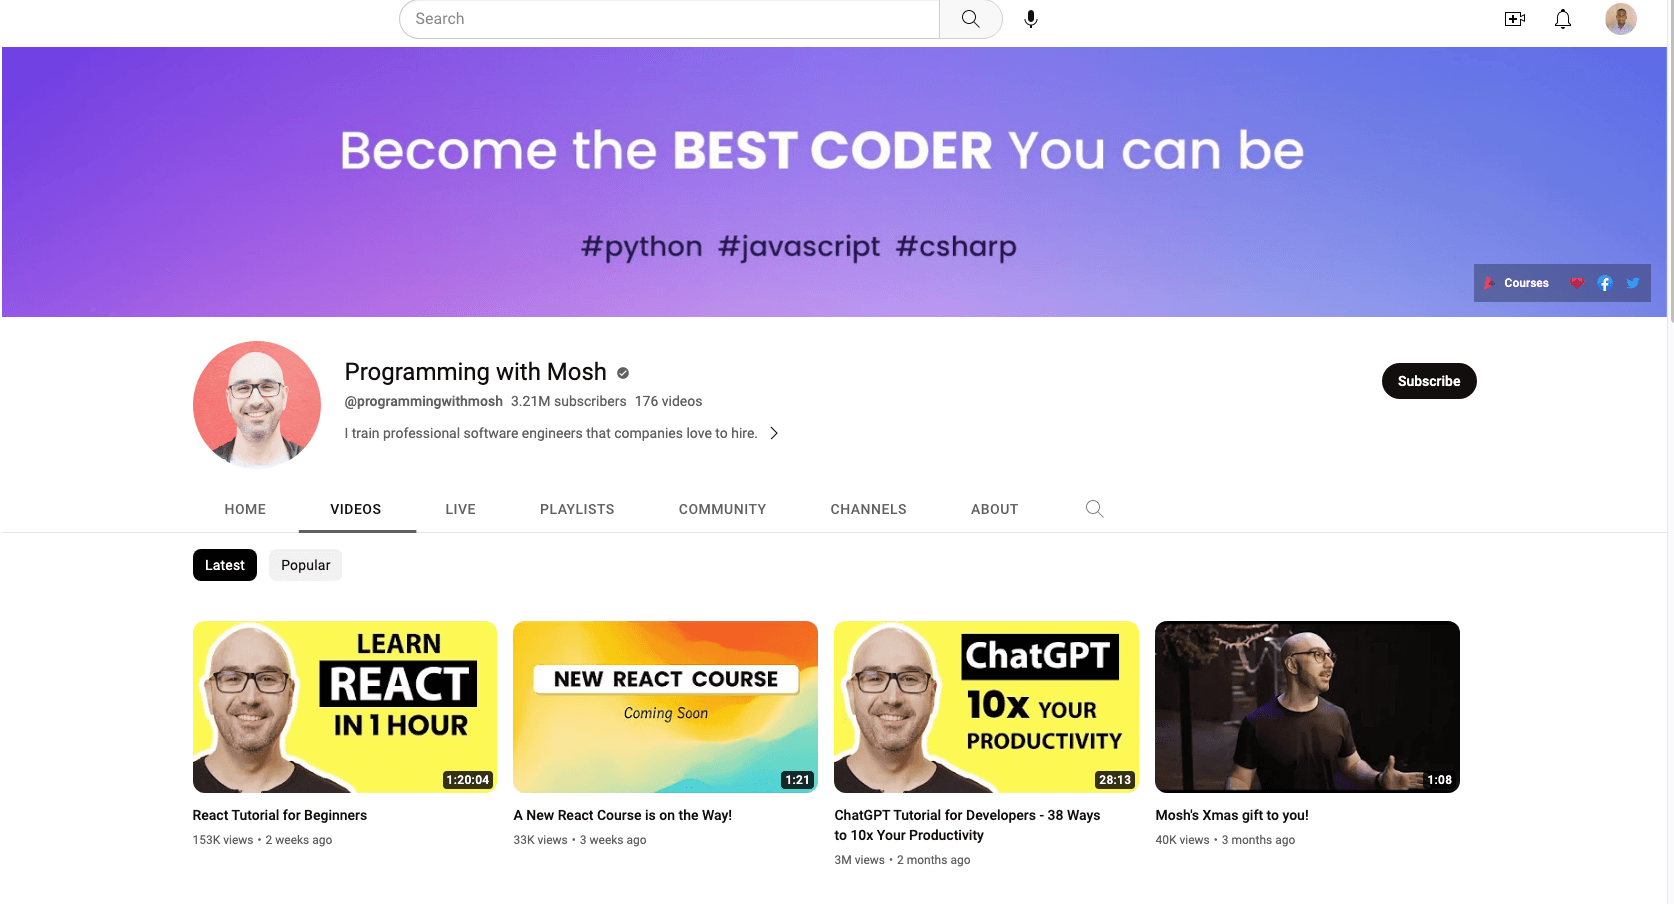
Programming with Mosh YouTube channel
From the Programming with Mosh YouTube channel, you’ll scrape the following information:
The title of the video.
The link or URL of the video.
The link or URL of the image.
The number of views for the particular video.
The time when the video was published.
Comments from a particular YouTube video URL.
And from Hacker News, you’ll collect the following data:
The title of the article.
The link to the article.
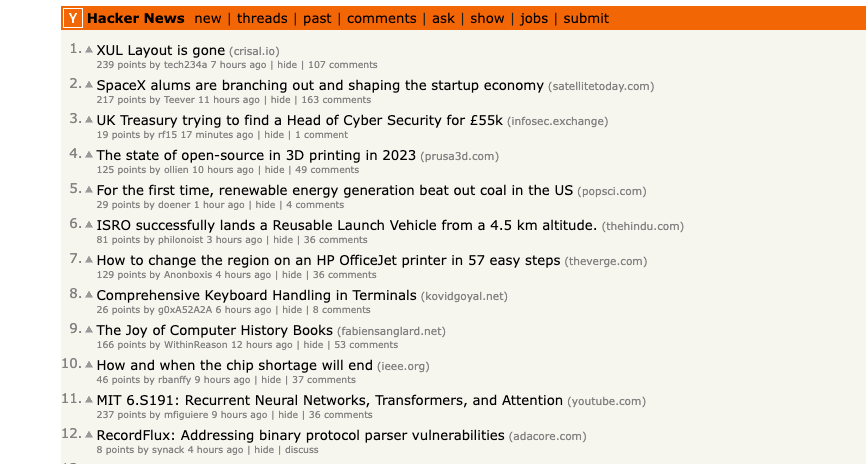
Screenshot of Hacker News
Now that you know what you’ll scrape, let’s create a new Python script ( ie data_scraping_project/scripts/youtube_videos_list.py).
Import Python Packages
First, you need to import the Python packages you’ll use to scrape, collect, and save data into a CSV file:
# import libraries
from selenium import webdriver
from selenium.webdriver.chrome.service import Service
from selenium.webdriver.common.by import By
from webdriver_manager.chrome import ChromeDriverManager
from selenium.webdriver.common.keys import Keys
from selenium.webdriver.common.action_chains import ActionChains
from selenium.webdriver.support.ui import WebDriverWait
from selenium.webdriver.support import expected_conditions as EC
import time
import pandas as pd
Instantiate the Webdriver
To instantiate Webdriver, you need to select the browser that Selenium will use (Chrome, in this instance) and then install the binary driver.
Chrome has developer tools to display the HTML code of the web page and identify HTML elements to scrape and collect the data. To display the HTML code, you need to right-click a web page in your Chrome web browser and select Inspect Element .
To install a binary driver for Chrome, run the following code:
driver = webdriver.Chrome(service=Service(ChromeDriverManager().install()))
The binary driver for Chrome will be installed on your machine and automatically instantiate Webdriver.
Scrape Data with Selenium
To scrape data with Selenium, you need to define the YouTube URL in a simple Python variable (
ie
url
). From this link, you collect all the data that was mentioned previously except for the comments from a particular YouTube URL:
# Define the URL
url = "https://www.youtube.com/@programmingwithmosh/videos"

# load the web page
driver.get(url)

# set maximum time to load the web page in seconds
driver.implicitly_wait(10)
Selenium automatically loads the YouTube link in the Chrome browser. Additionally, a time frame is specified ( ie ten seconds) to make sure that the web page is fully loaded (including all HTML elements). This helps you scrape data that is rendered by JavaScript.
Scrape Data Using ID and Tags
One of the benefits of Selenium is that it can extract data using different elements presented on the web page, including the ID and tag.
For instance, you can use either the ID element (
ie
post-title
) or tags (
ie
h1
and
p
) to scrape the data:
<h1 id ="post-title">Introduction to data scrapping using Python</h1>
<p>You can use selenium python package to collect data from any dynamic website</p>
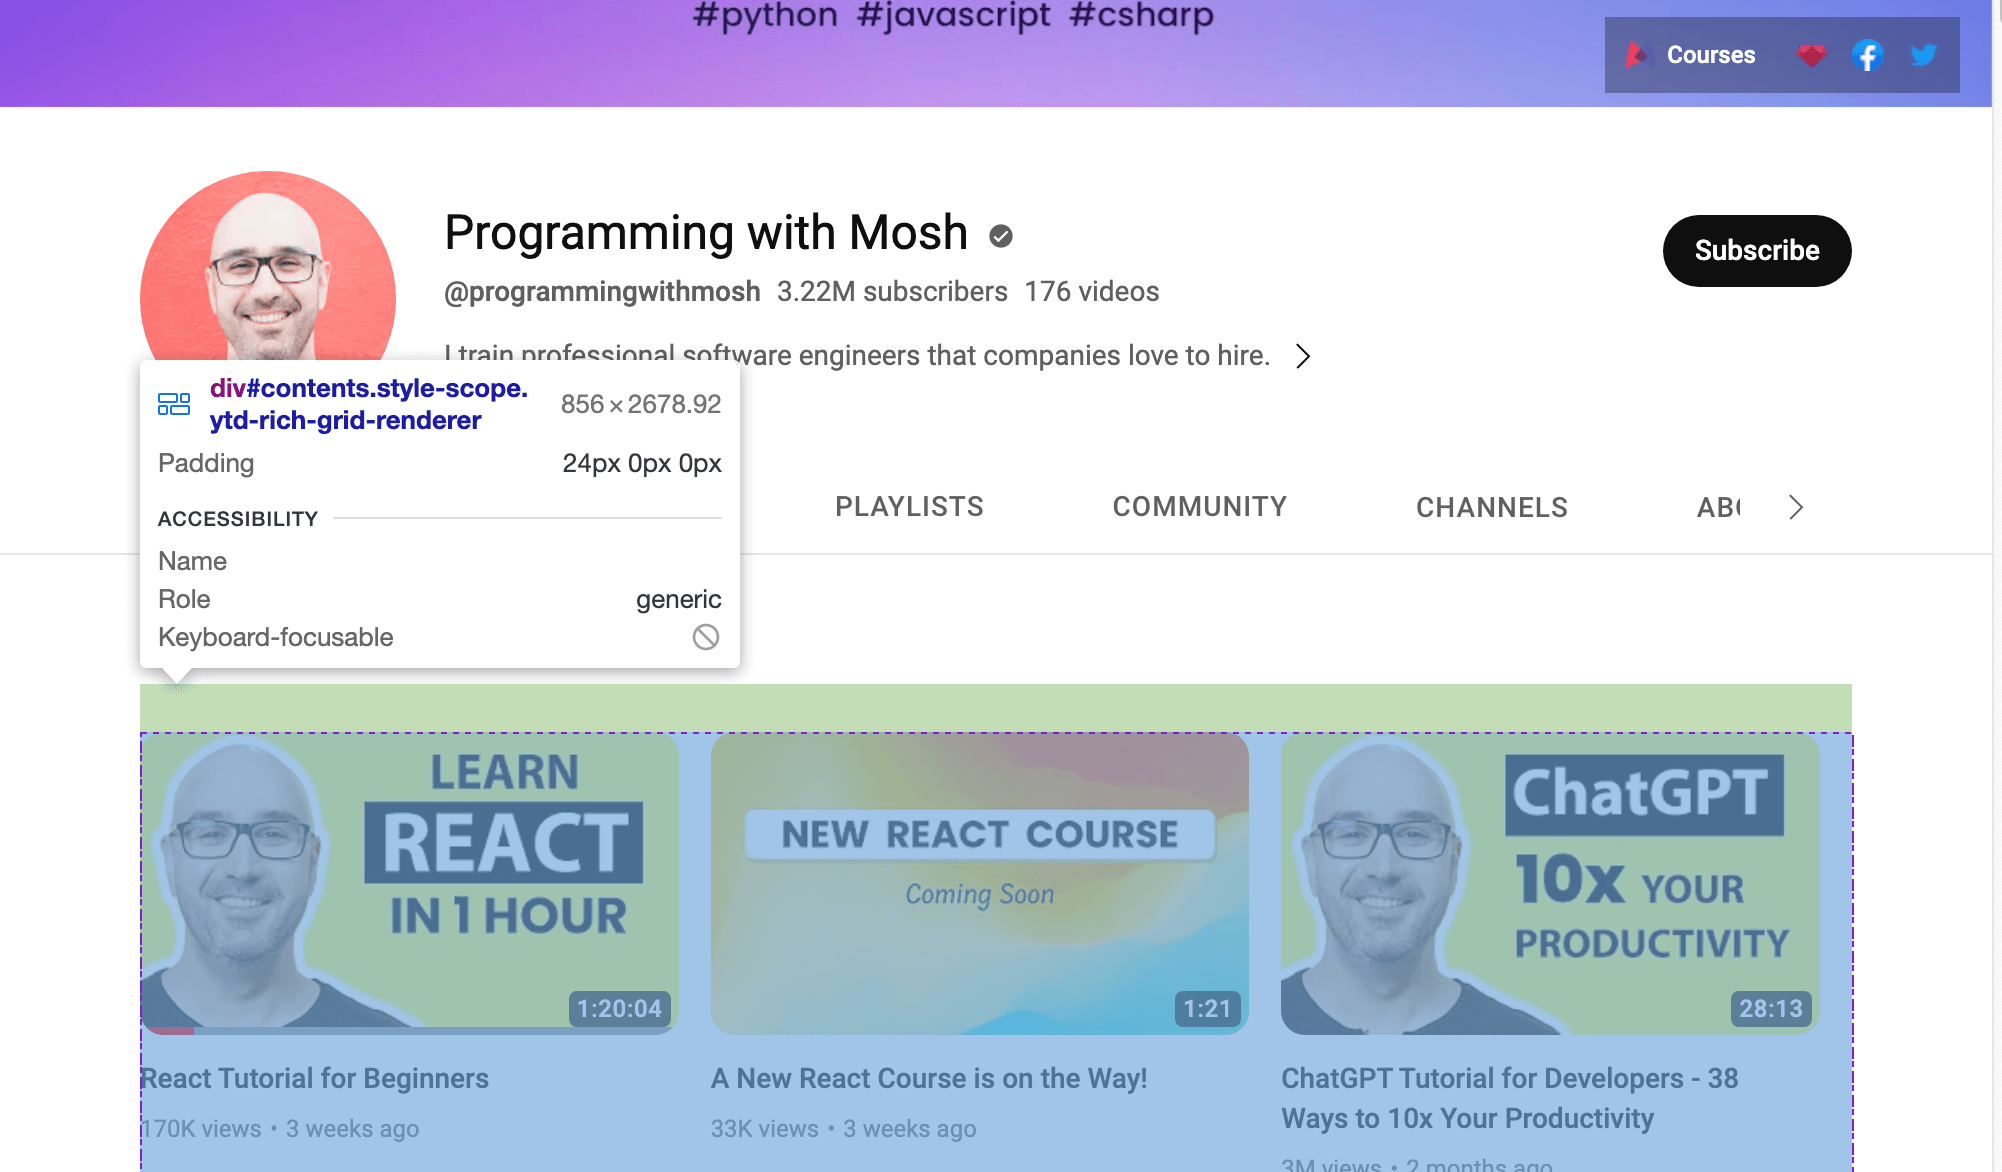
Or if you want to scrape data from the YouTube link, you need to use the ID presented on the web page. Open the YouTube URL in your web browser; then right-click and select Inspect to identify the ID. Then use your mouse to view the page and identify the ID that holds the list of videos presented on the channel:
Use Webdriver to scrape data that is within the ID identified. To find an HTML element by ID attribute, call the
find_element()
Selenium method and pass
By.ID
as the first argument and
ID
as the second argument.
To collect the video title and video link for each video, you need to use the
video-title-link
ID attribute. Since you’re going to collect multiple HTML elements with this ID attribute, you’ll need to use the
find_elements()
method:
# collect data that are withing the id of contents
contents = driver.find_element(By.ID, "contents")

#1 Get all the by video tite link using id video-title-link
video_elements = contents.find_elements(By.ID, "video-title-link")

#2 collect title and link for each youtube video
titles = []
links = []

for video in video_elements:

    #3 Extract the video title
    video_title = video.get_attribute("title")

    #4 append the video title
    titles.append(video_title)

    #5 Extract the video link
    video_link = video.get_attribute("href")

#6 append the video link
links.append(video_link)
This code performs the following tasks:
It collects data that is within the ID attribute of
contents
.
It collects all HTML elements that have an ID attribute of
video-title-link
from the WebElement
contents
object.
It creates two lists to append titles and links.
It extracts the video title using the
get_attribute()
method and passes the
title
.
It appends the video title in the titles list.
It extracts the video link using the
get_atribute()
method and passes
href
as an argument.
It appends the video link in the links list.
At this point, all the video titles and links will be in two Python lists:
titles
and
links
.
Next, you need to scrape the link of the image that is available on the web page before you click the YouTube video link to watch the video. To scrape this image link, you need to find all the HTML elements by calling the
find_elements()
Selenium method and passing
By.TAG_NAME
as the first argument and the name of the tag as the second argument:
#1 Get all the by Tag
img_elements = contents.find_elements(By.TAG_NAME, "img")

#2 collect img link and link for each youtube video
img_links = []

for img in img_elements:

    #3 Extract the img link
    img_link = img.get_attribute("src")
    if img_link:
        #4 append the img link
        img_links.append(img_link)
This code collects all the HTML elements with the
img
tag name from the WebElement object called
contents
. It also creates a list to append the image links and extracts it using the
get_attribute()
method and passes
src
as an argument. Finally, it appends the image link to the
img_links
list.
You can also use the
ID
and the tag name to scrape more data for each YouTube video. On the web page of the YouTube URL, you should be able to see the number of views and the time published for each video listed on the page. To extract this data, you need to collect all the HTML elements that have an ID of
metadata-line
and then collect data from the HTML elements with a
span
tag name:
#1 find the element with the specific ID you want to scrape
meta_data_elements = contents.find_elements(By.ID, 'metadata-line')

#2 collect data from span tag
meta_data = []

for element in meta_data_elements:
    #3 collect span HTML element
    span_tags = element.find_elements(By.TAG_NAME, 'span')

    #4 collect span data
    span_data = []
    for span in span_tags:
        #5 extract data for each span HMTL element.
        span_data.append(span.text)
    #6 append span data to the list
    meta_data.append(span_data)

# print out the scraped data.
print(meta_data)
This code block collects all the HTML elements that have an ID attribute of
metadata-line
from the WebElement
contents
object and creates a list to append data from the
span
tag that will have the number of views and the time published.
It also collects all the HTML elements whose tag name is
span
from the WebElement object called
meta_data_elements
and creates a list with this span data. Then it extracts the text data from the span HTML element and appends it to the
span_data
list. Finally, it appends the data from the
span_data
list to the
meta_data
.
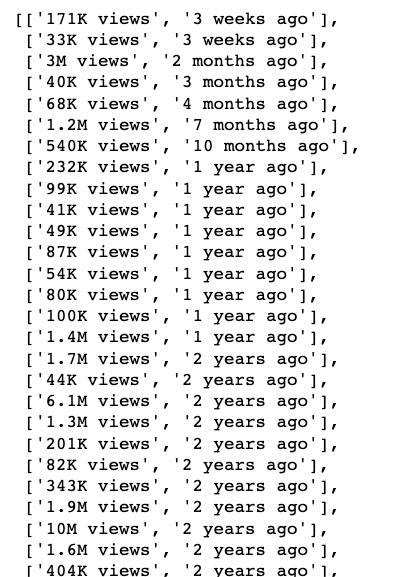
The data extracted from the span HTML element will look like this:
Next, you need to create two Python lists and save the number of views and time published separately:
#1 Iterate over the list of lists and collect the first and second item of each sublist
views_list = []
published_list = []

for sublist in meta_data:
    #2 append number of views in the views_list
    views_list.append(sublist[0])

    #3 append time published in the published_list
    published_list.append(sublist[1])
Here, you create two Python lists that extract data from
meta_data
, and you append the number of views for each sublist to
view_list
and the time published for each sublist to the
published_list
.
At this point, you’ve scraped the title of the video, the URL of the video page, the URL of the image, the number of views, and the time the video was published. This data can be saved into a pandas DataFrame using the pandas Python package. Use the following code to save the data from the list of
titles
,
links
,
img_links
,
views_list
, and
published_list
into the pandas DataFrame:
# save in pandas dataFrame
data = pd.DataFrame(

list(zip(titles, links, img_links, views_list, published_list)),

columns=['Title', 'Link', 'Img_Link', 'Views', 'Published']
)

# show the top 10 rows
data.head(10)

# export data into a csv file.
data.to_csv("../data/youtube_data.csv",index=False)

driver.quit()
This is what the scraped data should look like in the pandas DataFrame:
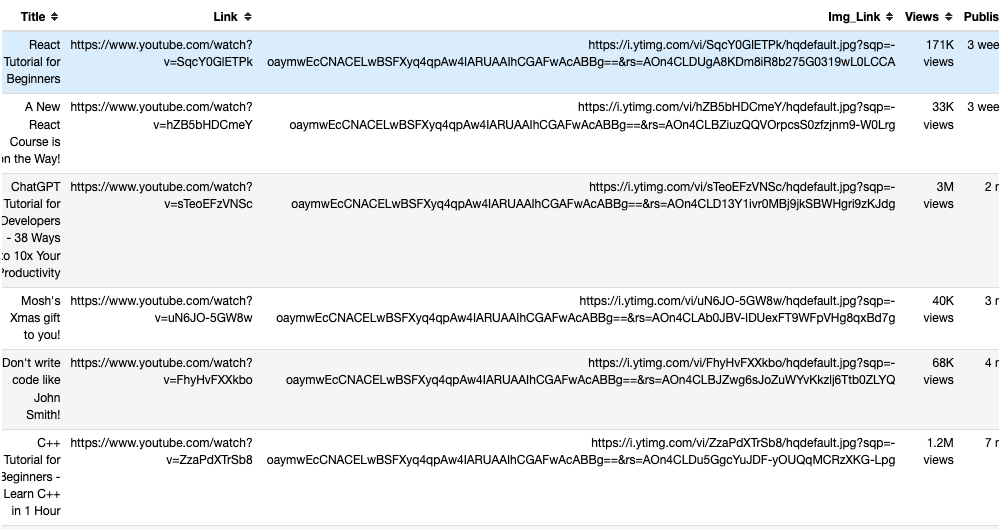
This saved data is exported from pandas to a CSV file called
youtube_data.csv
using
to_csv()
.
Now you can run
youtube_videos_list.py
, and make sure everything works correctly.
Scrape Data Using the CSS Selector
Selenium can also extract data based on the specific patterns in the HTML elements using the CSS selector on the web page. The CSS selector is applied to target specific elements according to their ID, tag name, class, or other attributes.
For example, here, the HTML page has some
div
elements, and one of them has a class name of
"inline-code"
:
<html>
<body>
<p>Hello World!</p>
<div>Learn Data Scraping</div>
<div class="inline-code"> data scraping with Python code</div>
<div>Saving</div>
</body>
</html>
You can use a CSS selector to find the HTML element on a web page whose tag name is
div
and whose class name is “’inline-code”`. You can apply this same approach to extract comments from the comment section of YouTube videos.
Now, let’s use a CSS selector to collect comments posted on this YouTube video .
The YouTube comments section is available under the following tag and class name:
<ytd-comment-thread-renderer class="style-scope ytd-item-section-renderer">...</tyd-comment-thread-renderer>
Let’s create a new script ( ie data_scraping_project/scripts/youtube_video_ comments.py). Import all the necessary packages like before, and add the following code to automatically start the Chrome web browser, browse the URL of the YouTube video, and then scrape the comments using the CSS selector:
#1 instantiate chrome driver
driver = webdriver.Chrome(service=Service(ChromeDriverManager().install()))

#2 Define the URL
url = "https://www.youtube.com/watch?v=hZB5bHDCmeY"

#3 Load the webpage
driver.get(url)

#4 define the CSS selector
comment_section = 'ytd-comment-thread-renderer.ytd-item-section-renderer’

#5 wait until element matching the given criteria to be found
try:
    element = WebDriverWait(driver, 10).until(
        EC.presence_of_element_located((By.CSS_SELECTOR, comment_section))
    )
except:
    driver.quit()

#6. collect HTML elements within the CSS selector
comment_blocks = driver.find_elements(By.CSS_SELECTOR,comment_section)
This code instantiates the Chrome driver and defines the YouTube video link to scrape the comments that have been posted. Then it loads the web page in the browser and waits ten seconds until the HTML elements matching the CSS selector are available.
Next, it collects all
comment
HTML elements using the CSS selector called
ytd-comment-thread-renderer.ytd-item-section-renderer
and saves all the comment elements in the
comment_blocks
WebElement object.
Then you can extract each author’s name using the ID
author-text
and the comment text using the ID
content-text
from each comment in the
comment_blocks
WebElement object:
#1 specify the id attribute for author and comment
author_id = 'author-text'
comment_id = 'content-text'

#2 Extract the text value for each comment and author in the list
comments = []
authors = []

for comment_element in comment_blocks:
    #3 collect author for each comment
    author = comment_element.find_element(By.ID, author_id)

    #4 append author name
    authors.append(author.text)

    #5 collect comments
    comment = comment_element.find_element(By.ID, comment_id)

    #6 append comment text
    comments.append(comment.text)

#7 save in pandas dataFrame
comments_df = pd.DataFrame(list(zip(authors, comments)), columns=['Author', 'Comment'])

#8 export data into a CSV file.
comments_df.to_csv("../data/youtube_comments_data.csv",index=False)

driver.quit()
This code specifies the ID for the author and comment. Then it creates two Python lists to append the author name and the comment text. It collects each HTML element that has the specified ID attributes from the WebElement object and appends the data to the Python lists.
Finally, it saves the scraped data into a pandas DataFrame and exports the data into a CSV file called
youtube_comments_data.csv
.
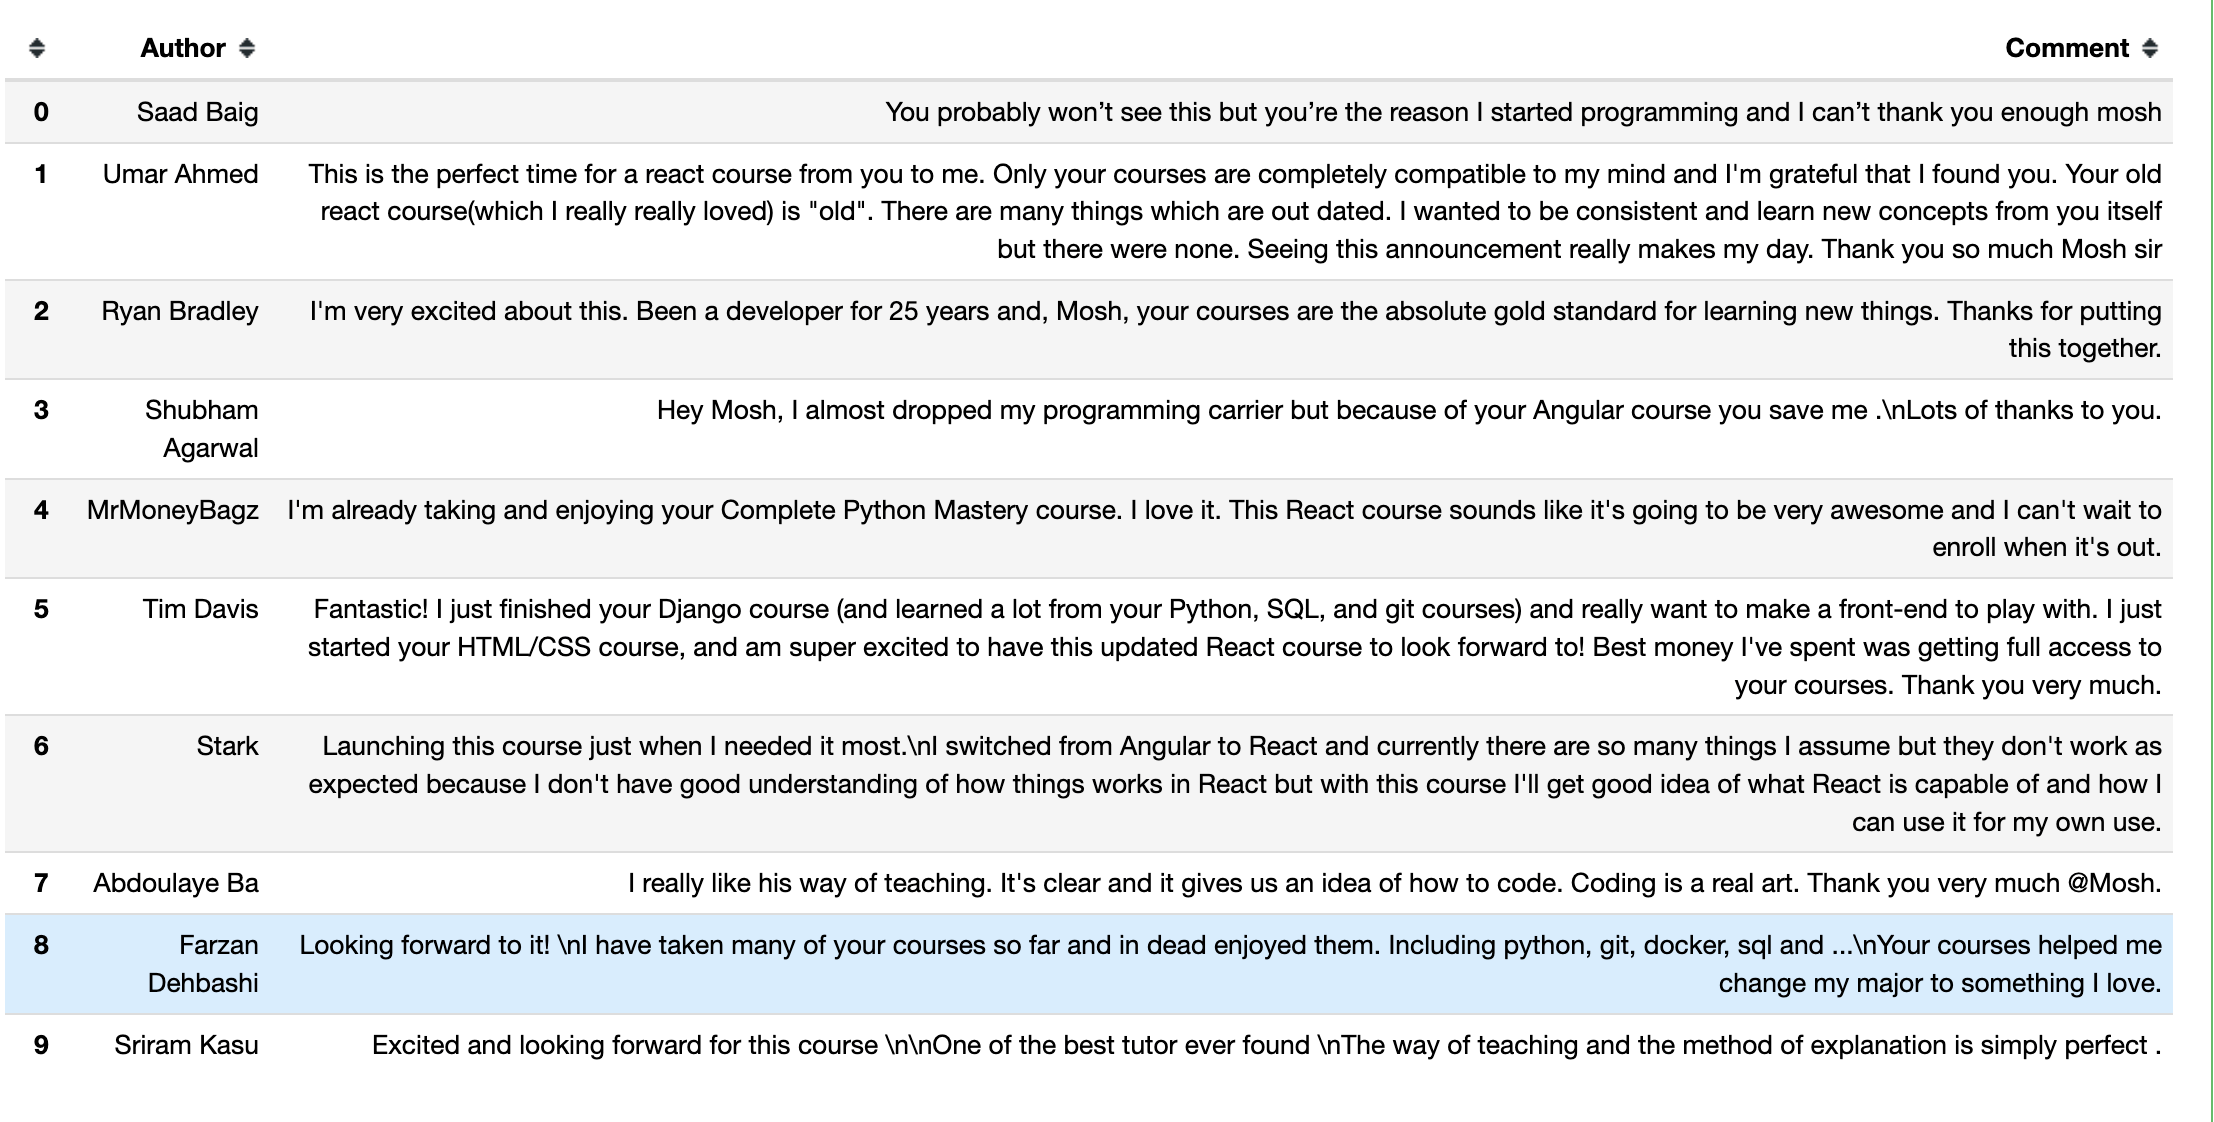
This is what the authors and comments from the first ten rows will look like in a pandas DataFrame:
Scrape Data Using the Class Name
In addition to scraping data with the CSS selector, you can also extract data based on a specific class name. To find an HTML element by its class name attribute using Selenium, you need to call the
find_element()
method and pass
By.CLASS_NAME
as the first argument, and you need to find the class name as the second argument.
In this section, you’ll use the class name to collect the title and link of the articles posted on Hacker News. On this web page, the HTML element that has the title and link of each article has a
titleline
class name, as seen in the web page’s code:
<span class="titleline"><a href="https://mullvad.net/en/browser">The Mullvad Browser</a><span class="sitebit comhead"> (<a href="from?site=mullvad.net"><span class="sitestr">mullvad.net</span></a>)</span></span></td></tr><tr><td colspan="2"></td><td class="subtext"><span class="subline">
<span class="score" id="score_35421034">302 points</span> by <a href="user?id=Foxboron" class="hnuser">Foxboron</a> <span class="age" title="2023-04-03T10:11:50"><a href="item?id=35421034">2 hours ago</a></span> <span id="unv_35421034"></span> | <a href="hide?id=35421034&auth=60e6bdf9e482441408eb9ca98f92b13ee2fac24d&goto=news" class="clicky">hide</a> | <a href="item?id=35421034">119 comments</a> </span>
Create a new Python script ( ie data_scraping_project/scripts/hacker_news.py), import all the necessary packages, and add the following Python code to scrape the title and link for each article posted on the Hacker News page:
#1 define url
hacker_news_url = 'https://news.ycombinator.com/'

#2 instantiate chrome driver
driver = webdriver.Chrome(service=Service(ChromeDriverManager().install()))

#3 load the web page
driver.get(hacker_news_url)

#4 wait until element matching the given criteria to be found
try:
    element = WebDriverWait(driver, 10).until(
        EC.presence_of_element_located((By.CLASS_NAME, 'titleline'))
    )
except:
    driver.quit()

#5 Extract the text value for each title and link in the list
titles= []
links = []

#6 Find all the articles on the web page
story_elements = driver.find_elements(By.CLASS_NAME, 'titleline')

#7 Extract title and link for each article
for story_element in story_elements:

    #8 append title to the titles list
    titles.append(story_element.text)

    #9 extract the URL of the article
    link = story_element.find_element(By.TAG_NAME, "a")

    #10 appen link to the links list
    links.append(link.get_attribute("href"))

driver.quit()
This code will define the URL of the web page, automatically start the Chrome web browser, and then browse the URL of Hacker News. It waits ten seconds until the HTML elements matching the
CLASS NAME
are available.
Then it creates two Python lists to append the title and link for each article. It also collects each HTML element that has a
titleline
class name from the WebElement driver object and extracts the title and link for each article represented in the
story_elements
WebElement object.
Finally, the code appends the title of the article to the titles list and collects the HTML element that has a tag name of
a
from the
story_element
object. It extracts the link using the
get_attribute()
method and appends the link to the links list.
Next, you need to use the
to_csv()
method from pandas to export the scraped data. You’ll be exporting both the titles and links into a
hacker_news_data.csv
CSV file and saving the data in the directory:
# save in pandas dataFrame
hacker_news = pd.DataFrame(list(zip(titles, links)),columns=['Title', 'Link'])

# export data into a csv file.
hacker_news.to_csv("../data/hacker_news_data.csv",index=False)
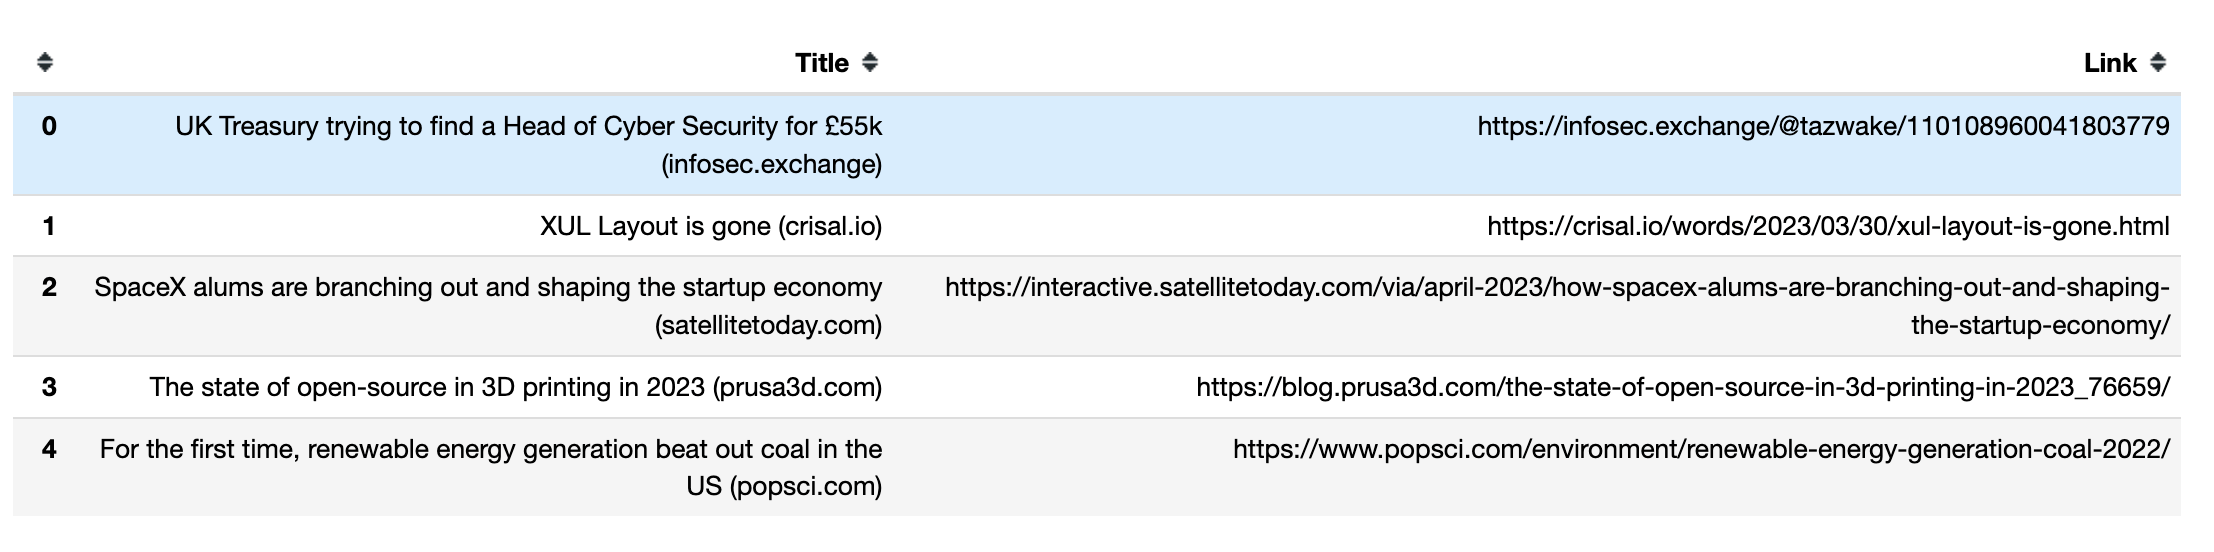
This is how the titles and links from the first five rows appear in a pandas DataFrame:
How to Handle Infinite Scrolls
Some dynamic web pages load additional content as you scroll to the bottom of the page. If you don’t navigate to the bottom, Selenium may only scrape the data that’s visible on your screen.
To scrape more data, you need to instruct Selenium to scroll to the bottom of the page, wait until new content loads, and then automatically scrape the data you want. For instance, the following Python script will scroll through the first forty results of Python books and extract their links:
#1 import packages
from selenium.webdriver.chrome.service import Service
from webdriver_manager.chrome import ChromeDriverManager
from selenium import webdriver
from selenium.webdriver.common.by import By
import time

#2 Instantiate a Chrome webdriver
driver = webdriver.Chrome(service=Service(ChromeDriverManager().install()))

#3 Navigate to the webpage
driver.get("https://example.com/results?search_query=python+books")

#4 instantiate a list to keep links
books_list = []

#5 Get the height of the current webpage
last_height = driver.execute_script("return document.body.scrollHeight")

#6 set target count
books_count = 40

#7 Keep scrolling down on the web page
while books_count > len(books_list):
    driver.execute_script("window.scrollTo(0, document.body.scrollHeight);")

    #8 Wait for the page to load
    time.sleep(5)

    #9 Calculate the new height of the page
    new_height = driver.execute_script("return document.body.scrollHeight")

    #10 Check if you have reached the bottom of the page
    if new_height == last_height:
        break
    last_height = new_height

    #11 Extract the data
    links = driver.find_elements(By.TAG_NAME, "a")
    for link in links:
        #12 append extracted data
        books_list.append(link.get_attribute("href"))

#13 Close the webdriver
driver.quit()
This code imports the Python packages that will be used and instantiates and opens Chrome. Then it navigates to the web page and creates a Python list to append the link for each of the search results.
It gets the height of the current page by running the
return document.body.scrollHeight
script and sets the number of links you want to collect. Then it continues to scroll down as long as the value of the
book_count
variable is greater than the length of the
book_list
and waits five seconds to load the page.
It calculates the new height of the web page by running the
return document.body.scrollHeight
script and checks if it’s reached the bottom of the page. If it does, the loop is terminated; otherwise, it will update the
last_height
and continue to scroll down. Finally, it collects the HTML element that has a tag name of
a
from the WebElement object and extracts and appends the link to the links list. After collecting the links, it will close the Webdriver.
Please note: For your script to end at some point, you must set a total number of items to be scraped if the page has infinite scrolling. If you don’t, your code will continue to execute.
Please note: For your script to end at some point, you must set a total number of items to be scraped if the page has infinite scrolling. If you don’t, your code will continue to execute.
Web Scraping with Bright Data
While it’s possible to scrape data with open source scrapers like Selenium, they tend to lack support. In addition, the process can be complicated and time-consuming. If you’re looking for a powerful and reliable web scraping solutions, you should consider Bright Data.
Bright Data controls the best proxy servers in the world, serving tens of Fortune 500 companies and over 20,000 customers. Its wide proxy network includes:
Datacenter proxies – Over 770,000 datacenter IPs. Residential proxies – Over 72M IPs from residential devices in more than 195 countries. ISP proxies – Over 700,000 ISP IPs. Mobile proxies – Over 7M mobile IPs.
Overall, this is one of the largest and most reliable scraping-oriented proxy networks on the market. But Bright Data is more than just a proxy provider. It also offers top-notch web scraping services, including a Scraping Browser (Puppeteer, Selenium, and Playwright), a Web Scraper IDE , and a SERP API .
If do not want to deal with scraping at all but are interested in web data, you can take advantage of its ready-to-use datasets .