
How to Use a Proxy in C#
{ "@context": "https://schema.org", "@type": "HowTo", "name": "Set Up Proxy in C#", "description": "Learn how to set up a local proxy and perform web scraping with C# using the HtmlAgilityPack and proxies for enhanced data extraction efficiency and anonymity.", "step": [ { "@type": "HowToStep", "name": "Prerequisites", "text": "Ensure you have Visual Studio 2022 or Visual Studio Code, .NET 7 or newer, and the HtmlAgilityPack NuGet package installed." }, { "@type": "HowToStep", "name": "Set Up a Local Proxy", "image": "https://media.brightdata.com/2024/02/Shell-window-1024x609.png", "text": "Use mitmproxy, an open-source proxy, to set up a local proxy server for web scraping. Install mitmproxy and launch it using the 'mitmproxy' command." }, { "@type": "HowToStep", "name": "Create a .NET Console Application", "text": "Create two console applications, WebScrapApp and WebScrapBrightData, using Visual Studio or Visual Studio Code for web scraping." }, { "@type": "HowToStep", "name": "Install HtmlAgilityPack", "text": "Add the HtmlAgilityPack NuGet package to both projects to parse and manipulate HTML content easily." }, { "@type": "HowToStep", "name": "Implement Proxy Rotation", "text": "Develop a proxy rotation mechanism in C# to use different proxies for each web scraping request, reducing the risk of detection and IP bans." }, { "@type": "HowToStep", "name": "Scrape Web Data", "text": "Write C# code to scrape web data using HttpClient configured with proxies and parse the HTML content using the HtmlAgilityPack." }, { "@type": "HowToStep", "name": "Use Bright Data Proxy for Enhanced Anonymity", "image": "https://media.brightdata.com/2024/02/Choosing-residential-proxies-in-the-control-panel-1024x574.png", "text": "Integrate Bright Data's proxy network into your web scraping project to use rotating proxies for improved efficiency and security." } ], "estimatedCost": { "@type": "MonetaryAmount", "currency": "USD", "value": "Varies" }, "supply": [ { "@type": "HowToSupply", "name": "Visual Studio or Visual Studio Code" }, { "@type": "HowToSupply", "name": ".NET 7 SDK" }, { "@type": "HowToSupply", "name": "HtmlAgilityPack NuGet package" } ], "tool": [ { "@type": "HowToTool", "name": "mitmproxy" }, { "@type": "HowToTool", "name": "Bright Data Proxy" } ] }
When you access the internet directly, websites can easily trace your requests to your IP address. This exposure can lead to targeted advertising and online tracking and potentially compromise your digital identity.
That’s where proxies come in. They act as intermediaries between your computer and the internet and help you protect your digital identity. When you use a proxy server, it sends requests to websites on your behalf using the proxy’s own IP address.
When it comes to web scraping, proxies can help you circumvent IP bans, avoid geoblocking, and protect your identity. In this article, you’ll learn how to implement proxies in C# for all your web scraping projects.
Prerequisites
Before you begin this tutorial, make sure you have the following:
Visual Studio 2022
.NET 7 or newer
HtmlAgilityPack
The examples in this article use a separate .NET console application. To create your own, you can use one of the following guides:
Create a .NET console application using Visual Studio Code
Create a .NET console application using Visual Studio
To get started, you need to create two console applications,
WebScrapApp
and
WebScrapBrightData
:
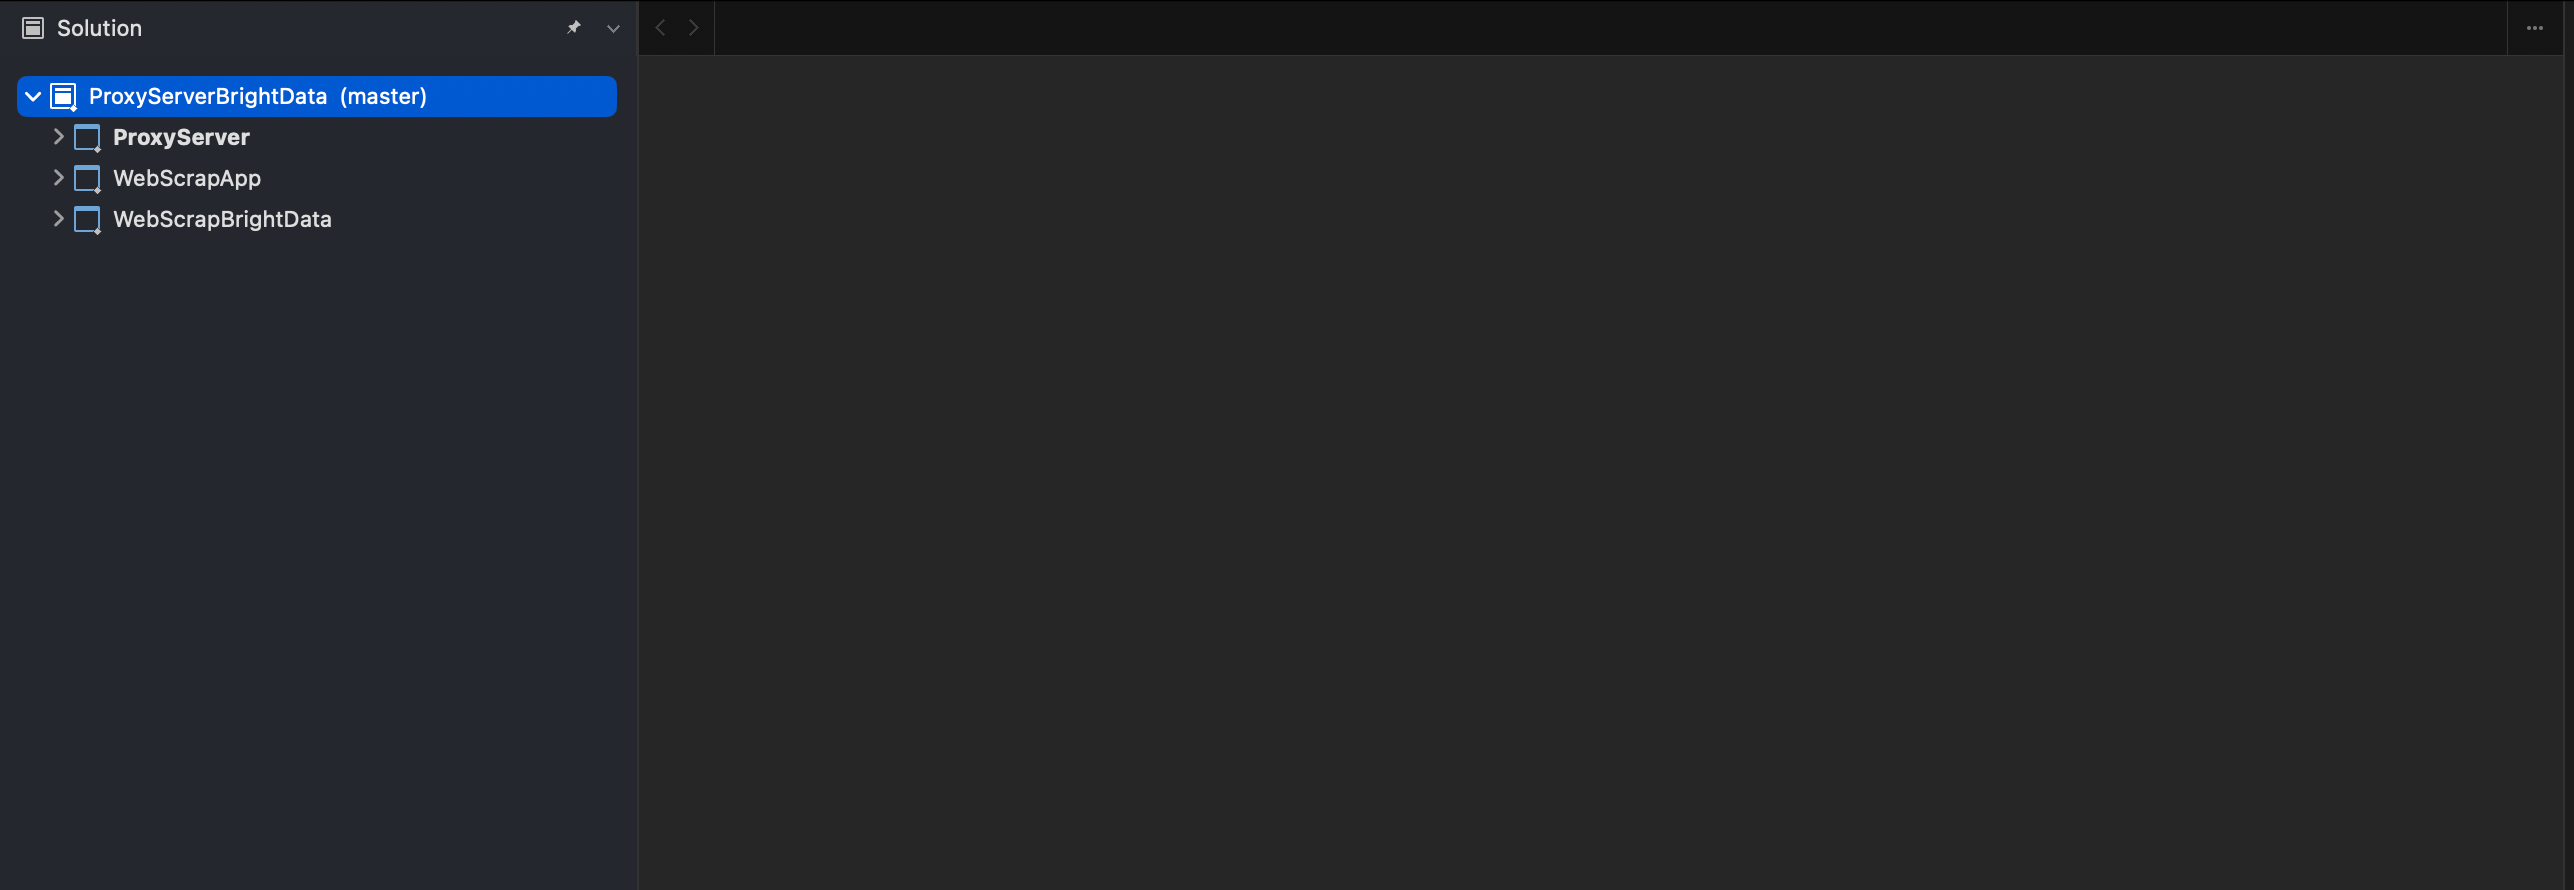
Creating webscrapeapp and webscrapbright data on VS
For web scraping, particularly if you’re dealing with HTML content, you need specific tools like the HtmlAgilityPack. This library simplifies HTML parsing and manipulation, making extracting data from web pages easier.
In both projects (
ie
WebScrapApp
and
WebScrapBrightData
), add the NuGet package HtmlAgilityPack by right-clicking on the
NuGet
folder and then
Manage NuGet Packages
. When a pop-up window appears, search for “HtmlAgilityPack” and install it for both projects:

Installation of HtmlAgilityPack on VS
To run any of the following projects, you need to navigate to the project directory in the command prompt and use
cd pathtoyourproject
followed by
dotnet run
. Alternatively, you can press
F5
to build and run the project in Visual Studio. Both methods compile and execute your application, displaying the output accordingly.
Note: If you don’t have Visual Studio 2022, you can use any alternative IDE that supports .NET 7. Just be aware that some steps in this guide may vary.
Note: If you don’t have Visual Studio 2022, you can use any alternative IDE that supports .NET 7. Just be aware that some steps in this guide may vary.
How to Set Up a Local Proxy
When it comes to web scraping, the first thing you need to do is to use a proxy server. This tutorial uses the open source proxy mitmproxy .
To start, navigate to the mitmproxy downloads , download version 10.1.6, and select the correct version for your operating system. For additional help, check out the official mitmproxy installation guide .
Once mitmproxy is installed, open your terminal and launch mitmproxy using the following command:
mitmproxy
You should see a window in your shell or terminal that looks like this:
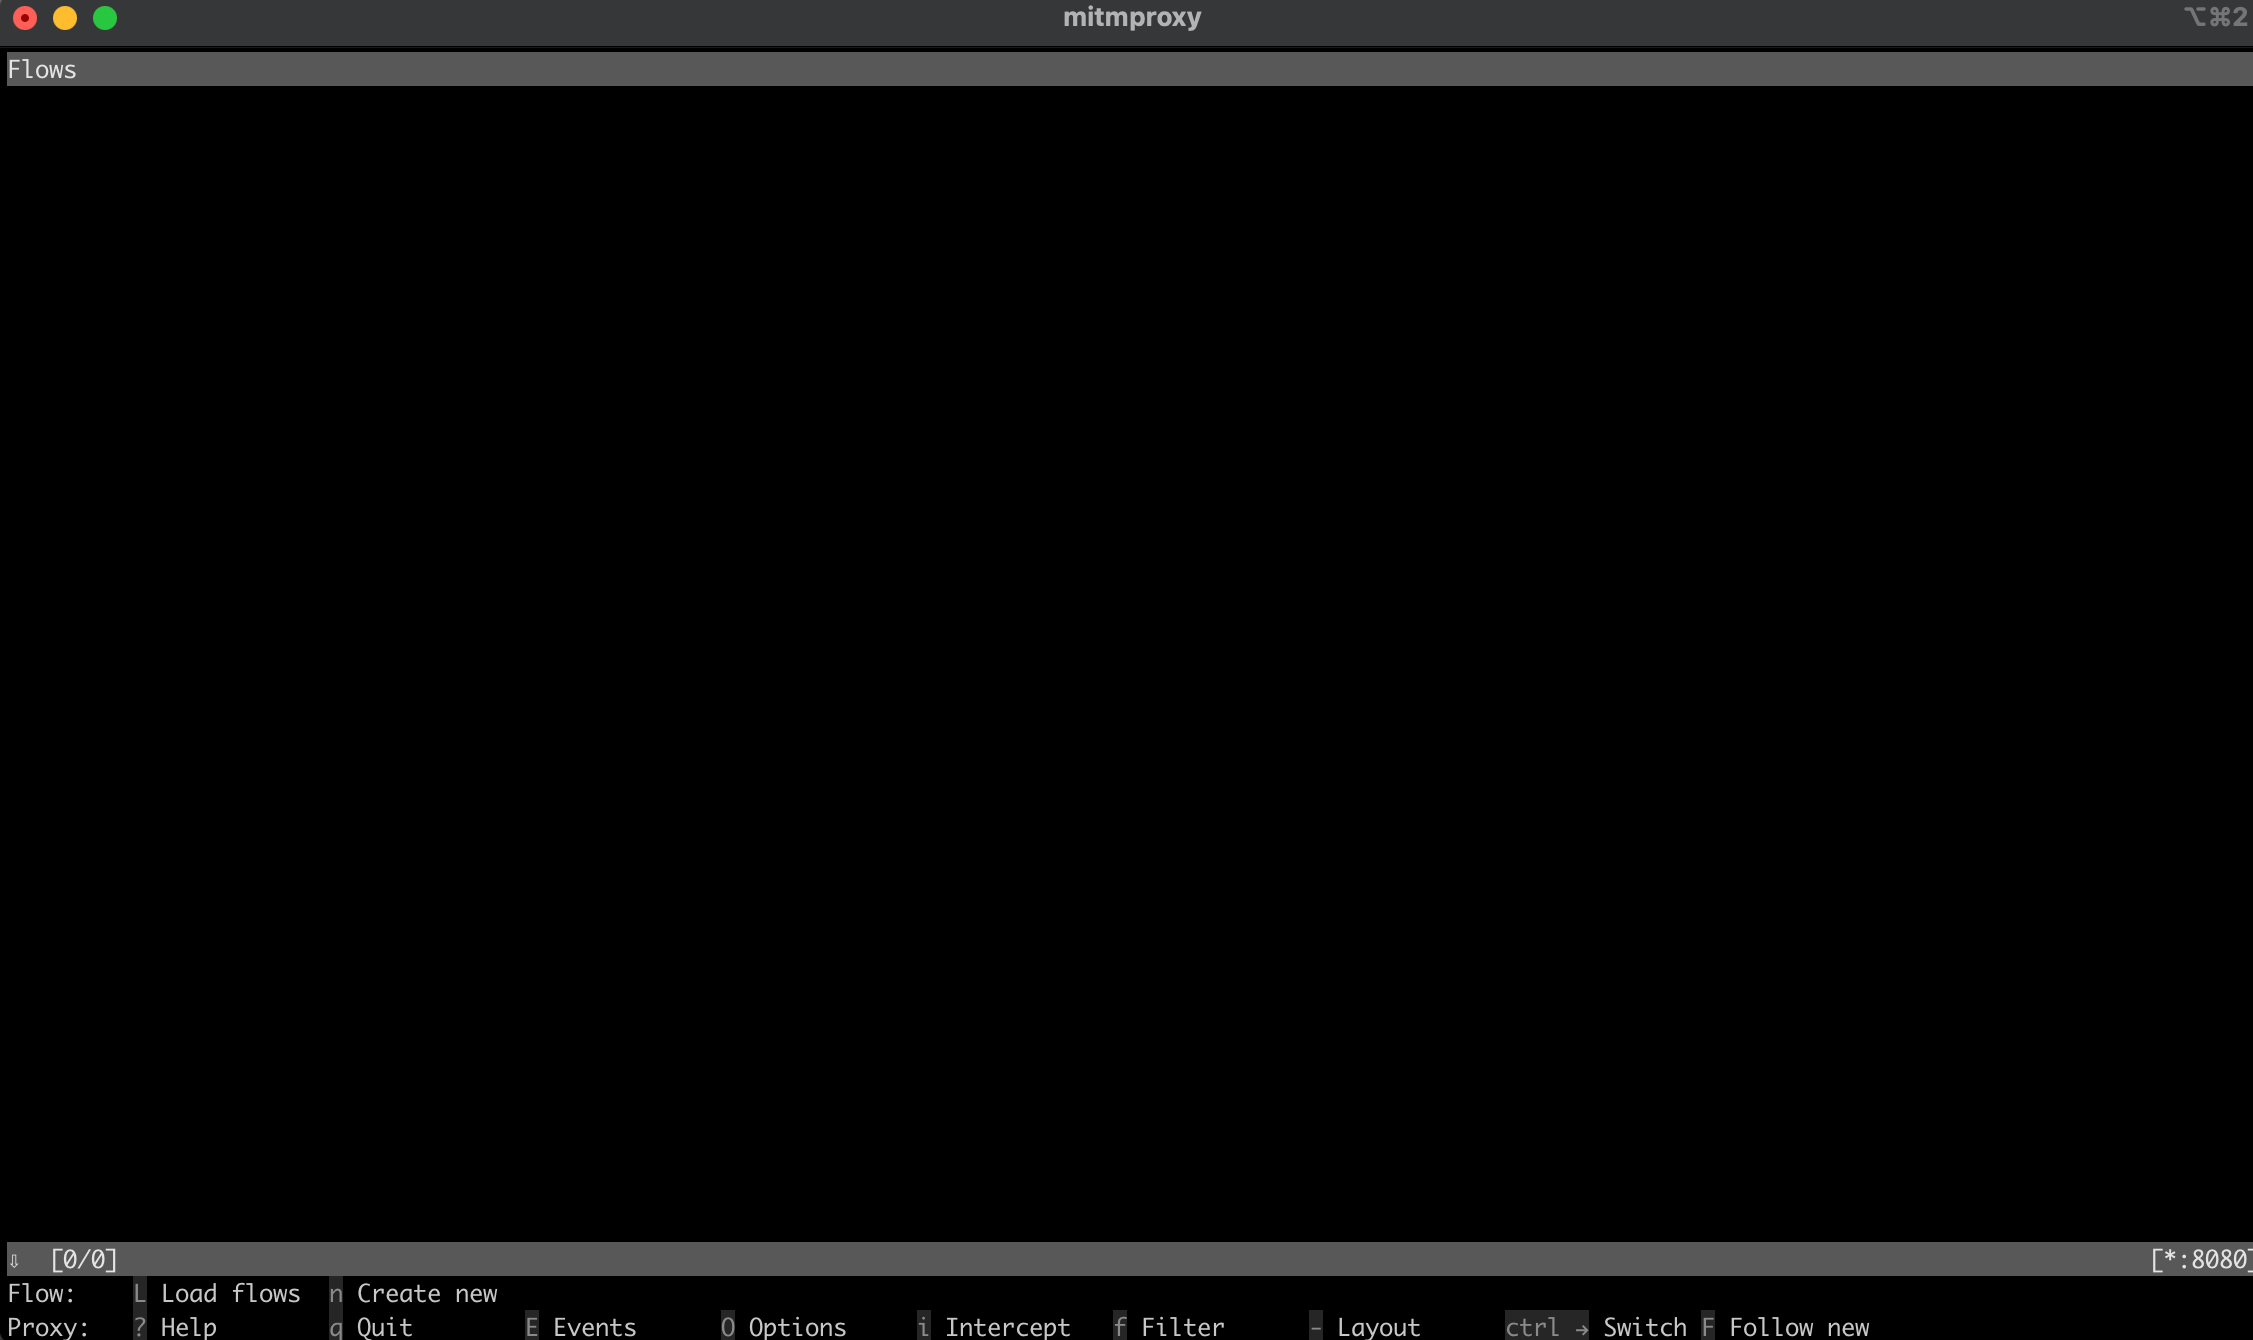
Shell window after launching mitmproxy
To test the proxy, open another terminal or shell and run the following curl request:
curl --proxy http://localhost:8080 "http://wttr.in/Dunedin?0"
Your output should look like this:
Weather report: Dunedin

                Cloudy
       .--.     +11(9) °C
    .-(    ).   ↙ 15 km/h
   (___.__)__)  10 km
                0.0 mm
In the mitmproxy window, you should see that it intercepted the call through the local proxy:
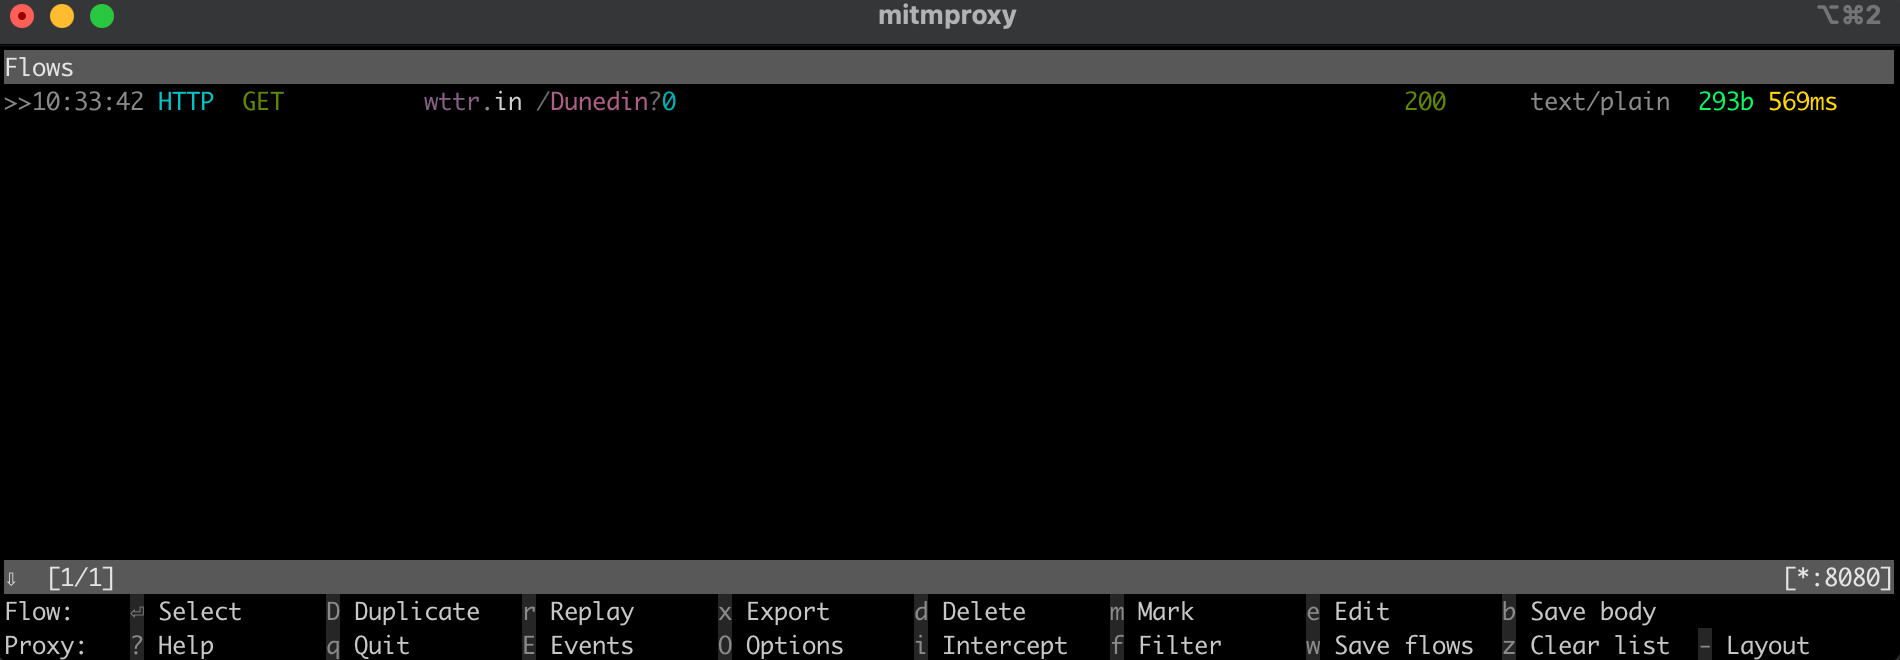
a call through a local proxy in the mitmproxy window
Web Scraping in C#
In the following section, you’ll set up the C# console application
WebScrapApp
for web scraping. This application utilizes the proxy server and includes proxy rotation for enhanced efficiency.
Create an HttpClient
The
ProxyHttpClient
class is designed to configure an
HttpClient
instance to route requests via a specified proxy server.
Under your
WebScrapApp
project, create a new class file named
ProxyHttpClient.cs
and add the following code:
namespace WebScrapApp
{
    public class ProxyHttpClient
    {
        public static HttpClient CreateClient(string proxyUrl)
        {
            var httpClientHandler = new HttpClientHandler()
            {
                Proxy = new WebProxy(proxyUrl),
                UseProxy = true
            };
            return new HttpClient(httpClientHandler);
        }
    }
}
Implement Proxy Rotation
To implement proxy rotation, create a
ProxyRotator.cs
class file under your
WebScrapApp
solution:
namespace WebScrapApp
{
    public class ProxyRotator
    {
        private List<string> _validProxies = new List<string>();
        private readonly Random _random = new();

        public ProxyRotator(string[] proxies, bool isLocal)
        {
            if (isLocal)
            {
                _validProxies.Add("http://localhost:8080/");
            }
            else
            {
                _validProxies = ProxyChecker.GetWorkingProxies(proxies.ToList()).Result;
            }
            if (_validProxies.Count == 0)
                throw new InvalidOperationException();
        }

        public HttpClient ScrapeDataWithRandomProxy(string url)
        {
            if (_validProxies.Count == 0)
                throw new InvalidOperationException();

            var proxyUrl = _validProxies[_random.Next(_validProxies.Count)];
            return ProxyHttpClient.CreateClient(proxyUrl);
        }
    }
}
This class manages a list of proxies, providing a method to select a proxy for each web request randomly. This randomization is key to reducing the risk of detection and potential IP bans during web scraping.
When the
isLocal
is set to
True
, it takes the local proxy from mitmproxy. If it’s set to
False
, it takes the public IPs of the proxies.
The
ProxyChecker
is used to validate the list of proxy servers.
Next, create a new class file named
ProxyChecker.cs
and add the following code:
using WebScrapApp;

namespace WebScrapApp
{
    public class ProxyChecker
    {
        private static SemaphoreSlim consoleSemaphore = new SemaphoreSlim(1, 1);
        private static int currentProxyNumber = 0;

        public static async Task<List<string>> GetWorkingProxies(List<string> proxies)
        {
            var tasks = new List<Task<Tuple<string, bool>>>();

            foreach (var proxyUrl in proxies)
            {
                tasks.Add(CheckProxy(proxyUrl, proxies.Count));
            }

            var results = await Task.WhenAll(tasks);

            var workingProxies = new List<string>();
            foreach (var result in results)
            {
                if (result.Item2)
                {
                    workingProxies.Add(result.Item1);
                }
            }

            return workingProxies;
        }

        private static async Task<Tuple<string, bool>> CheckProxy(string proxyUrl, int totalProxies)
        {
            var client = ProxyHttpClient.CreateClient(proxyUrl);
            bool isWorking = await IsProxyWorking(client);

            await consoleSemaphore.WaitAsync();
            try
            {
                currentProxyNumber++;
                Console.WriteLine($"Proxy: {currentProxyNumber} de {totalProxies}");
            }
            finally
            {
                consoleSemaphore.Release();
            }

            return new Tuple<string, bool>(proxyUrl, isWorking);
        }

        private static async Task<bool> IsProxyWorking(HttpClient client)
        {
            try
            {
                var testUrl = "http://www.google.com";
                var response = await client.GetAsync(testUrl);
                return response.IsSuccessStatusCode;
            }
            catch
            {
                return false;
            }
        }
    }

}
This code defines the
ProxyChecker
for validating a list of proxy servers. When you use the
GetWorkingProxies
method with a list of proxy URLs, it checks each proxy’s status asynchronously via the
CheckProxy
method, collecting operational proxies in a
workingProxies
list. Within
CheckProxy
, you establish an
HttpClient
with the proxy URL, make a test request to
http://www.google.com
, and record progress safely using a semaphore.
The
IsProxyWorking
method confirms the proxy’s functionality by examining the response status code, returning
true
for operational proxies. This class aids in identifying working proxies from a given list.
Scrape Web Data
To scrape data, create a new
WebScraper.cs
class file under your
WebScrapApp
solution and add the following code:
using HtmlAgilityPack;

namespace WebScrapApp
{
    public class WebScraper
    {
        public static async Task ScrapeData(ProxyRotator proxyRotator, string url)
        {
            try
            {
                var client = proxyRotator.ScrapeDataWithRandomProxy(url);

                // Use HttpClient to make an asynchronous GET request
                var response = await client.GetAsync(url);
                var content = await response.Content.ReadAsStringAsync();

                // Load the HTML content into an HtmlDocument
                HtmlDocument doc = new();
                doc.LoadHtml(content);

                // Use XPath to find all <a> tags that are direct children of <li>, <p>, or <td>
                var nodes = doc.DocumentNode.SelectNodes("//li/a[@href] | //p/a[@href] | //td/a[@href]");

                if (nodes != null)
                {
                    foreach (var node in nodes)
                    {
                        string hrefValue = node.GetAttributeValue("href", string.Empty);
                        string title = node.InnerText; // This gets the text content of the <a> tag, which is usually the title

                        // Since Wikipedia URLs are relative, we need to convert them to absolute
                        Uri baseUri = new(url);
                        Uri fullUri = new(baseUri, hrefValue);

                        Console.WriteLine($"Title: {title}, Link: {fullUri.AbsoluteUri}");
                        // You can process each title and link as required
                    }
                }
                else
                {
                    Console.WriteLine("No article links found on the page.");
                }

                // Add additional logic for other data extraction as needed
            }
            catch (Exception ex)
            {
                throw ex;
            }
        }
    }
}
In this code, you define the
WebScraper
, which encapsulates web scraping functionality. When you call the
ScrapeData
method, you provide it with a
ProxyRotator
instance and a target URL. Inside this method, you use an
HttpClient
to make an asynchronous GET request to the URL, retrieve the HTML content, and parse it using the HtmlAgilityPack library. Then you employ XPath queries to locate and extract links and corresponding titles from specific HTML elements. If any article links are found, you print their titles and absolute URLs; otherwise, you print a message indicating no links were found.
After configuring the proxy rotation mechanism and implementing web scraping functionality, you need to seamlessly integrate these components into the application’s primary entry point, which is typically found in
Program.cs
. This integration enables the application to execute web scraping tasks while utilizing rotating proxies with a specific focus on scraping data from the Wikipedia home page:
namespace WebScrapApp {
    public class Program
    {
        static async Task Main(string[] args)
        {
            string[] proxies = {
            "http://162.223.89.84:80",
            "http://203.80.189.33:8080",
            "http://94.45.74.60:8080",
            "http://162.248.225.8:80",
            "http://167.71.5.83:3128"
        };

            var proxyRotator = new ProxyRotator(proxies, false);
            string urlToScrape = "https://www.wikipedia.org/";
            await WebScraper.ScrapeData(proxyRotator, urlToScrape);
        }
    }

}
In this code, the application initializes a list of proxy URLs, creates a
ProxyRotator
instance, specifies the target URL for scraping (in this case,
https://www.wikipedia.org/
), and invokes the
WebScraper.ScrapeData
method to start the web scraping process.
The application uses a list of free proxy IPs, specified in the proxies array, to route web scraping requests, masking the trustworthy source and minimizing the risk of being blocked by the Wikipedia server. The
ScrapeData
method is set to scrape the Wikipedia home page to extract and display article titles and links in the console. The
ProxyRotator
class handles the rotation of these proxies, enhancing the discreteness of the scraping.
Run the WebScrapApp
To run the
WebScrapApp
, open a new terminal or shell under the root directory of your
WebScrapApp
application and run the following commands:
dotnet build
dotnet run
Your output should look like this:
…output omitted…
Title: Latina, Link: https://la.wikipedia.org/
Title: Latviešu, Link: https://lv.wikipedia.org/
Title: Lietuvių, Link: https://lt.wikipedia.org/
Title: Magyar, Link: https://hu.wikipedia.org/
Title: Македонски, Link: https://mk.wikipedia.org/
Title: Bahasa Melayu, Link: https://ms.wikipedia.org/
Title: Bahaso Minangkabau, Link: https://min.wikipedia.org/
Title: bokmål, Link: https://no.wikipedia.org/
Title: nynorsk, Link: https://nn.wikipedia.org/
Title: Oʻzbekcha / Ўзбекча, Link: https://uz.wikipedia.org/
Title: Қазақша / Qazaqşa / قازاقشا, Link: https://kk.wikipedia.org/
Title: Română, Link: https://ro.wikipedia.org/
Title: Simple English, Link: https://simple.wikipedia.org/
Title: Slovenčina, Link: https://sk.wikipedia.org/
Title: Slovenščina, Link: https://sl.wikipedia.org/
Title: Српски / Srpski, Link: https://sr.wikipedia.org/
Title: Srpskohrvatski / Српскохрватски, Link: https://sh.wikipedia.org/
Title: Suomi, Link: https://fi.wikipedia.org/
Title: தமிழ், Link: https://ta.wikipedia.org/
…output omitted…
When the
ScrapeData
method of the
WebScraper
class is invoked, it performs the data extraction from Wikipedia, resulting in a console display of article titles and their corresponding links. This code uses publicly available proxies, and each time you run the application, it chooses one of the listed IP addresses as a proxy.
To test with the local proxy from mitmproxy, update the
ProxyRotator
method in the
Program
file with the following:
var proxyRotator = new ProxyRotator(proxies, true)
 string urlToScrape = "http://toscrape.com/";
By setting the value to
true
, it takes the local proxy server that is running on your localhost port 8080 (
ie
the mitmproxy server).
To simplify the configuration process when you set up a certificate on your machine, change the URL to
http://toscrape.com/
.
Verify that the mitmproxy server is running; then run the same commands again:
dotnet build
dotnet run
Your output should look like this:
…output omitted…
Title: fictional bookstore, Link: http://books.toscrape.com/
Title: books.toscrape.com, Link: http://books.toscrape.com/
Title: A website, Link: http://quotes.toscrape.com/
Title: Default, Link: http://quotes.toscrape.com/
Title: Scroll, Link: http://quotes.toscrape.com/scroll
Title: JavaScript, Link: http://quotes.toscrape.com/js
Title: Delayed, Link: http://quotes.toscrape.com/js-delayed
Title: Tableful, Link: http://quotes.toscrape.com/tableful
Title: Login, Link: http://quotes.toscrape.com/login
Title: ViewState, Link: http://quotes.toscrape.com/search.aspx
Title: Random, Link: http://quotes.toscrape.com/random
…output omitted…
If you check the mitmproxy window from your terminal or shell, you should see that it intercepted the call:
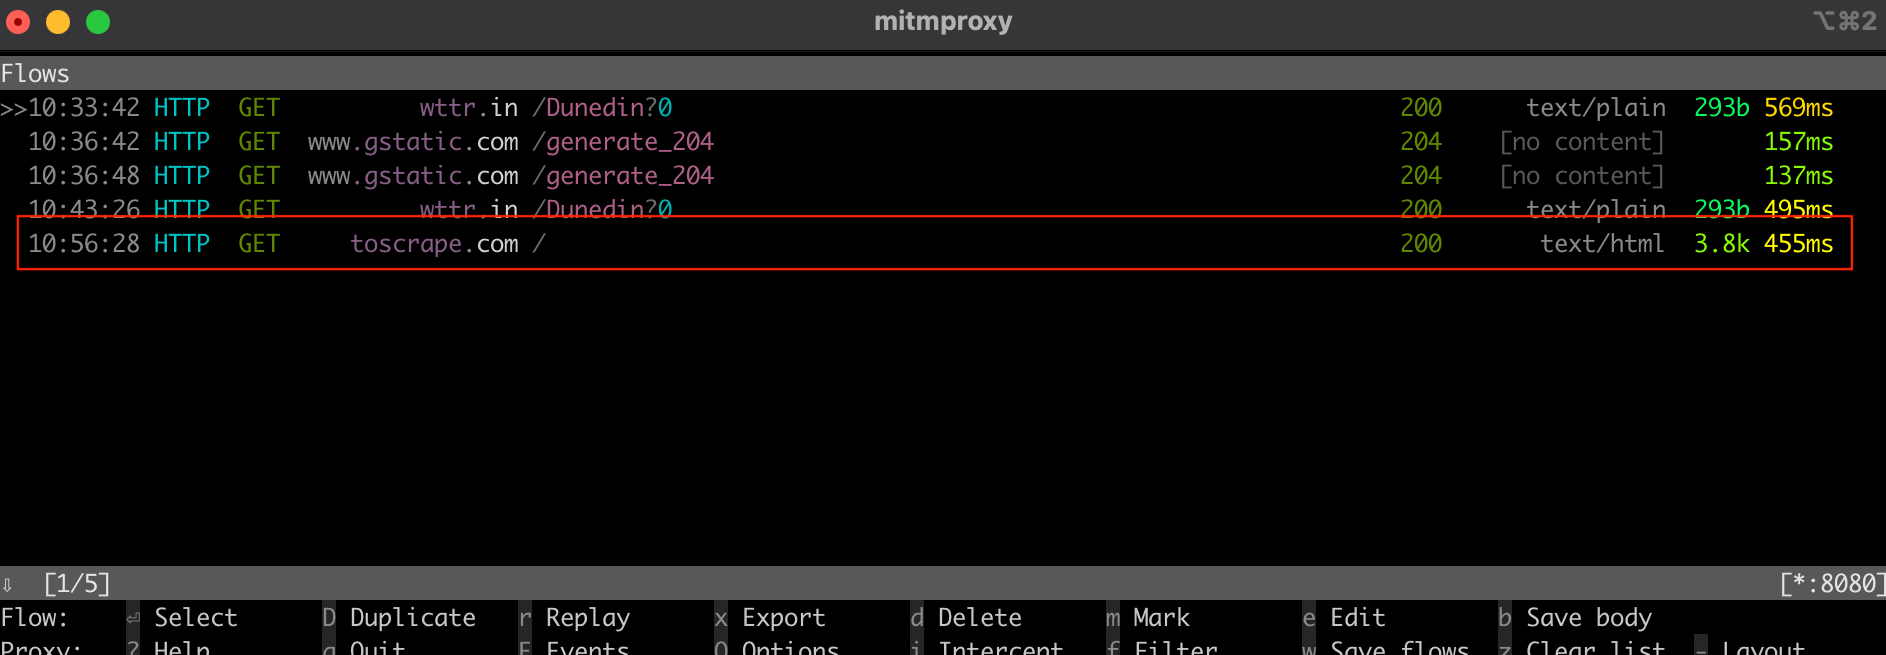
an interception of the call in the mitmproxy window
As you can see, setting up a local proxy or switching between various proxies can be a complex and time-consuming task. Thankfully, tools like Bright Data can help. In the following section, you’ll learn how to use the Bright Data proxy server to simplify the scraping process.
Bright Data Proxy
Bright Data offers an network of proxy services available across 195 locations . This network integrates the Bright Data proxy rotation feature , systematically alternating between servers to enhance web scraping effectiveness and security.
Using this rotating proxy system diminishes the risk of IP bans or blocks typically encountered during web scraping tasks. Each request uses a different proxy, concealing the scraper’s identity and making it challenging for websites to detect and limit access. This approach enhances data collection reliability, ensuring heightened anonymity and security.
The Bright Data platform is designed for ease of use and straightforward setup, making it a perfect fit for C# web scraping projects , which you’ll see in the next section.
Create a Residential Proxy
Before you can use a Bright Data proxy in your project, you need to set up an account. To do so, visit the Bright Data website and sign up for a free trial.
Once you’ve set up your account, sign into it and click on the location icon on the left to navigate to Proxies & Scraping Infrastructure . Then click on Add and choose Residential Proxies :
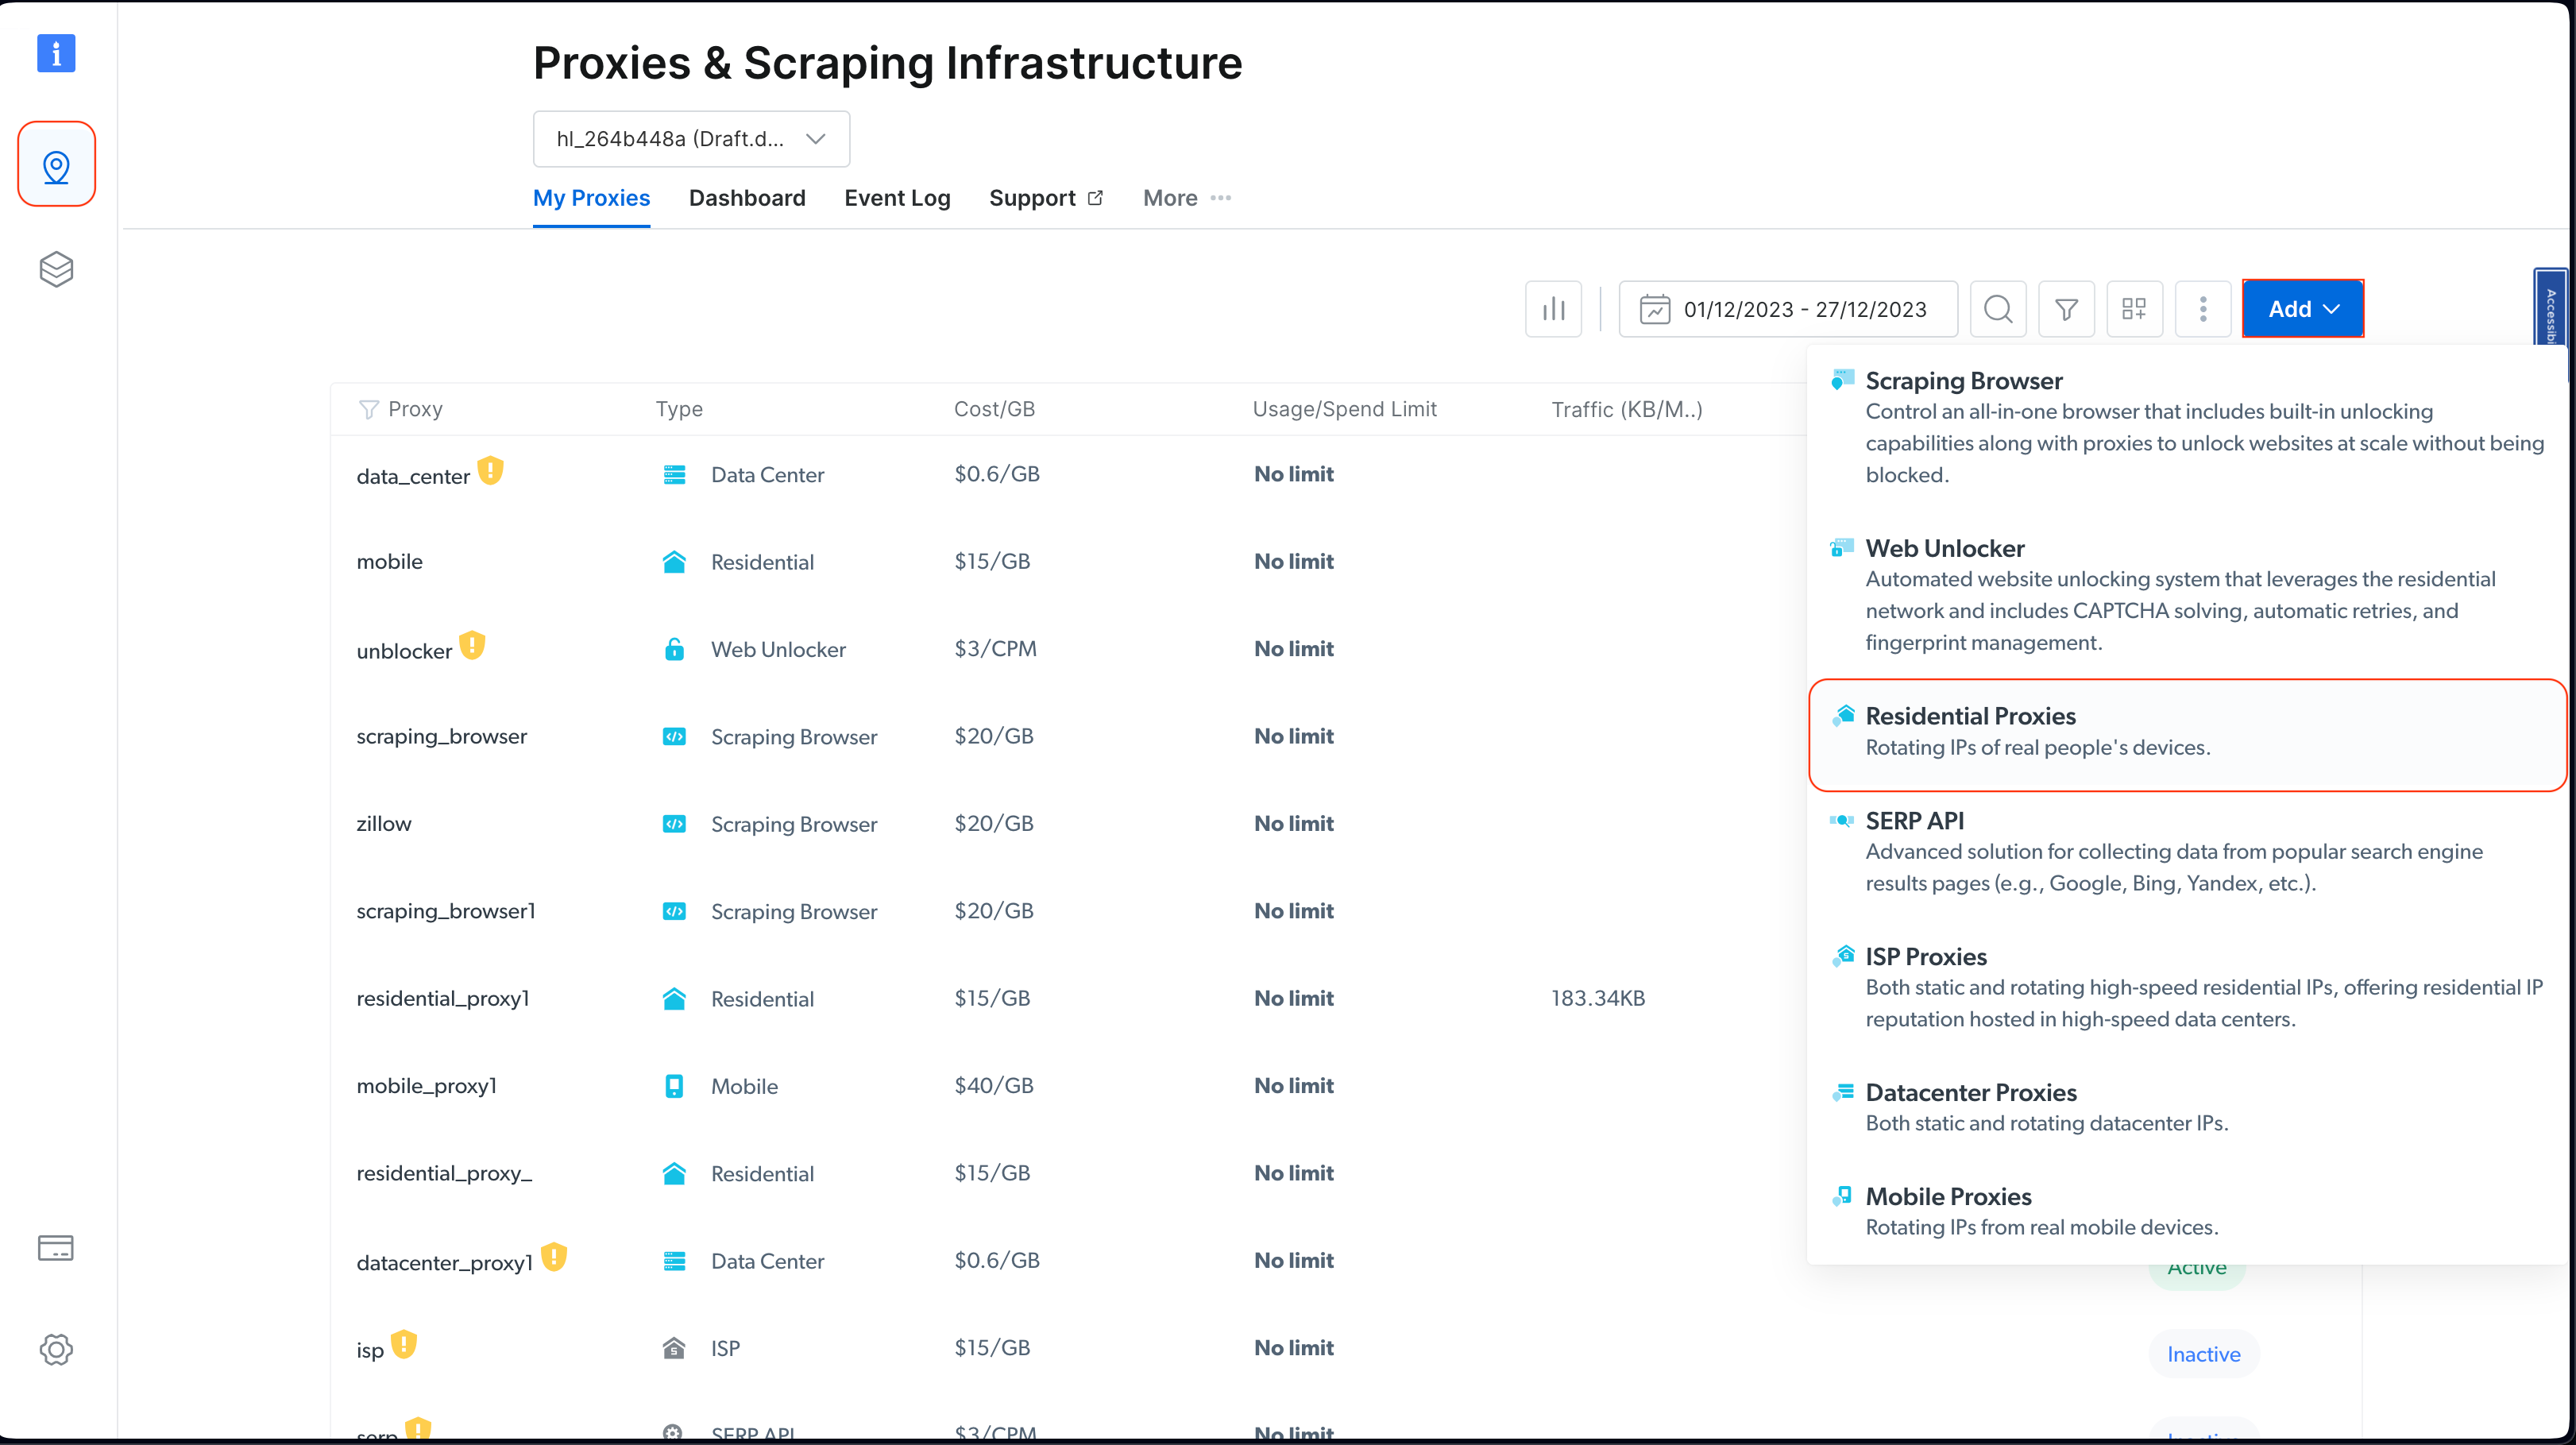
choosing residential proxies in the control panel
Keep the default names and click on Add again to create a residential proxy:
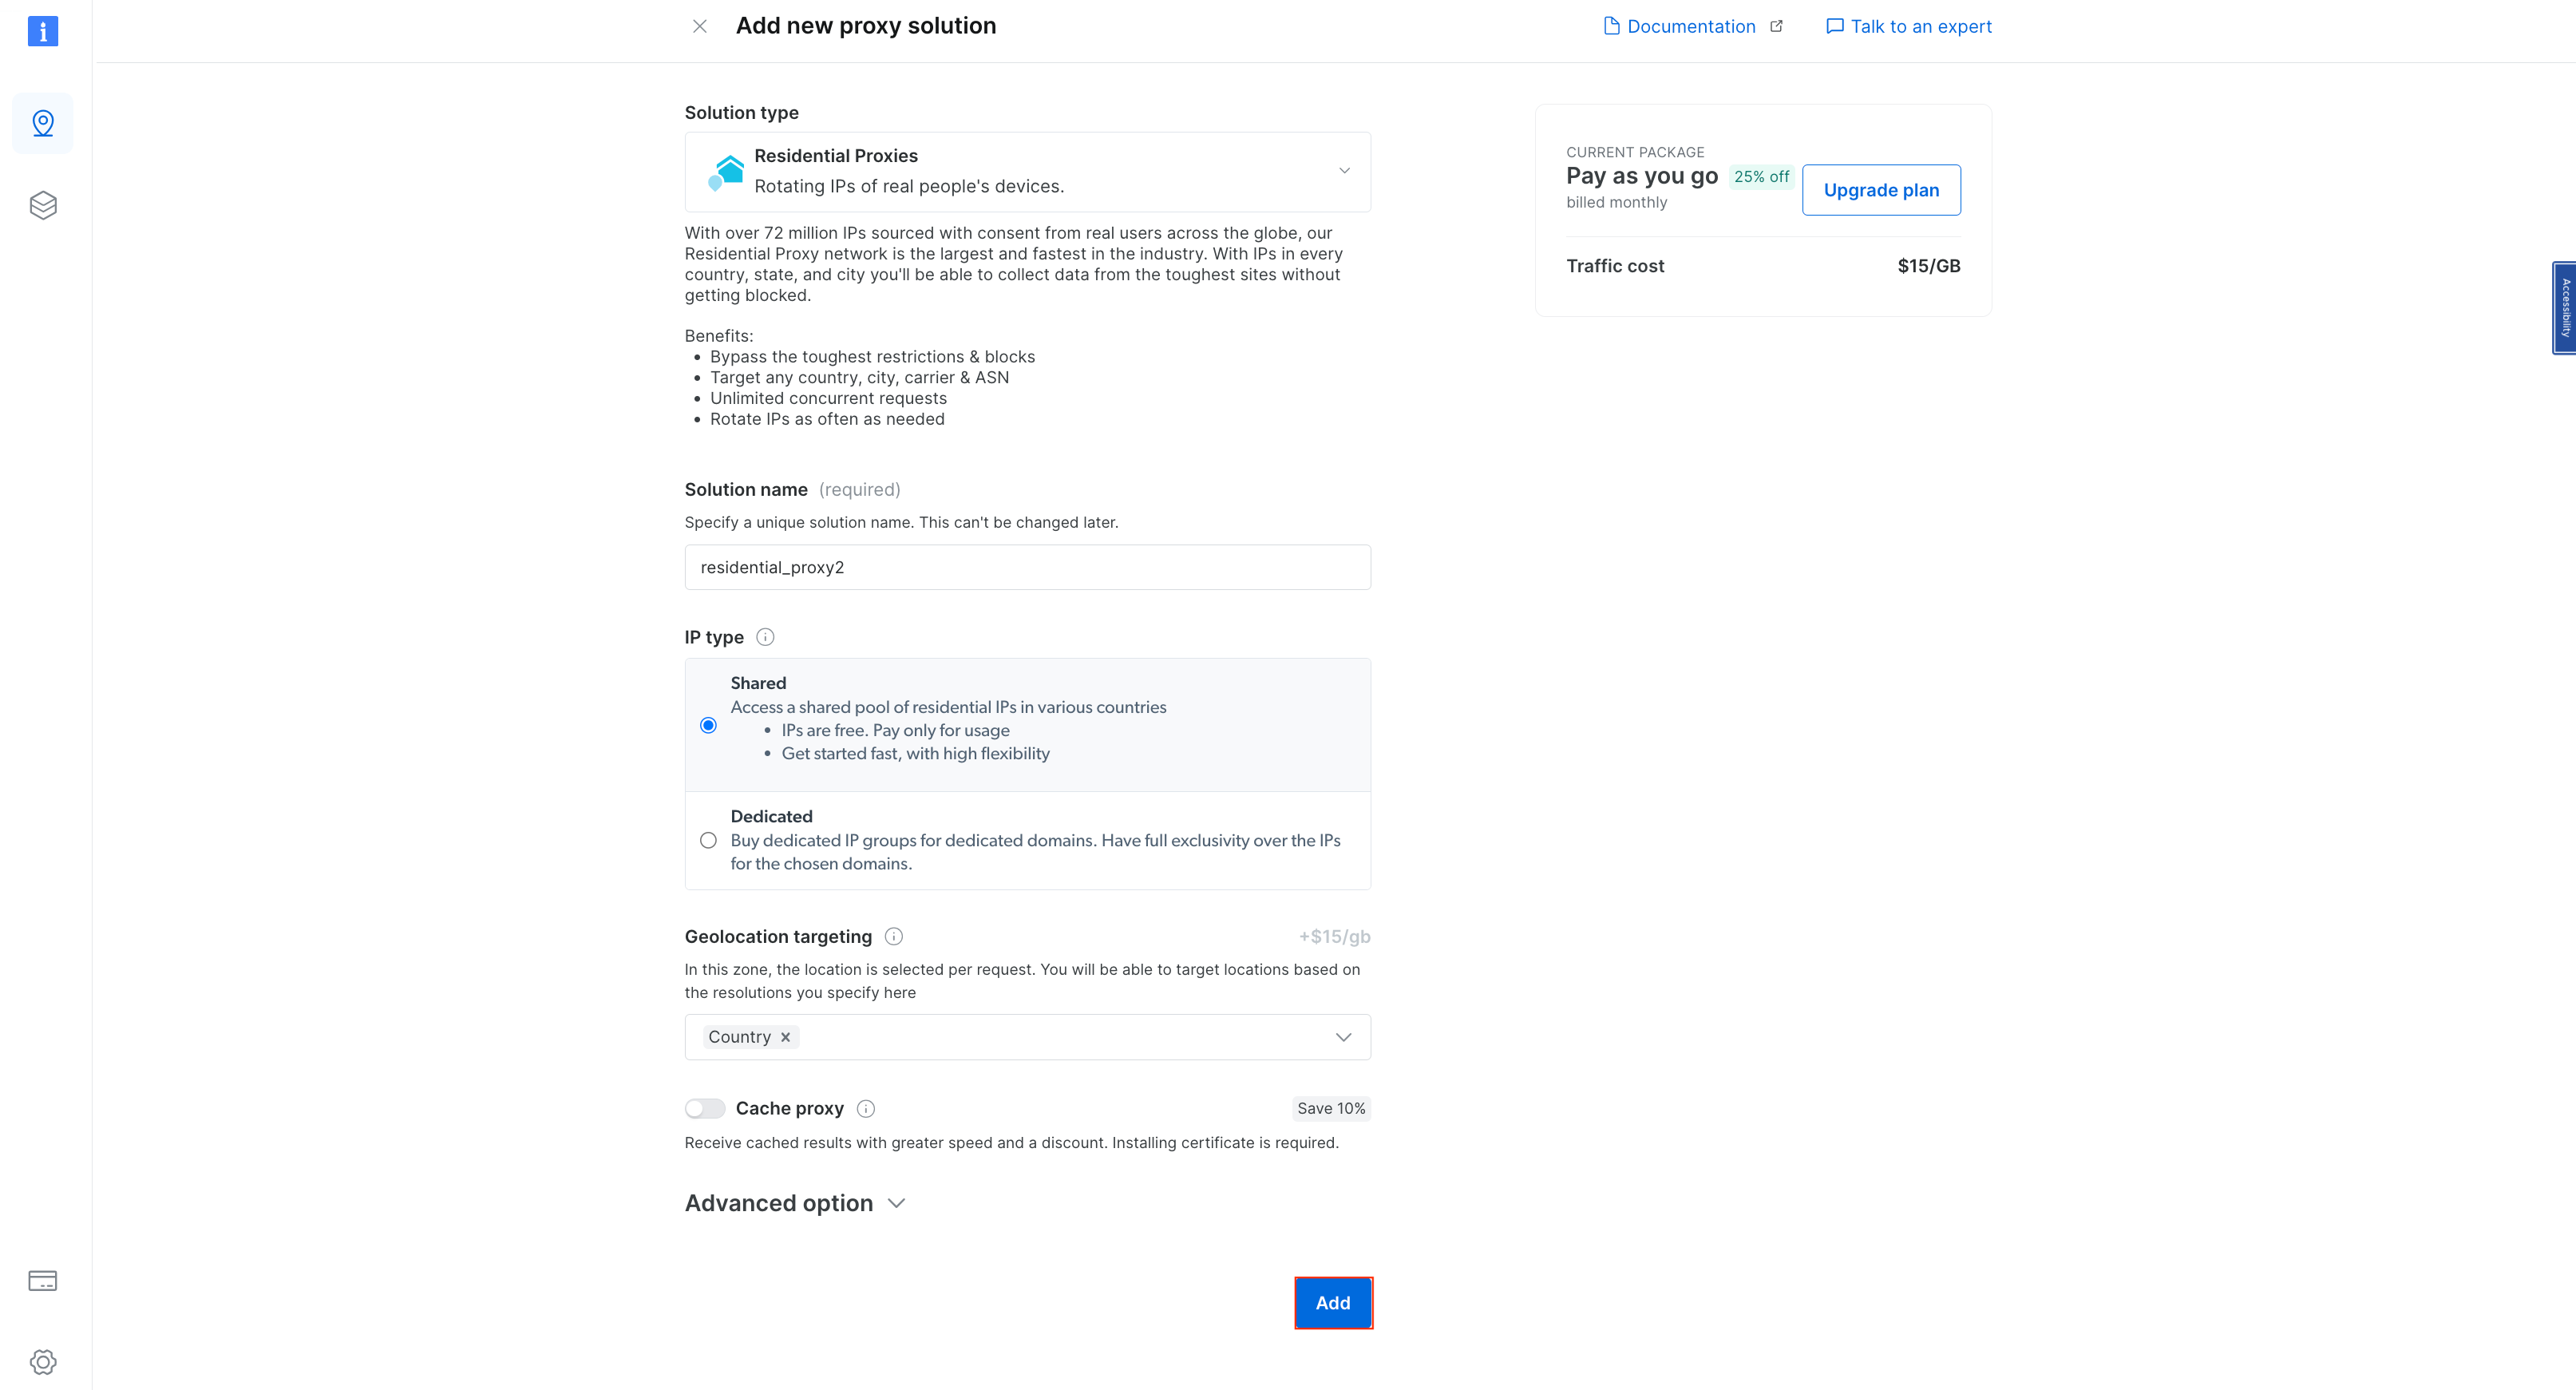
creating a new residential proxy
Once the proxy is created, you should see the credentials, including a host, port, username, and password. Save these credentials in a safe place as you’ll need them later:
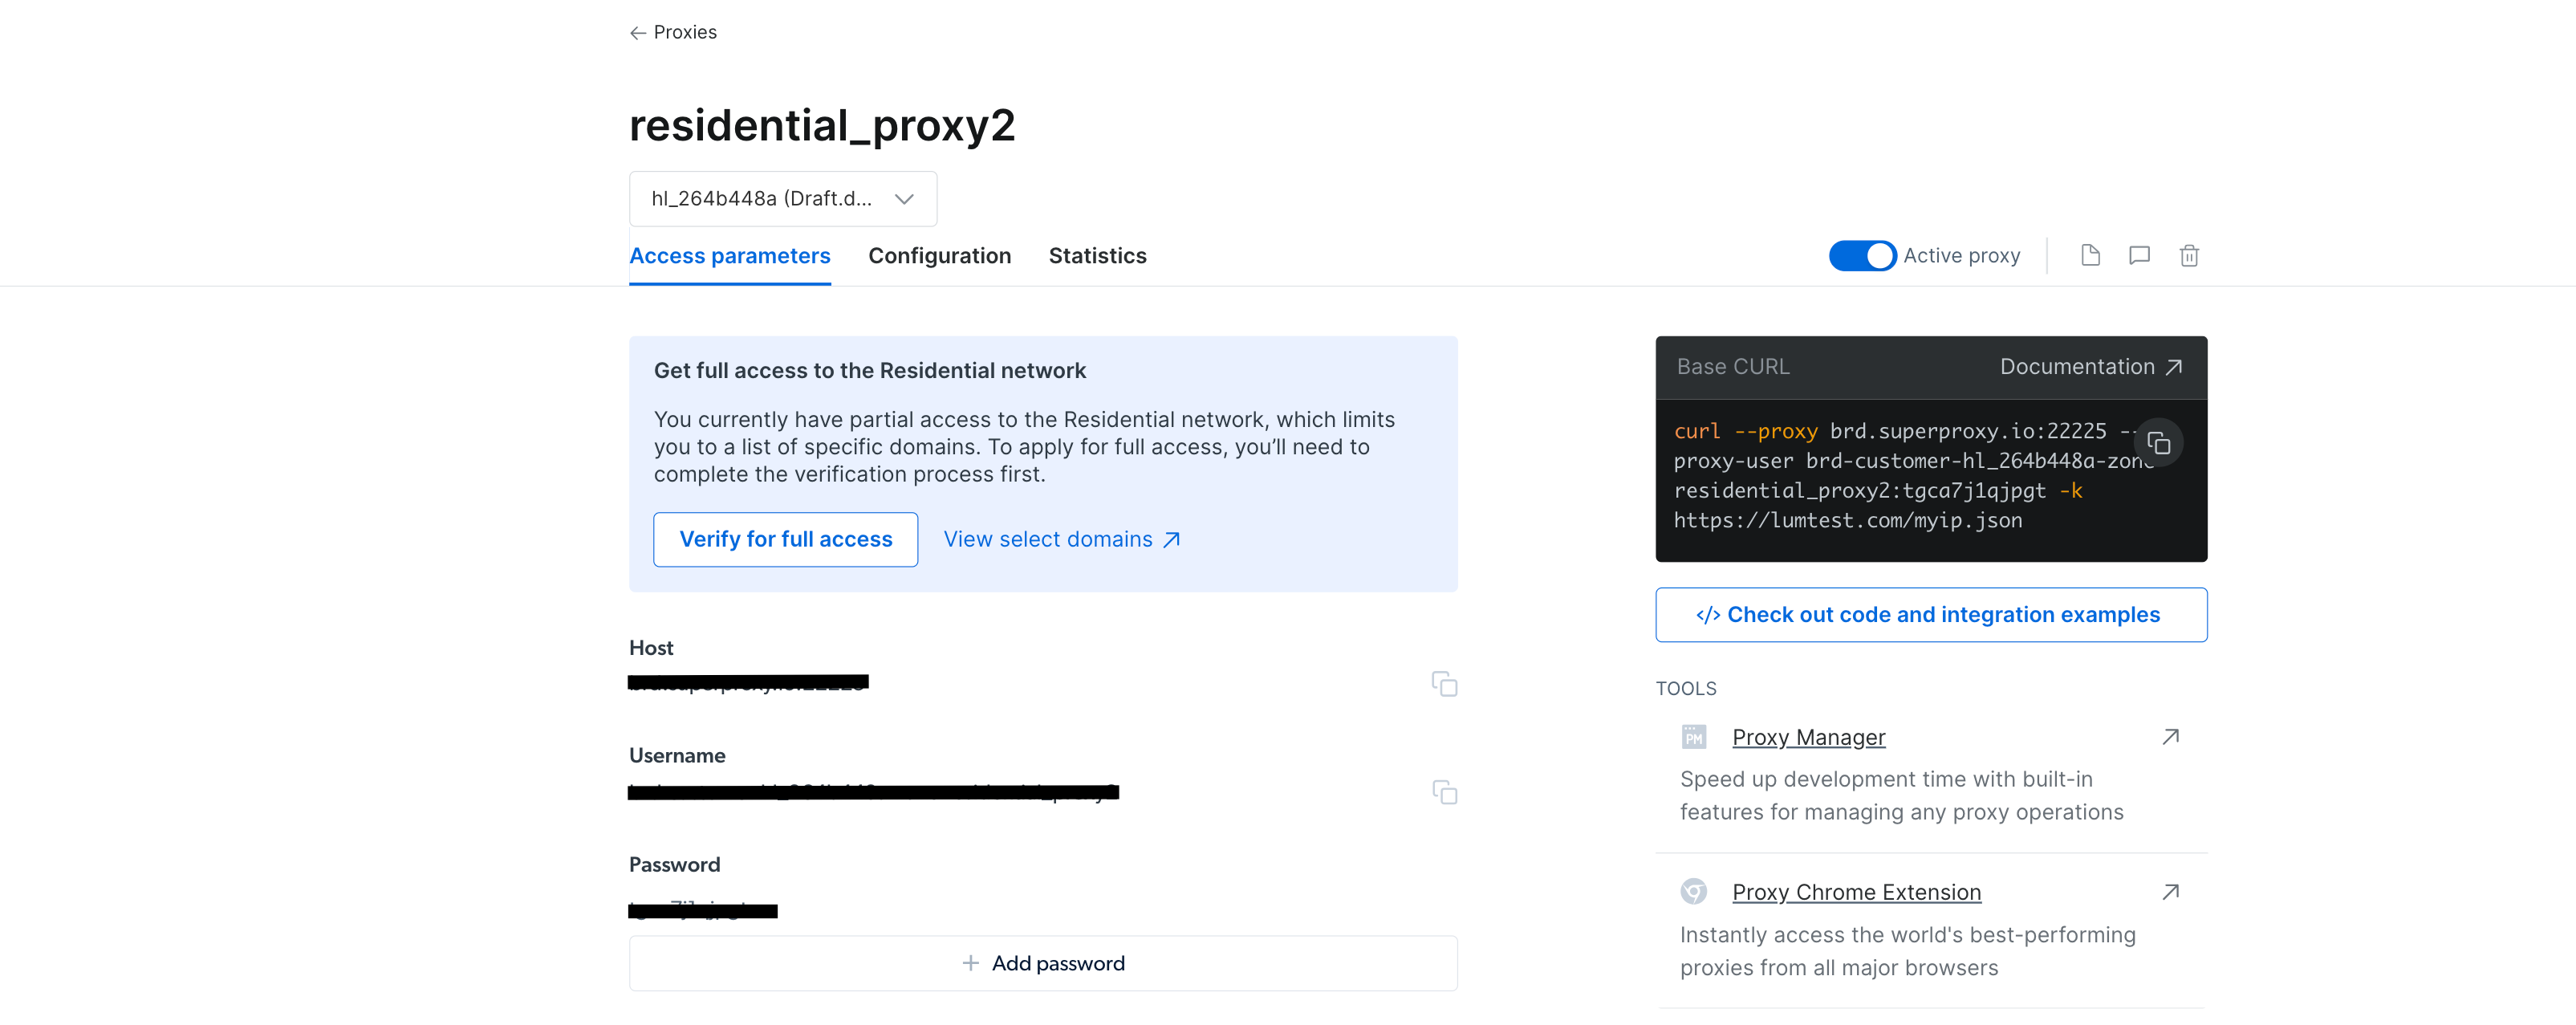
proxy credentials that you need to save
Navigate to your
WebScrapingBrightData
project from your IDE or terminal/shell. Then create a
BrightDataProxyConfigurator.cs
class file and add the following code:
using System.Net;

namespace WebScrapBrightData
{
    public class BrightDataProxyConfigurator
    {
        public static HttpClient ConfigureHttpClient(string proxyHost, string proxyUsername, string proxyPassword)
        {

            var proxy = new WebProxy(proxyHost) {
                Credentials = new NetworkCredential(proxyUsername, proxyPassword)
            };
            var httpClientHandler = new HttpClientHandler() {
                Proxy = proxy,
                UseProxy = true
            };
            var client = new HttpClient(httpClientHandler);
            client.DefaultRequestHeaders.Add("User-Agent", "YourUserAgent");
            client.DefaultRequestHeaders.Add("Accept", "application/json");

            client.DefaultRequestHeaders.TryAddWithoutValidation("Proxy-Authorization", Convert.ToBase64String(System.Text.Encoding.UTF8.GetBytes($"{proxyUsername}:{proxyPassword}")));
            return client;

        }
    }
}
In this code, you define a
BrightDataProxyConfigurator
class, which includes the
ConfigureHttpClient
method. When called, this method configures and returns an
HttpClient
that is set up to use a proxy server. You achieve this by creating a proxy URL using the provided
username
,
password
,
host
, and
port
, and then configuring an
HttpClientHandler
with this proxy. The method ultimately returns an
HttpClient
instance that routes all its requests through the specified proxy.
Next, create the
WebContentScraper.cs
class file under the
WebScrapingBrightData
project and add the following code:
using HtmlAgilityPack;

namespace WebScrapBrightData
{
    public class WebContentScraper
    {
        public static async Task ScrapeContent(string url, HttpClient client)
        {
            var response = await client.GetAsync(url);
            var content = await response.Content.ReadAsStringAsync();

            HtmlDocument doc = new();
            doc.LoadHtml(content);
            var nodes = doc.DocumentNode.SelectNodes("//li/a[@href] | //p/a[@href] | //td/a[@href]");

            if (nodes != null)
            {
                foreach (var node in nodes)
                {
                    string hrefValue = node.GetAttributeValue("href", string.Empty);
                    string title = node.InnerText;

                    Uri baseUri = new(url);
                    Uri fullUri = new(baseUri, hrefValue);

                    Console.WriteLine($"Title: {title}, Link: {fullUri.AbsoluteUri}");
                }
            }
            else
            {
                Console.WriteLine("No article links found on the page.");
            }
        }
    }
}
This code defines a
WebContentScraper
class with a static async method,
ScrapeContent
. This method takes a URL and an HttpClient, fetches the web page’s content, parses it as HTML, and extracts links from specific HTML elements (list items, paragraphs, and table cells). It then prints the titles and absolute URIs of these links to the console.
Program Class
Now, scrape Wikipedia again and see how Bright Data improves access and anonymity.
Update the
Program.cs
class file with the following code:
namespace WebScrapBrightData
{
    public class Program
    {
        public static async Task Main(string[] args)
        {
            // Bright Data Proxy Configuration
            string host = "your_brightdata_proxy_host";
            string username = "your_brightdata_proxy_username";
            string password = "your_brightdata_proxy_password";
            var client = BrightDataProxyConfigurator.ConfigureHttpClient(host, username, password);

            // Scrape content from the target URL
            string urlToScrape = "https://www.wikipedia.org/";
            await WebContentScraper.ScrapeContent(urlToScrape, client);
        }
    }
}
Note: Make sure you replace the Bright Data proxy credentials with the ones you saved previously.
Note: Make sure you replace the Bright Data proxy credentials with the ones you saved previously.
Next, to test and run your application, open your shell or terminal from the root directory of your
WebScrapBrightData
project and run the following command:
dotnet build
dotnet run
You should get the same output as before when you utilized public proxies:
…output omitted…
Title: Latina, Link: https://la.wikipedia.org/
Title: Latviešu, Link: https://lv.wikipedia.org/
Title: Lietuvių, Link: https://lt.wikipedia.org/
Title: Magyar, Link: https://hu.wikipedia.org/
Title: Македонски, Link: https://mk.wikipedia.org/
Title: Bahasa Melayu, Link: https://ms.wikipedia.org/
Title: Bahaso Minangkabau, Link: https://min.wikipedia.org/
Title: bokmål, Link: https://no.wikipedia.org/
Title: nynorsk, Link: https://nn.wikipedia.org/
Title: Oʻzbekcha / Ўзбекча, Link: https://uz.wikipedia.org/
Title: Қазақша / Qazaqşa / قازاقشا, Link: https://kk.wikipedia.org/
Title: Română, Link: https://ro.wikipedia.org/
Title: Simple English, Link: https://simple.wikipedia.org/
Title: Slovenčina, Link: https://sk.wikipedia.org/
Title: Slovenščina, Link: https://sl.wikipedia.org/
Title: Српски / Srpski, Link: https://sr.wikipedia.org/
Title: Srpskohrvatski / Српскохрватски, Link: https://sh.wikipedia.org/
Title: Suomi, Link: https://fi.wikipedia.org/
Title: தமிழ், Link: https://ta.wikipedia.org/
…output omitted…
The program uses the Bright Data proxy to scrape the Wikipedia home page and display the extracted titles and links in the console. This showcases the effectiveness and ease of integrating the Bright Data proxy into a C# web scraping project for discreet and robust data extraction.
If you want to visualize the effect of using a Bright Data proxy, you can try sending a GET request to http://lumtest.com/myip.json . This website will return the location and other network-related details of the client currently trying to access the website. If you want to try this yourself, open up the link in a new browser tab. You should see the details of your network which are publicly visible.
To try it with a Bright Data proxy, update the code in
WebContentScraper.cs
to match the following:
using HtmlAgilityPack;


public class WebContentScraper
{
    public static async Task ScrapeContent(string url, HttpClient client)
    {
        var response = await client.GetAsync(url);
        var content = await response.Content.ReadAsStringAsync();

        HtmlDocument doc = new();
        doc.LoadHtml(content);

        Console.Write(content);
    }
}
Then, update the
urlToScrape
variable in the
Program.cs
file to scrape the website:
string urlToScrape = "http://lumtest.com/myip.json";
Now, try running the app again. You should see an output like this in your terminal:
{"ip":"79.221.123.68","country":"DE","asn":{"asnum":3320,"org_name":"Deutsche Telekom AG"},"geo":{"city":"Koenigs Wusterhausen","region":"BB","region_name":"Brandenburg","postal_code":"15711","latitude":52.3014,"longitude":13.633,"tz":"Europe/Berlin","lum_city":"koenigswusterhausen","lum_region":"bb"}}
This confirms that the request is now being proxied through one of Bright Data’s proxy servers.
Conclusion
In this article, you learned how to use proxy servers with C# for web scraping.
Although local proxy servers can be useful in some scenarios, they often present limitations for web scraping projects. Thankfully, proxy servers can help. With its extensive global network and a diverse range of proxy options, including residential , ISP , datacenter , and mobile proxies , Bright Data guarantees a high degree of flexibility and reliability. Notably, the proxy rotation feature is invaluable for large-scale scraping tasks, helping to maintain anonymity and reduce the risk of IP bans.
As you continue your web scraping journey, consider using Bright Data solutions as a powerful and scalable way to gather data efficiently while adhering to best practices in web scraping.
All the code for this tutorial is available in this GitHub repository .