Build AI Apps with Web Data Access in Langflow & Bright Data
{ "@context": "https://schema.org", "@type": "HowTo", "name": "How to Build AI Apps with Web Data Access in Langflow", "description": "Step-by-step tutorial for building an AI agent in Langflow that retrieves live web data using a custom Bright Data component for LLM-powered apps.", "step": [ { "@type": "HowToStep", "name": "Review prerequisites", "text": "Ensure you have a dual-core CPU (4GB+ RAM recommended), Python 3.10–3.13, the 'uv' package, a Bright Data API key, and an LLM API key (e.g., Gemini)." }, { "@type": "HowToStep", "name": "Set up the Langflow environment", "text": "Create a project folder and Python virtual environment using 'uv', activate your environment, and install Langflow via 'uv pip install langflow'." }, { "@type": "HowToStep", "name": "Start Langflow locally", "text": "Run 'uv run langflow run' to launch Langflow at http://localhost:7860 in your browser." }, { "@type": "HowToStep", "name": "Configure Bright Data Web Unlocker", "text": "In your Bright Data dashboard, create a Web Unlocker zone and generate an API key for authenticated web scraping requests." }, { "@type": "HowToStep", "name": "Initialize a new blank Langflow flow", "text": "On the Langflow server, click 'Create first flow', select 'Blank Flow', and name your project (e.g., 'Langflow x Bright Data AI App')." }, { "@type": "HowToStep", "name": "Create a Custom Bright Data Component", "text": "Add a new custom component. Paste the Python class code that authenticates and queries the Bright Data Web Unlocker API, returning site data in Markdown." }, { "@type": "HowToStep", "name": "Enable Tool Mode and configure component", "text": "Turn on 'Tool Mode' for the Bright Data component, then input your API key and Web Unlocker zone name." }, { "@type": "HowToStep", "name": "Connect the Bright Data component to an AI Agent", "text": "Drag in an 'Agent' component, select your preferred LLM and API key, and wire the Bright Data component to the Agent's Tools input." }, { "@type": "HowToStep", "name": "Complete the flow with Input and Output", "text": "Add Input Chat and Output Chat components; connect Input → Agent, Agent → Output to enable chat-driven interactions." }, { "@type": "HowToStep", "name": "Test the AI app in Playground", "text": "Click 'Playground' in Langflow. Enter a URL prompt (e.g., Amazon product link) and verify that the agent retrieves and processes live web data successfully." } ], "estimatedCost": { "@type": "MonetaryAmount", "currency": "USD", "value": "Free" }, "supply": [ { "@type": "HowToSupply", "name": "Python 3.10–3.13 environment" }, { "@type": "HowToSupply", "name": "uv Python package" }, { "@type": "HowToSupply", "name": "Bright Data account and API key" }, { "@type": "HowToSupply", "name": "Langflow package" }, { "@type": "HowToSupply", "name": "LLM API key (e.g., Gemini)" } ], "tool": [ { "@type": "HowToTool", "name": "Langflow" }, { "@type": "HowToTool", "name": "Bright Data Web Unlocker" }, { "@type": "HowToTool", "name": "uv" }, { "@type": "HowToTool", "name": "httpx" } ], "totalTime": "PT30M" }
In this guide, you will discover:
What Langflow is and why it has become so popular.
The limitations of using standard LLMs in Langflow apps, and how to overcome them with external data.
How to build a Langflow AI app integrated with Bright Data for web data access.
Let’s dive in!
What Is Langflow?
Langflow is an open-source tool built in Python and JavaScript for building and deploying AI-powered agents and workflows. With over 92k stars on GitHub, it is one of the most popular and widely adopted libraries for developing AI agents .
Langflow operates as a low-code visual development platform. It enables you to create complex AI applications simply by connecting pre-built components through a drag-and-drop interface. This approach eliminates the need for extensive coding. Still, it supports custom code integration for maximum flexibility.
Langflow exposes a wide range of AI features , including agents, LLMs, vector stores, and integration with any API, model, or database.
Why AI Apps Need Data Access
Compared to other frameworks, Langflow shines as a visual low-code platform for building AI apps. But just like any other LLM-powered system, Langflow-based apps are only as smart as the data they have access to.
LLMs are trained on static datasets and have no built-in awareness of real-time events or private business data. This makes them disconnected from the current world unless you connect them to fresh, relevant data sources. And the web is the most expansive source of information available.
To overcome those limitations of LLMs, Langflow lets you connect to flexible web data pipelines. This pattern is foundational in important use cases like:
RAG workflows , where retrieved data enhances the LLM’s output.
Data pipelines, where data is extracted and cleaned before analysis.
AI agents, which need external knowledge to perform tasks like answering queries, summarizing documents, or executing web searches .
Now, retrieving accurate public data from the web is not trivial. You need infrastructure that can:
Connect to virtually any website (even those protected by anti-scraping technologies ).
Extract the required data reliably.
Return it in a structured, AI-ready format.
This is exactly what Bright Data provides . By combining Langflow with Bright Data tools, your AI app gains powerful capabilities, including:
Real-time web scraping while bypassing anti-bot defenses.
Structured data extraction from top-tier platforms like Amazon, LinkedIn, Zillow, and more.
Search engine result access for live, query-based SERP data.
Visual data capture through automated full-page screenshots.
You can connect to Bright Data directly via a custom Langflow component. That means you do not need to build or maintain complex backend logic. Just wire the component into your flow, and you are ready to go!
Building an AI App in Langflow with Web Data Access Thanks to Bright Data
In this step-by-step tutorial, you will use Langflow to build an AI agent capable of retrieving live web data by integrating it with Bright Data.
Keep in mind that the AI agent setup presented here is just one simple example of what you can build thanks to this integration. There are countless other AI apps you can build using the Bright Data × Langflow integration. For inspiration, explore our list of possible use cases .
Follow the guide below to create a Bright Data–powered AI agent in Langflow!
Prerequisites
To follow this tutorial, make sure you meet the following requirements:
At least a dual-core CPU and 2 GB RAM (Recommended: Multi-core CPU and at least 4 GB RAM).
Python version 3.10 to 3.12 on Windows, or 3.10 to 3.13 on macOS/Linux, installed locally.
uv
package installed locally.
A Bright Data API key .
An API key to connect to one of the supported LLMs (here, we will use Gemini, which is free to use via API).
Do not worry if you do not have a Bright Data API key, as you will be guided through the setup process during the tutorial.
To install
uv
, fire the the following command:
pip install uvIf you are a Windows user, you will also need Microsoft Visual C++ 14.0 or higher . Download it and follow the support guide to complete the installation.
Step #1: Set Up Langflow
First, create a folder for your Langflow project and navigate into it:
mkdir langflow-agent
cd langflow-agent
The
langflow-agent
folder will serve as your Langflow project directory.
Inside the project folder, create a
Python virtual environment
using
uv
:
uv venv venvThen, on macOS/Linux, activate it with:
source venv/bin/activateEquivalently, on Windows, execute:
venv\Scripts\activateWith your activated virtual environment, install Langflow into your project environment:
uv pip install langflowThis will take a little while, so be patient.
Once installation is complete, verify that the setup works by running the application with this command:
uv run langflow runWait for LangFlow to initialize the local server. Once it is ready, it should be available at this page in your browser:
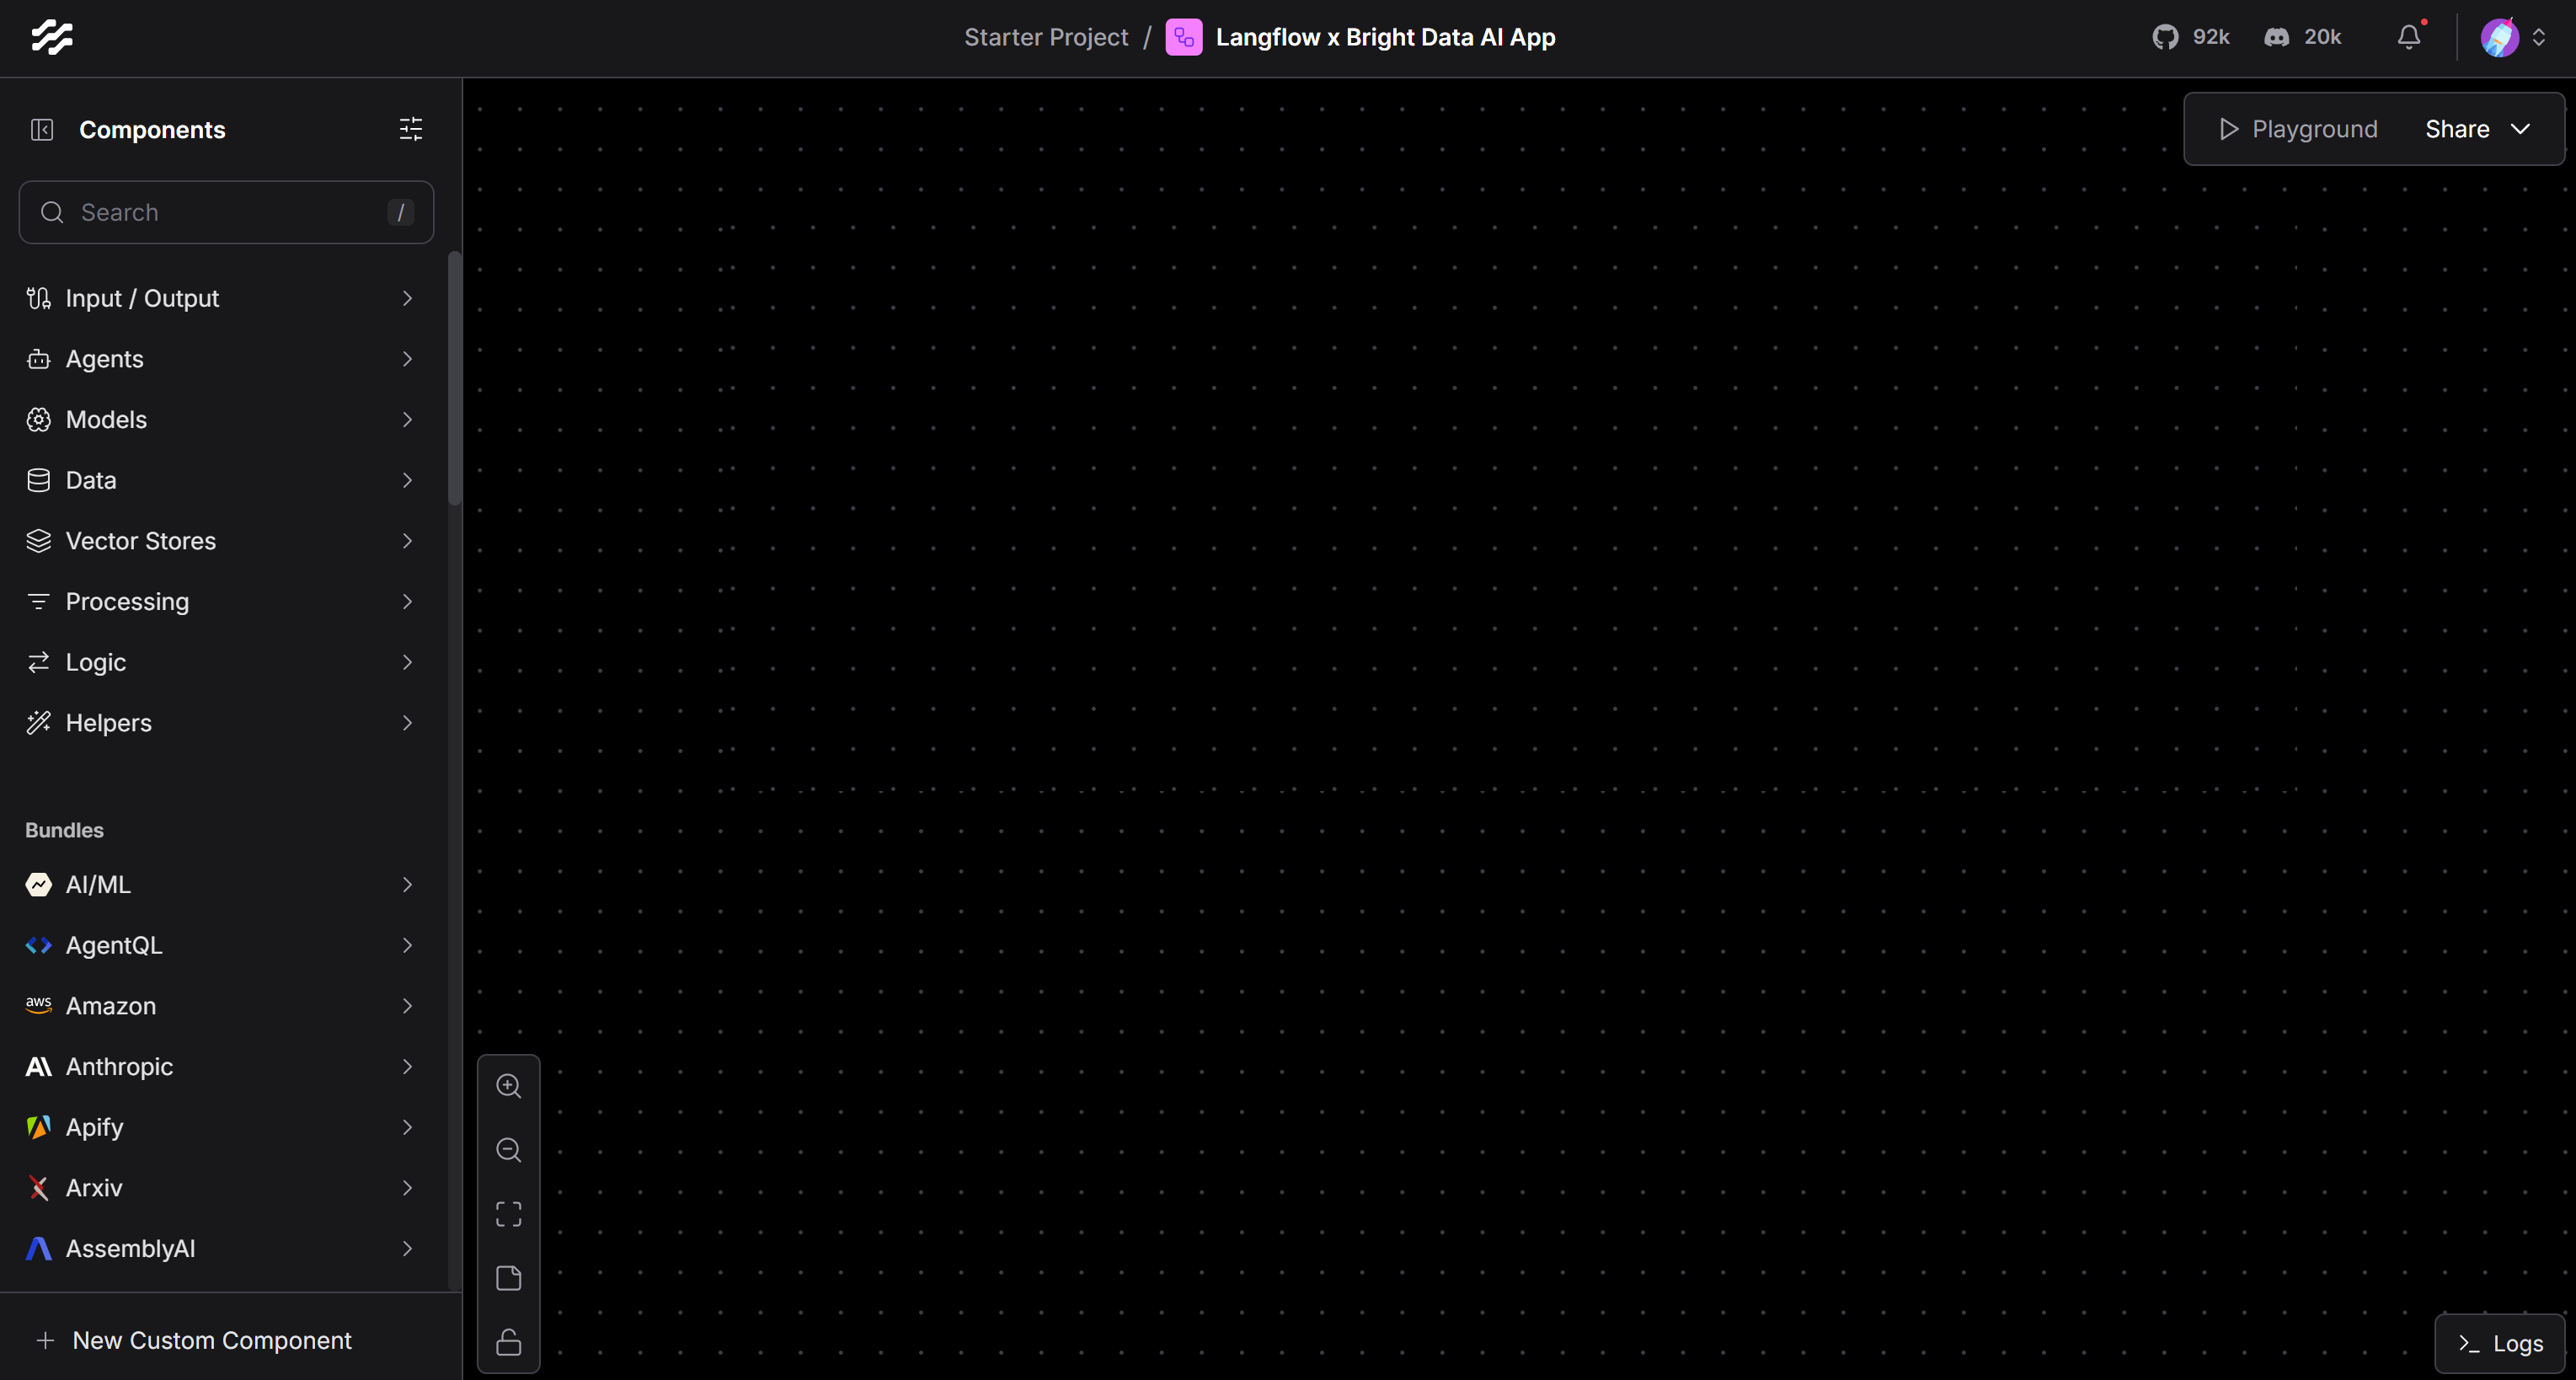
http://localhost:7860Open it, and if everything went as expected and this is the first time you use Langflow, you will see this interface:
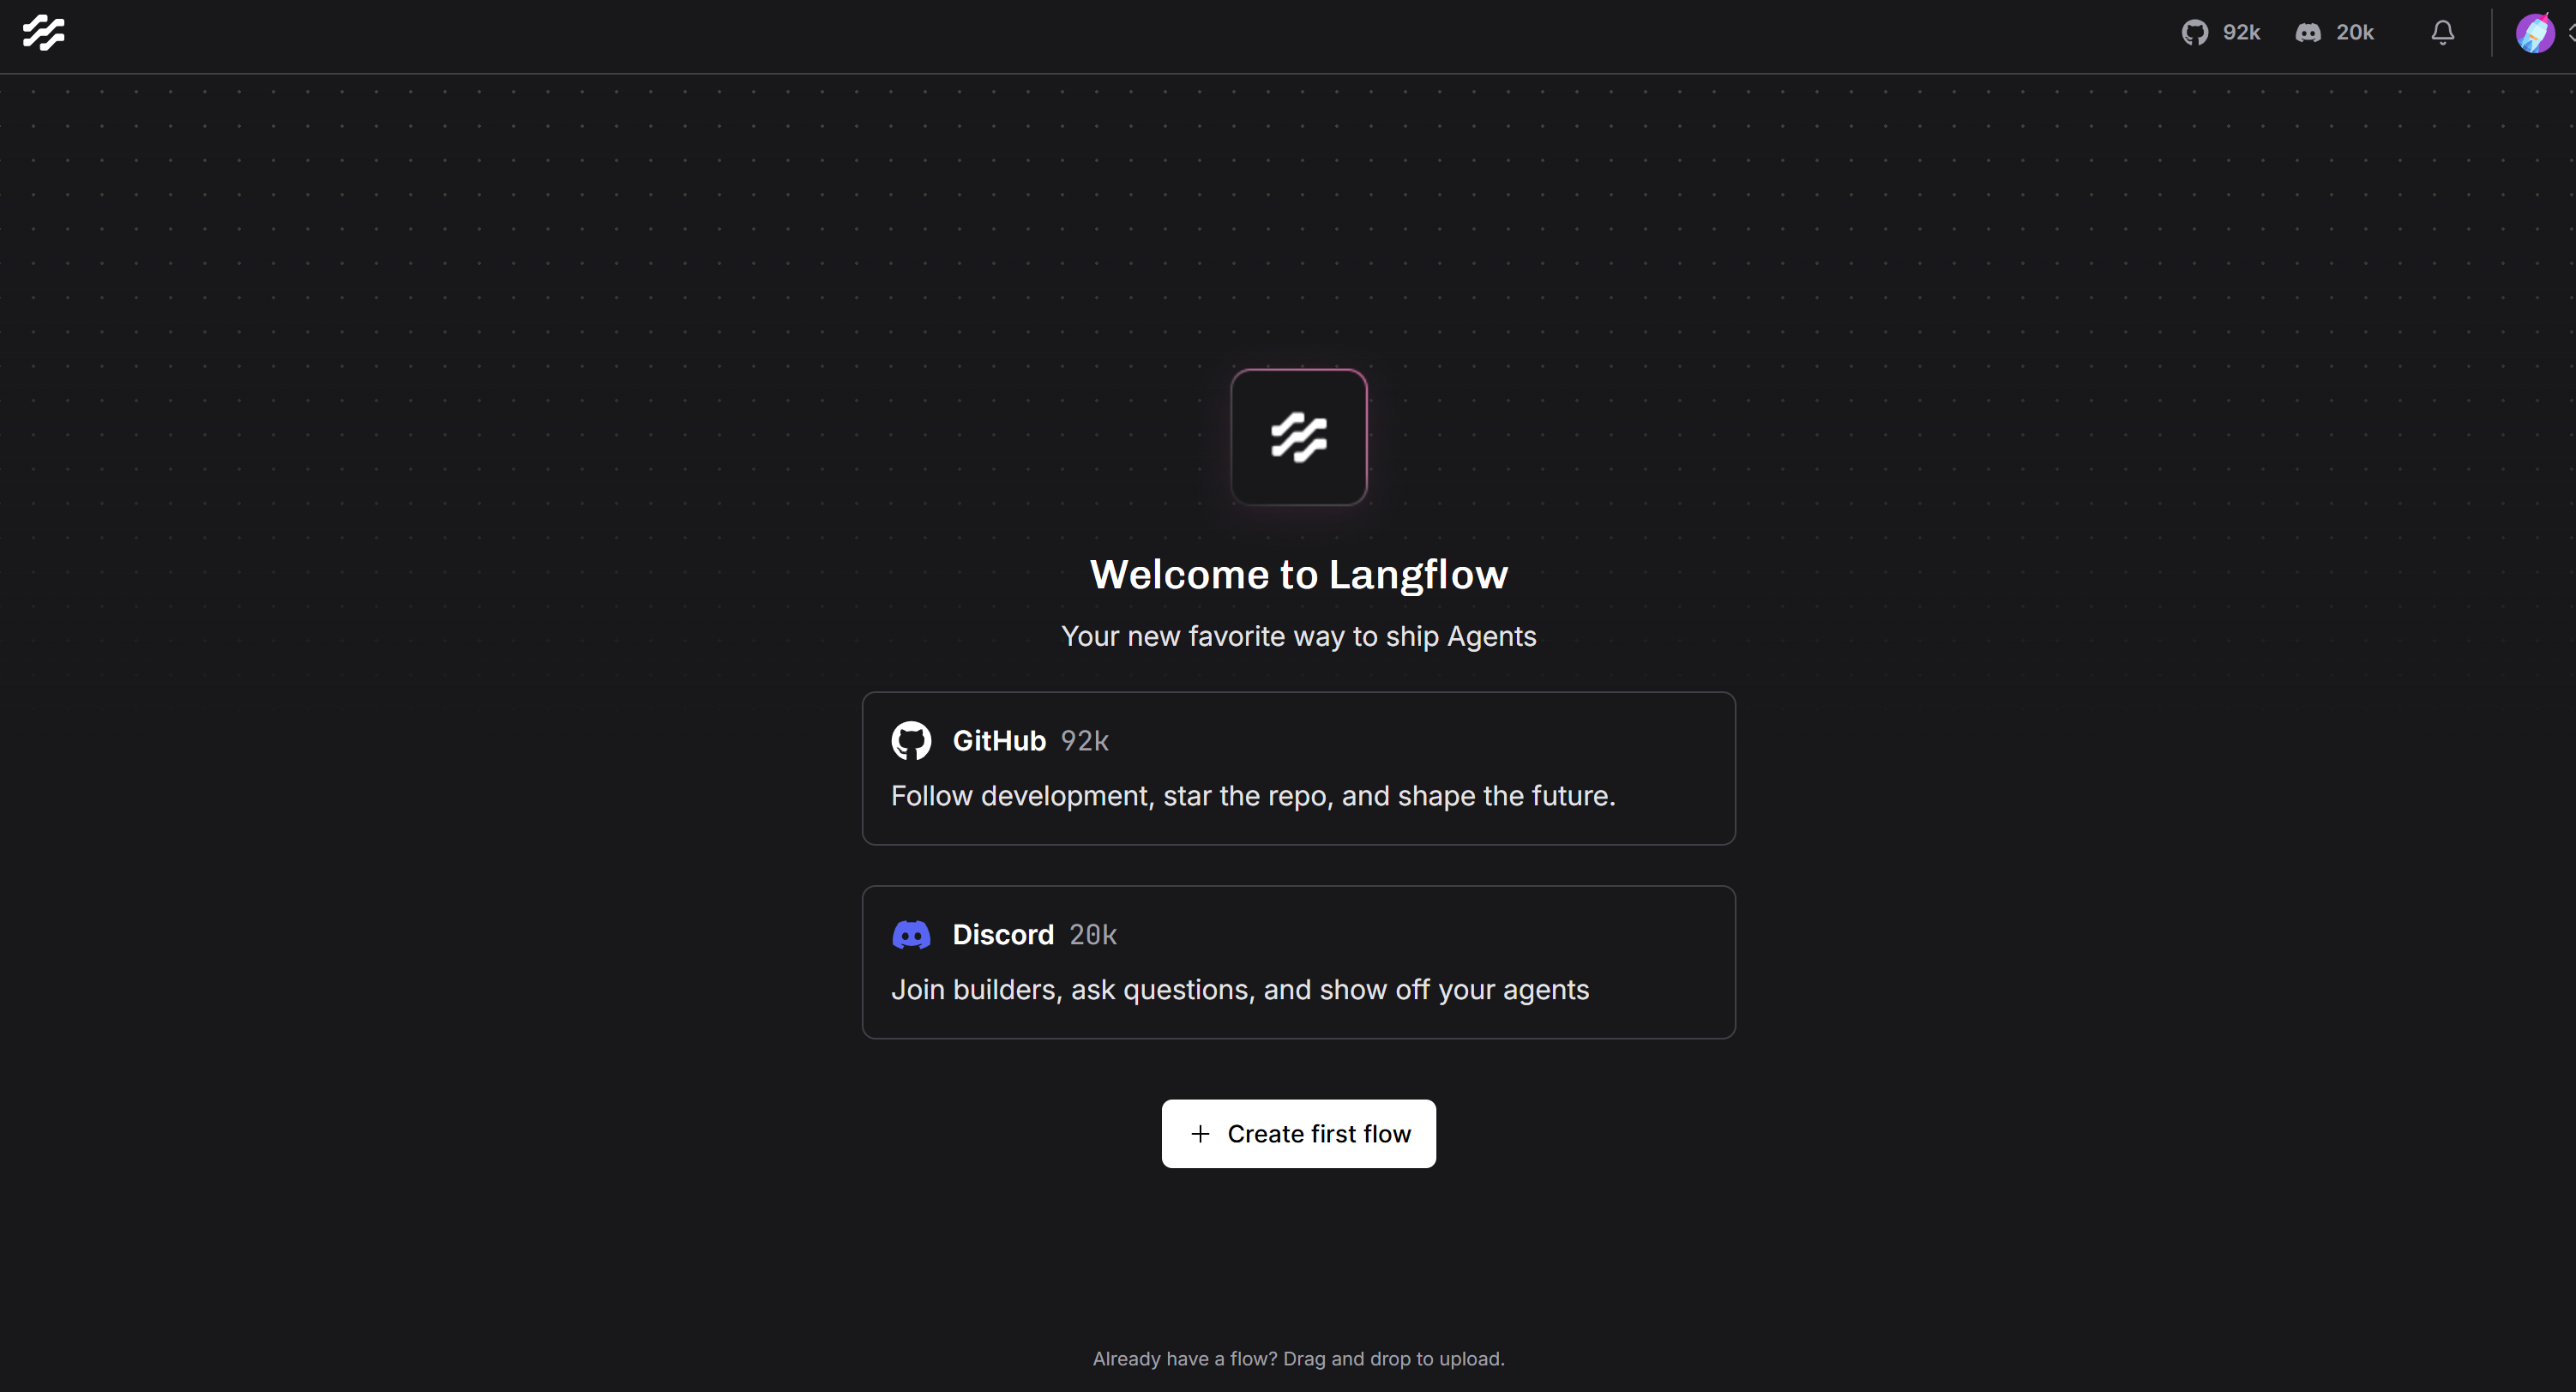
Langflow running in your browser
If you encounter any errors, refer to the official installation guide .
Amazing! Your LangFlow setup is now up and running.
Step #2: Configure Bright Data
To give your AI application the ability to retrieve data from the web, you need to connect it to Bright Data’s AI infrastructure .
Bright Data offers many data collection solutions , but in this tutorial, we will focus on:
Web Unlocker : An advanced scraping API that bypasses bot protections and returns any web page in HTML or Markdown format.
Note : Integration with other Bright Data tools like Web Scraper APIs is also possible, but this guide focuses on the general-purpose Web Unlocker.
To use Web Unlocker in your Langflow app, you first have to:
Set up a Web Unlocker zone in your Bright Data account.
Generate your Bright Data API token to authenticate requests.
Follow the instructions below to do both! As a reference, consider also exploring the official documentation .
First, If you do not already have a Bright Data account, sign up for free . If you do, log in and open your dashboard. Click the “Proxies & Scraping” button:
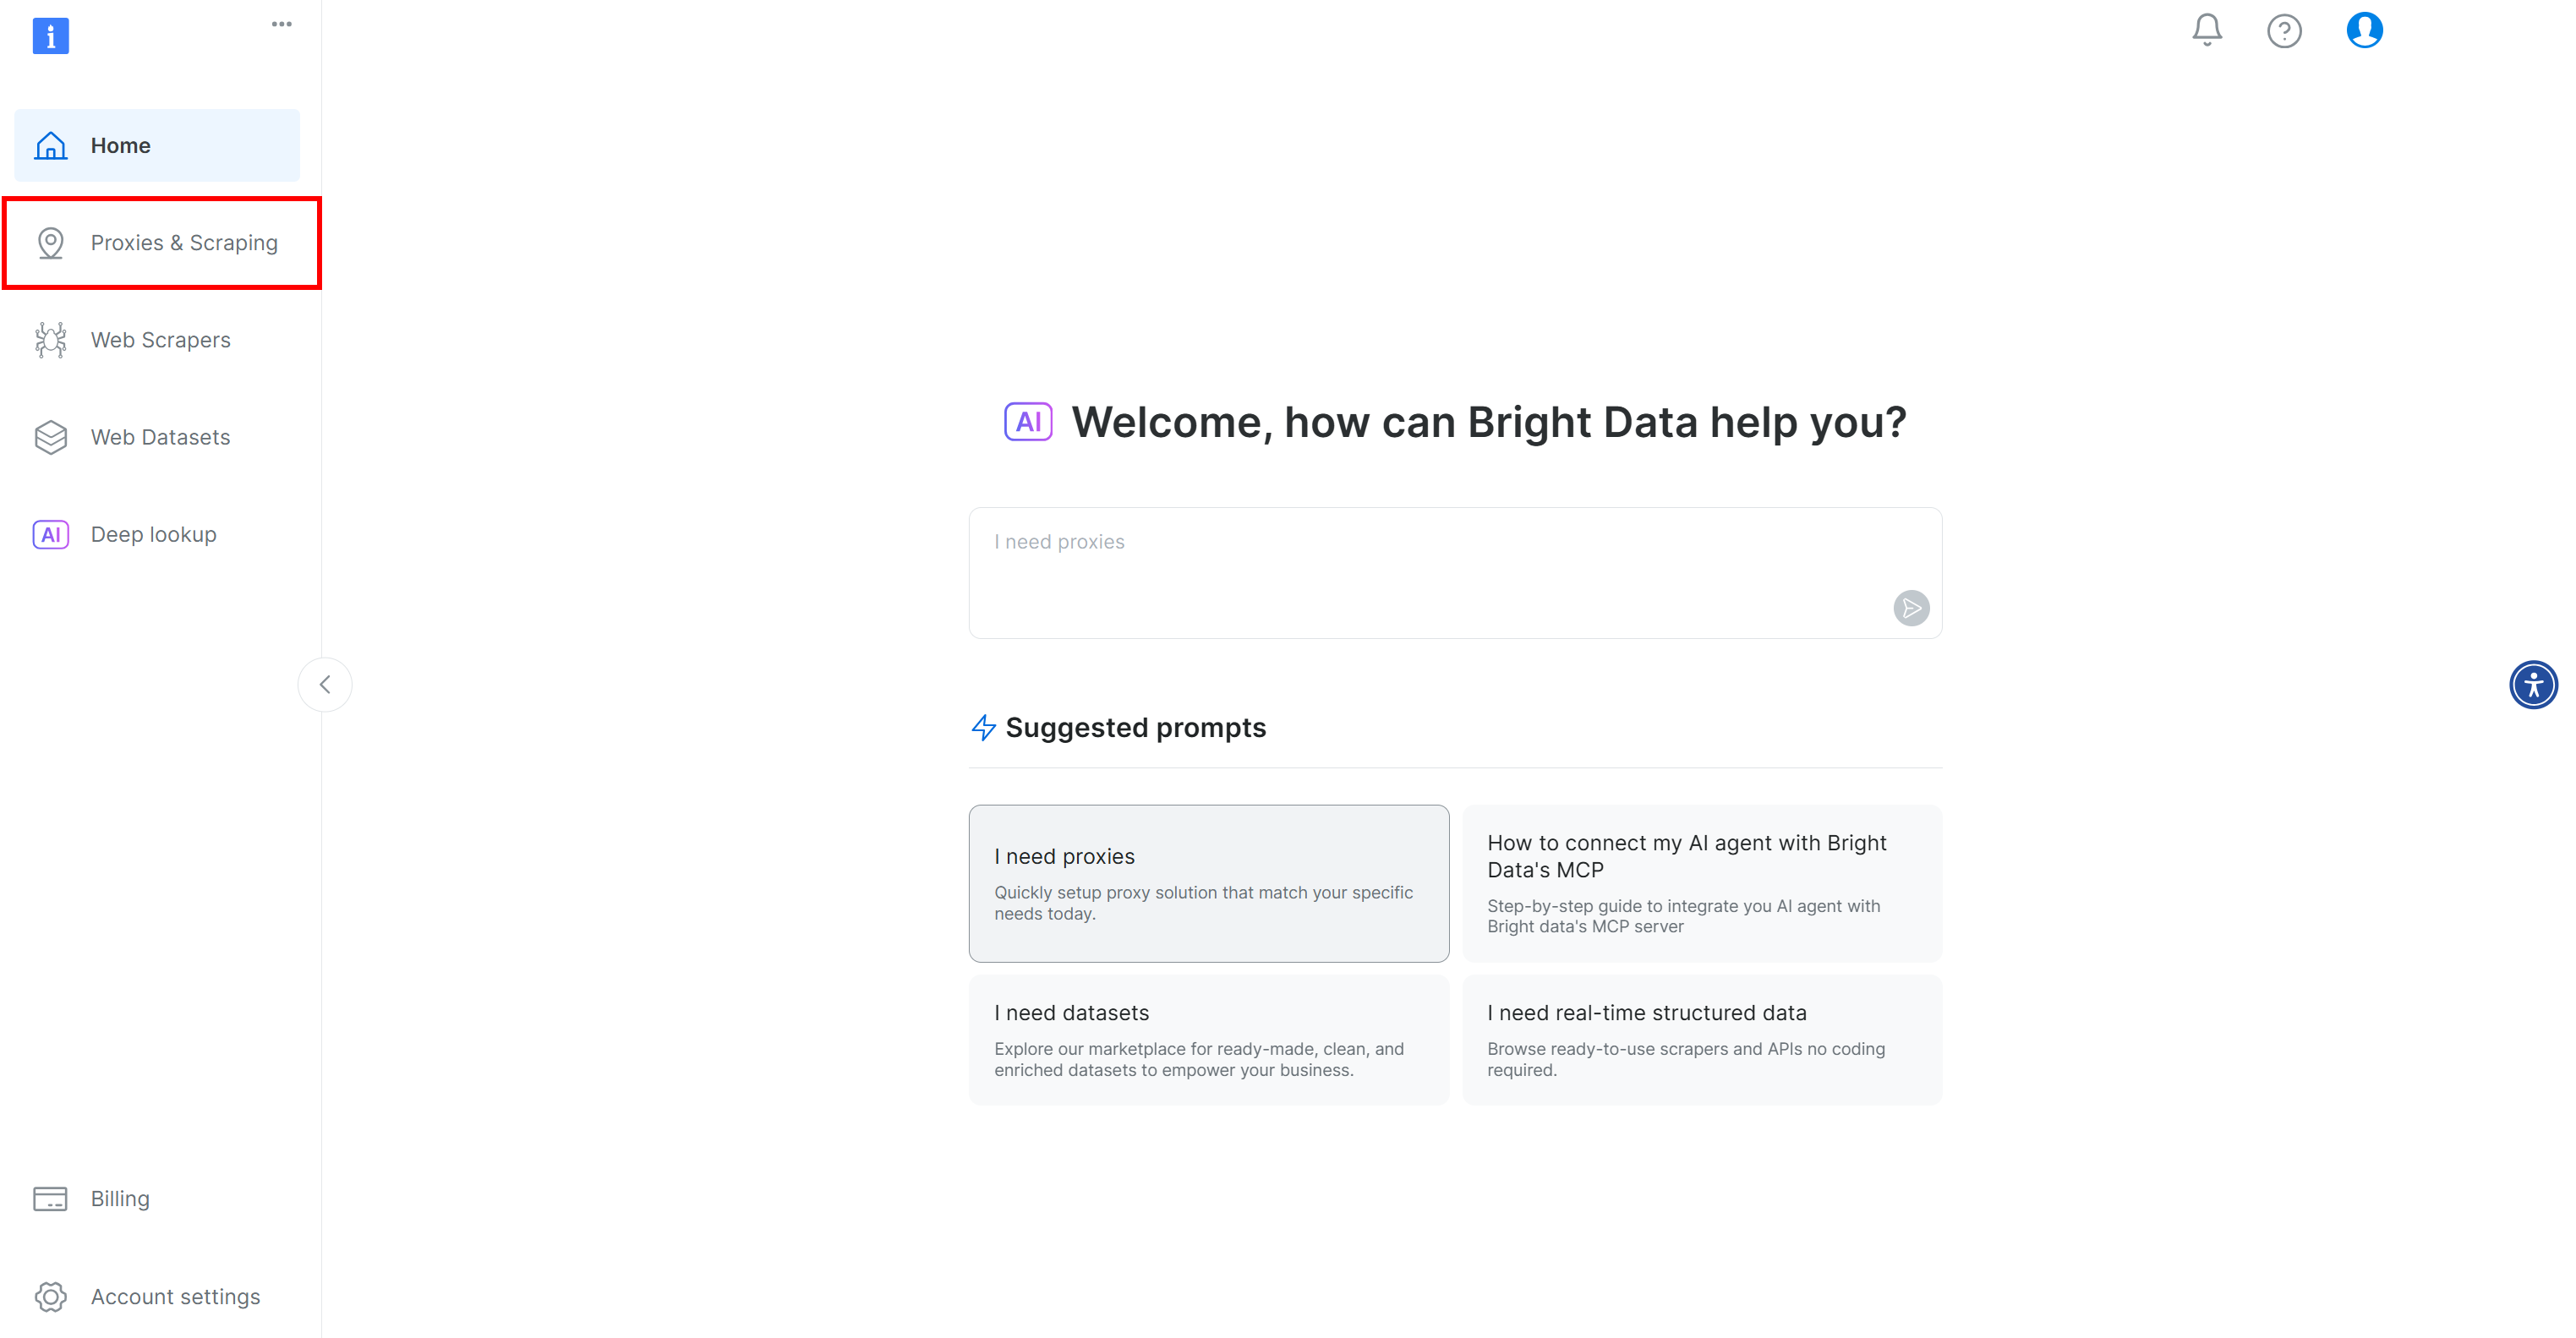
Clicking the “Proxies & Scraping” button in the Bright Data dashboard
You will be redirected to the “Proxies & Scraping Infrastructure” page:
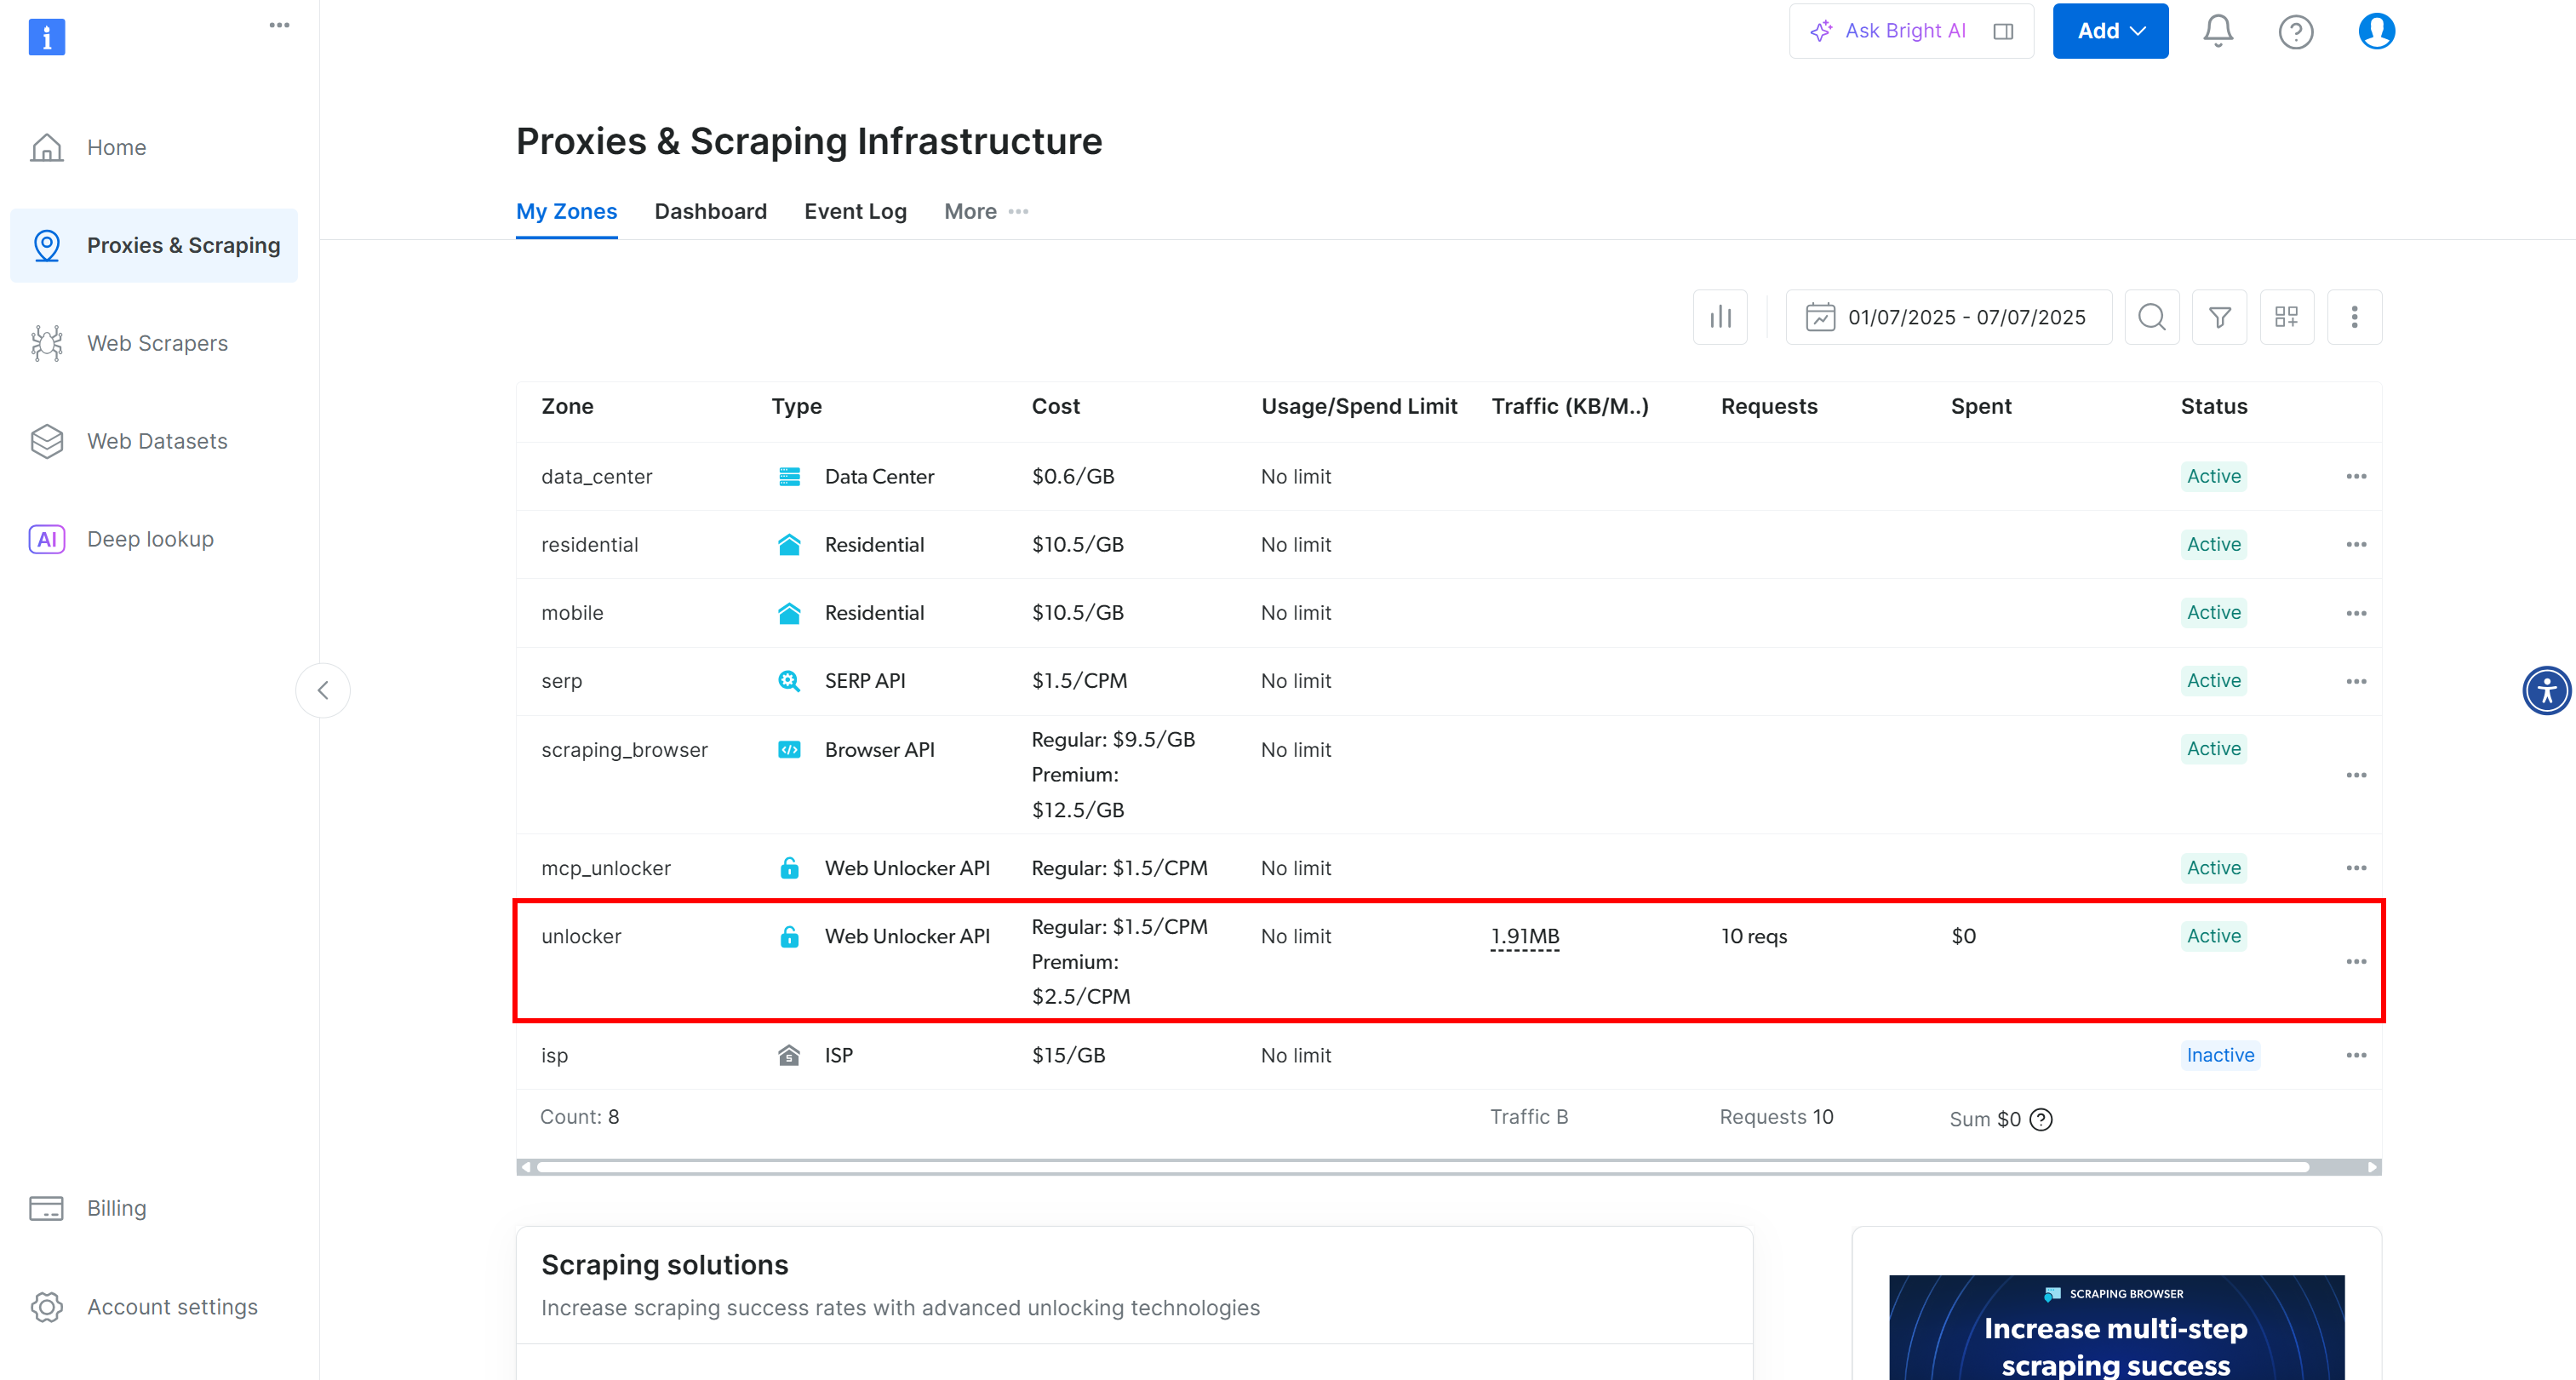
Note the already activated Web Unlocker API zone
If you already have a Web Unlocker zone, you will see it listed on this page. In this example, the zone already exists and is called
"unblocker"
(remember this name, as you will need it later on).
If you do not have the required zone yet, scroll down to the “Web Unlocker API” card and click “Create zone”:
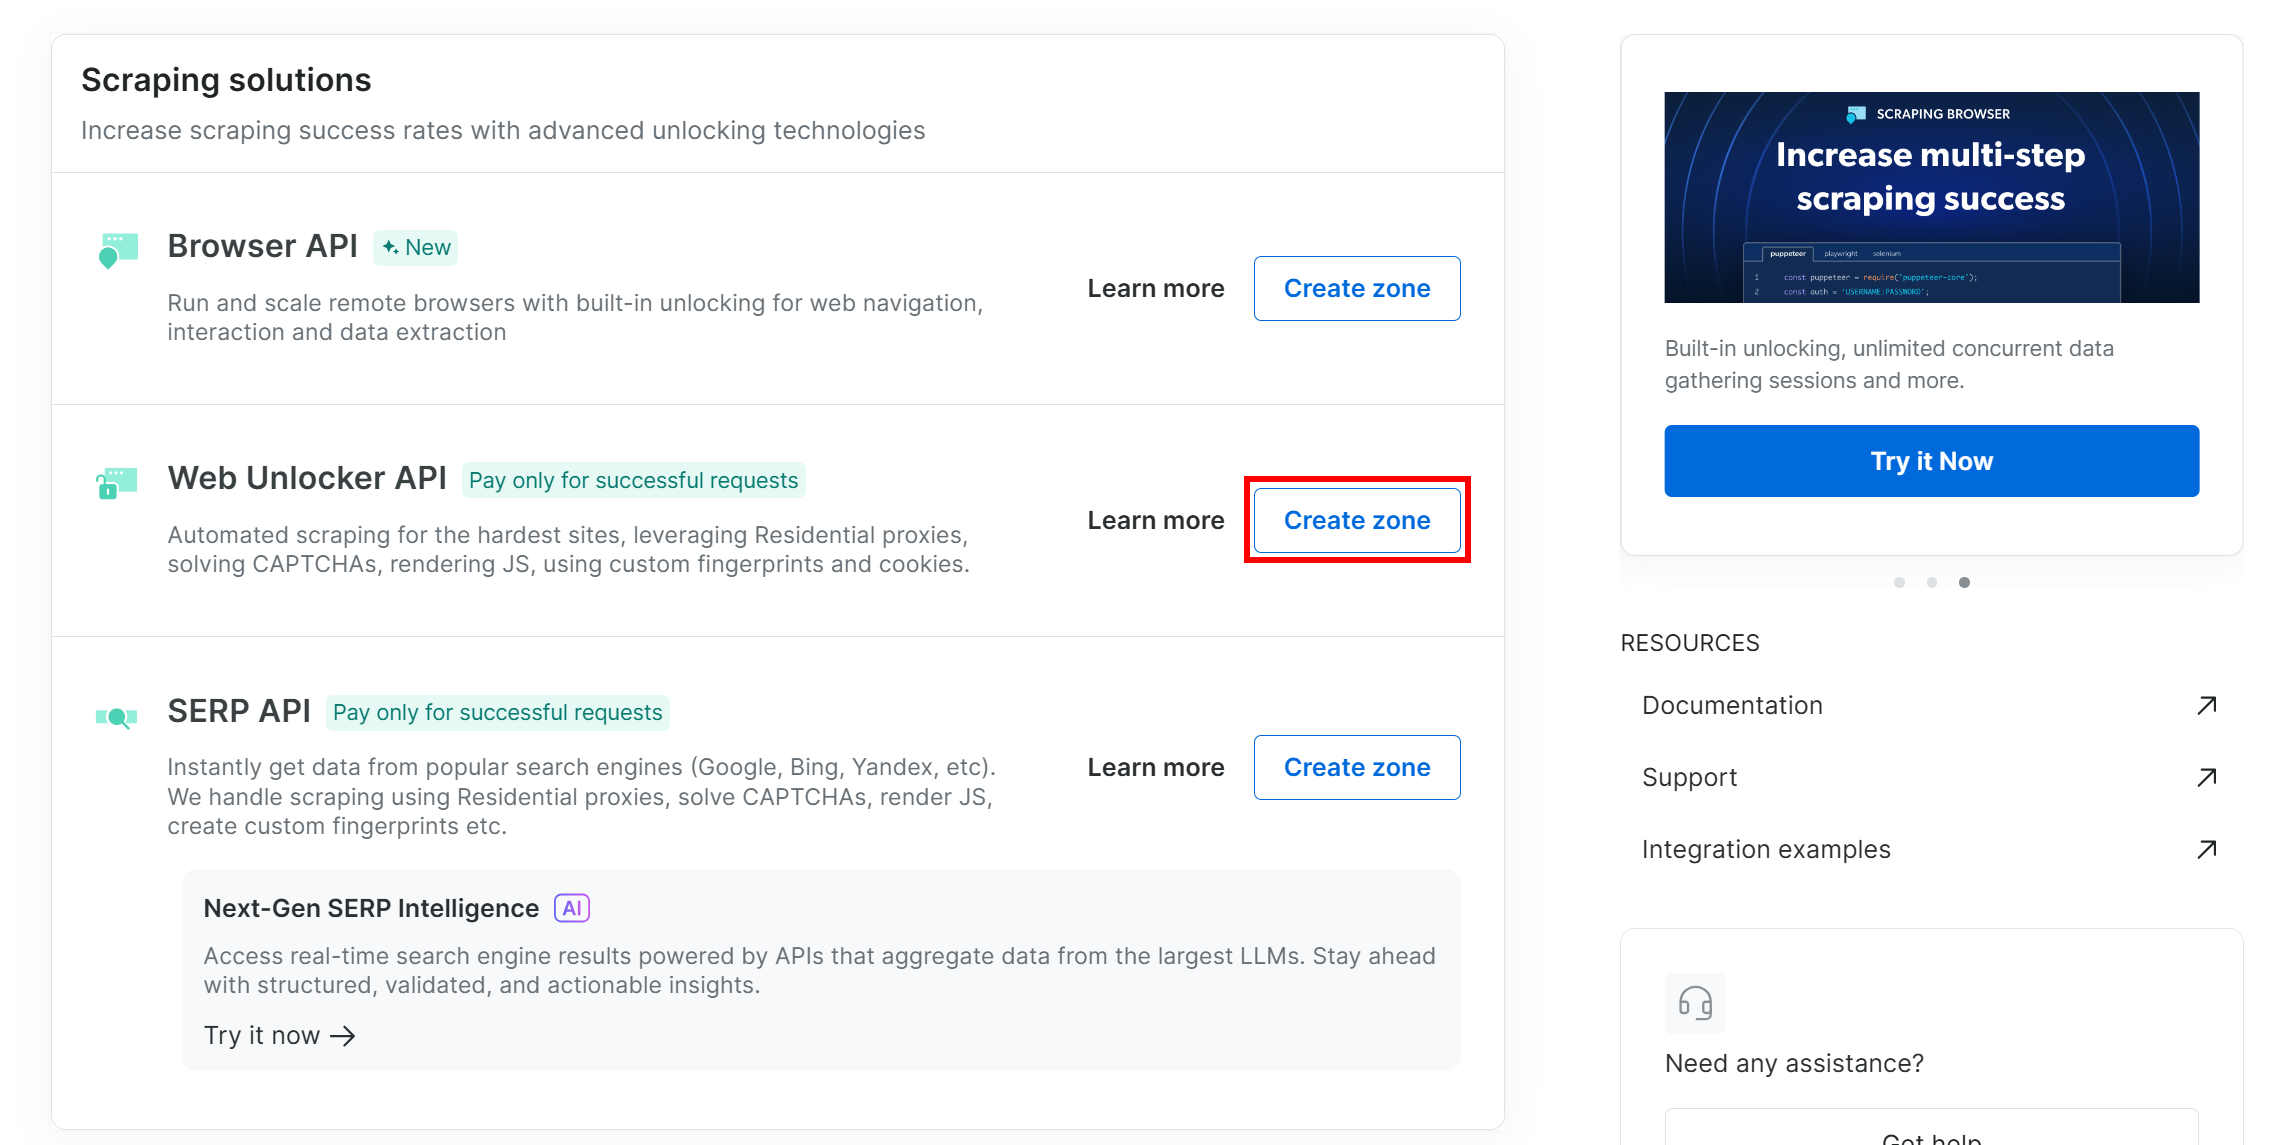
Clicking the “Create zone” on the “Web Unlocker API” card
Give your zone a name (like “unlocker”), enable advanced features for best performance, and press the “Add” button:
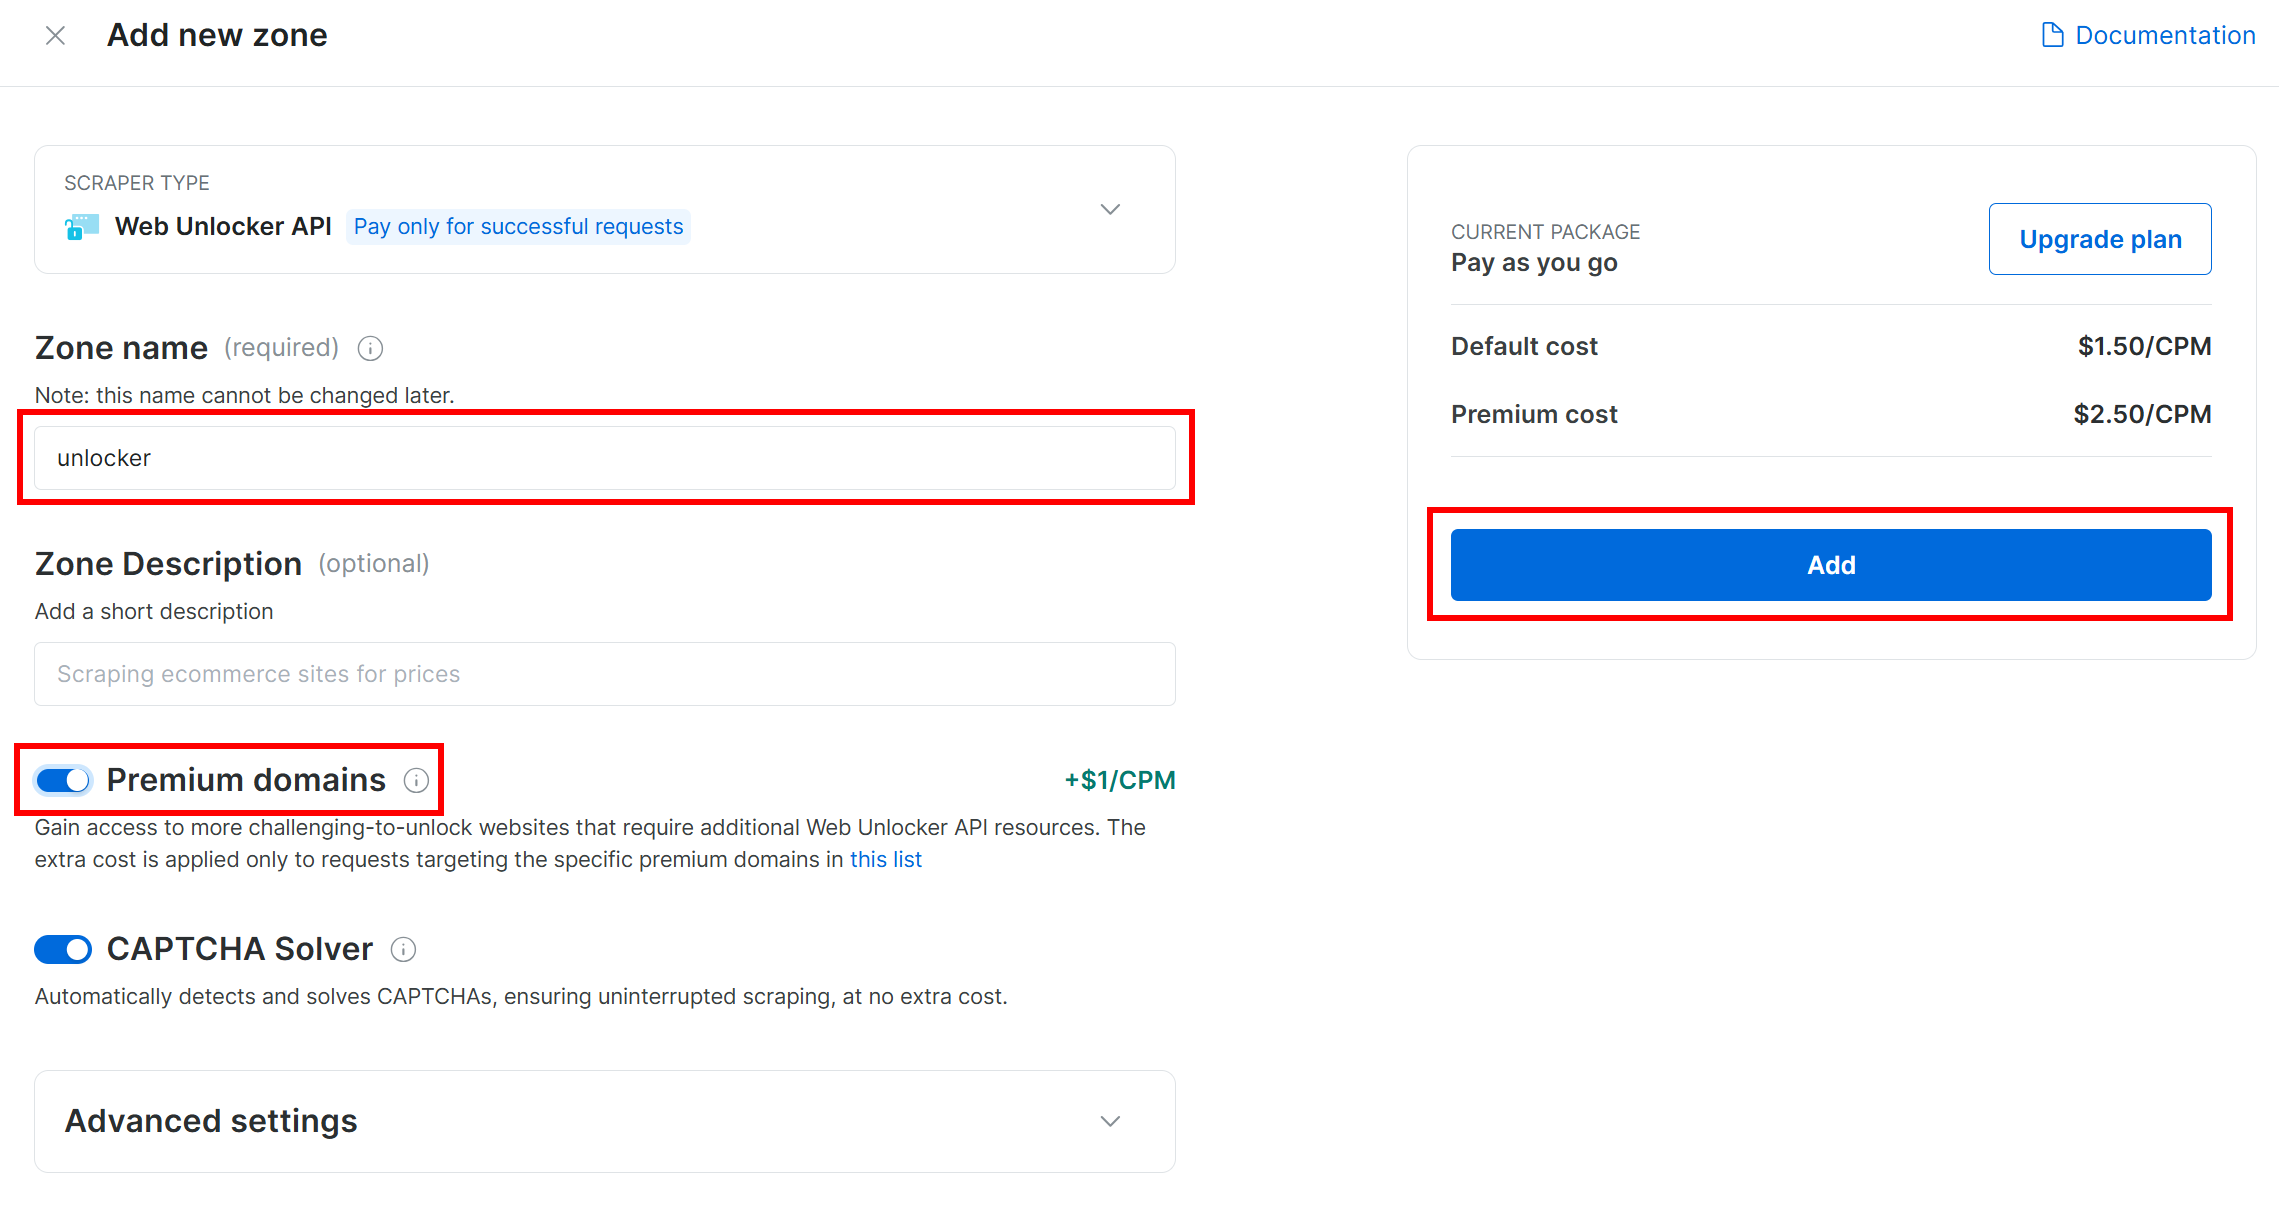
Configuring your new Web Unlocker API zone
Once created, you will land on the zone detail page. Make sure the toggle is set to “Active”, which confirms the product is ready to use:

The “unlocker” Web Unlocker API zone page
Now, follow the official Bright Data documentation to generate your API key . Once you have it, store it in a safe place, as you will require it soon.
Perfect! You are ready to integrate Bright Data with Langflow using a custom component.
Step #3: Initialize a New Blank Flow
Before continuing, you must create a new Langflow flow. Go back to the Langflow local server and click the “Create first flow” button:
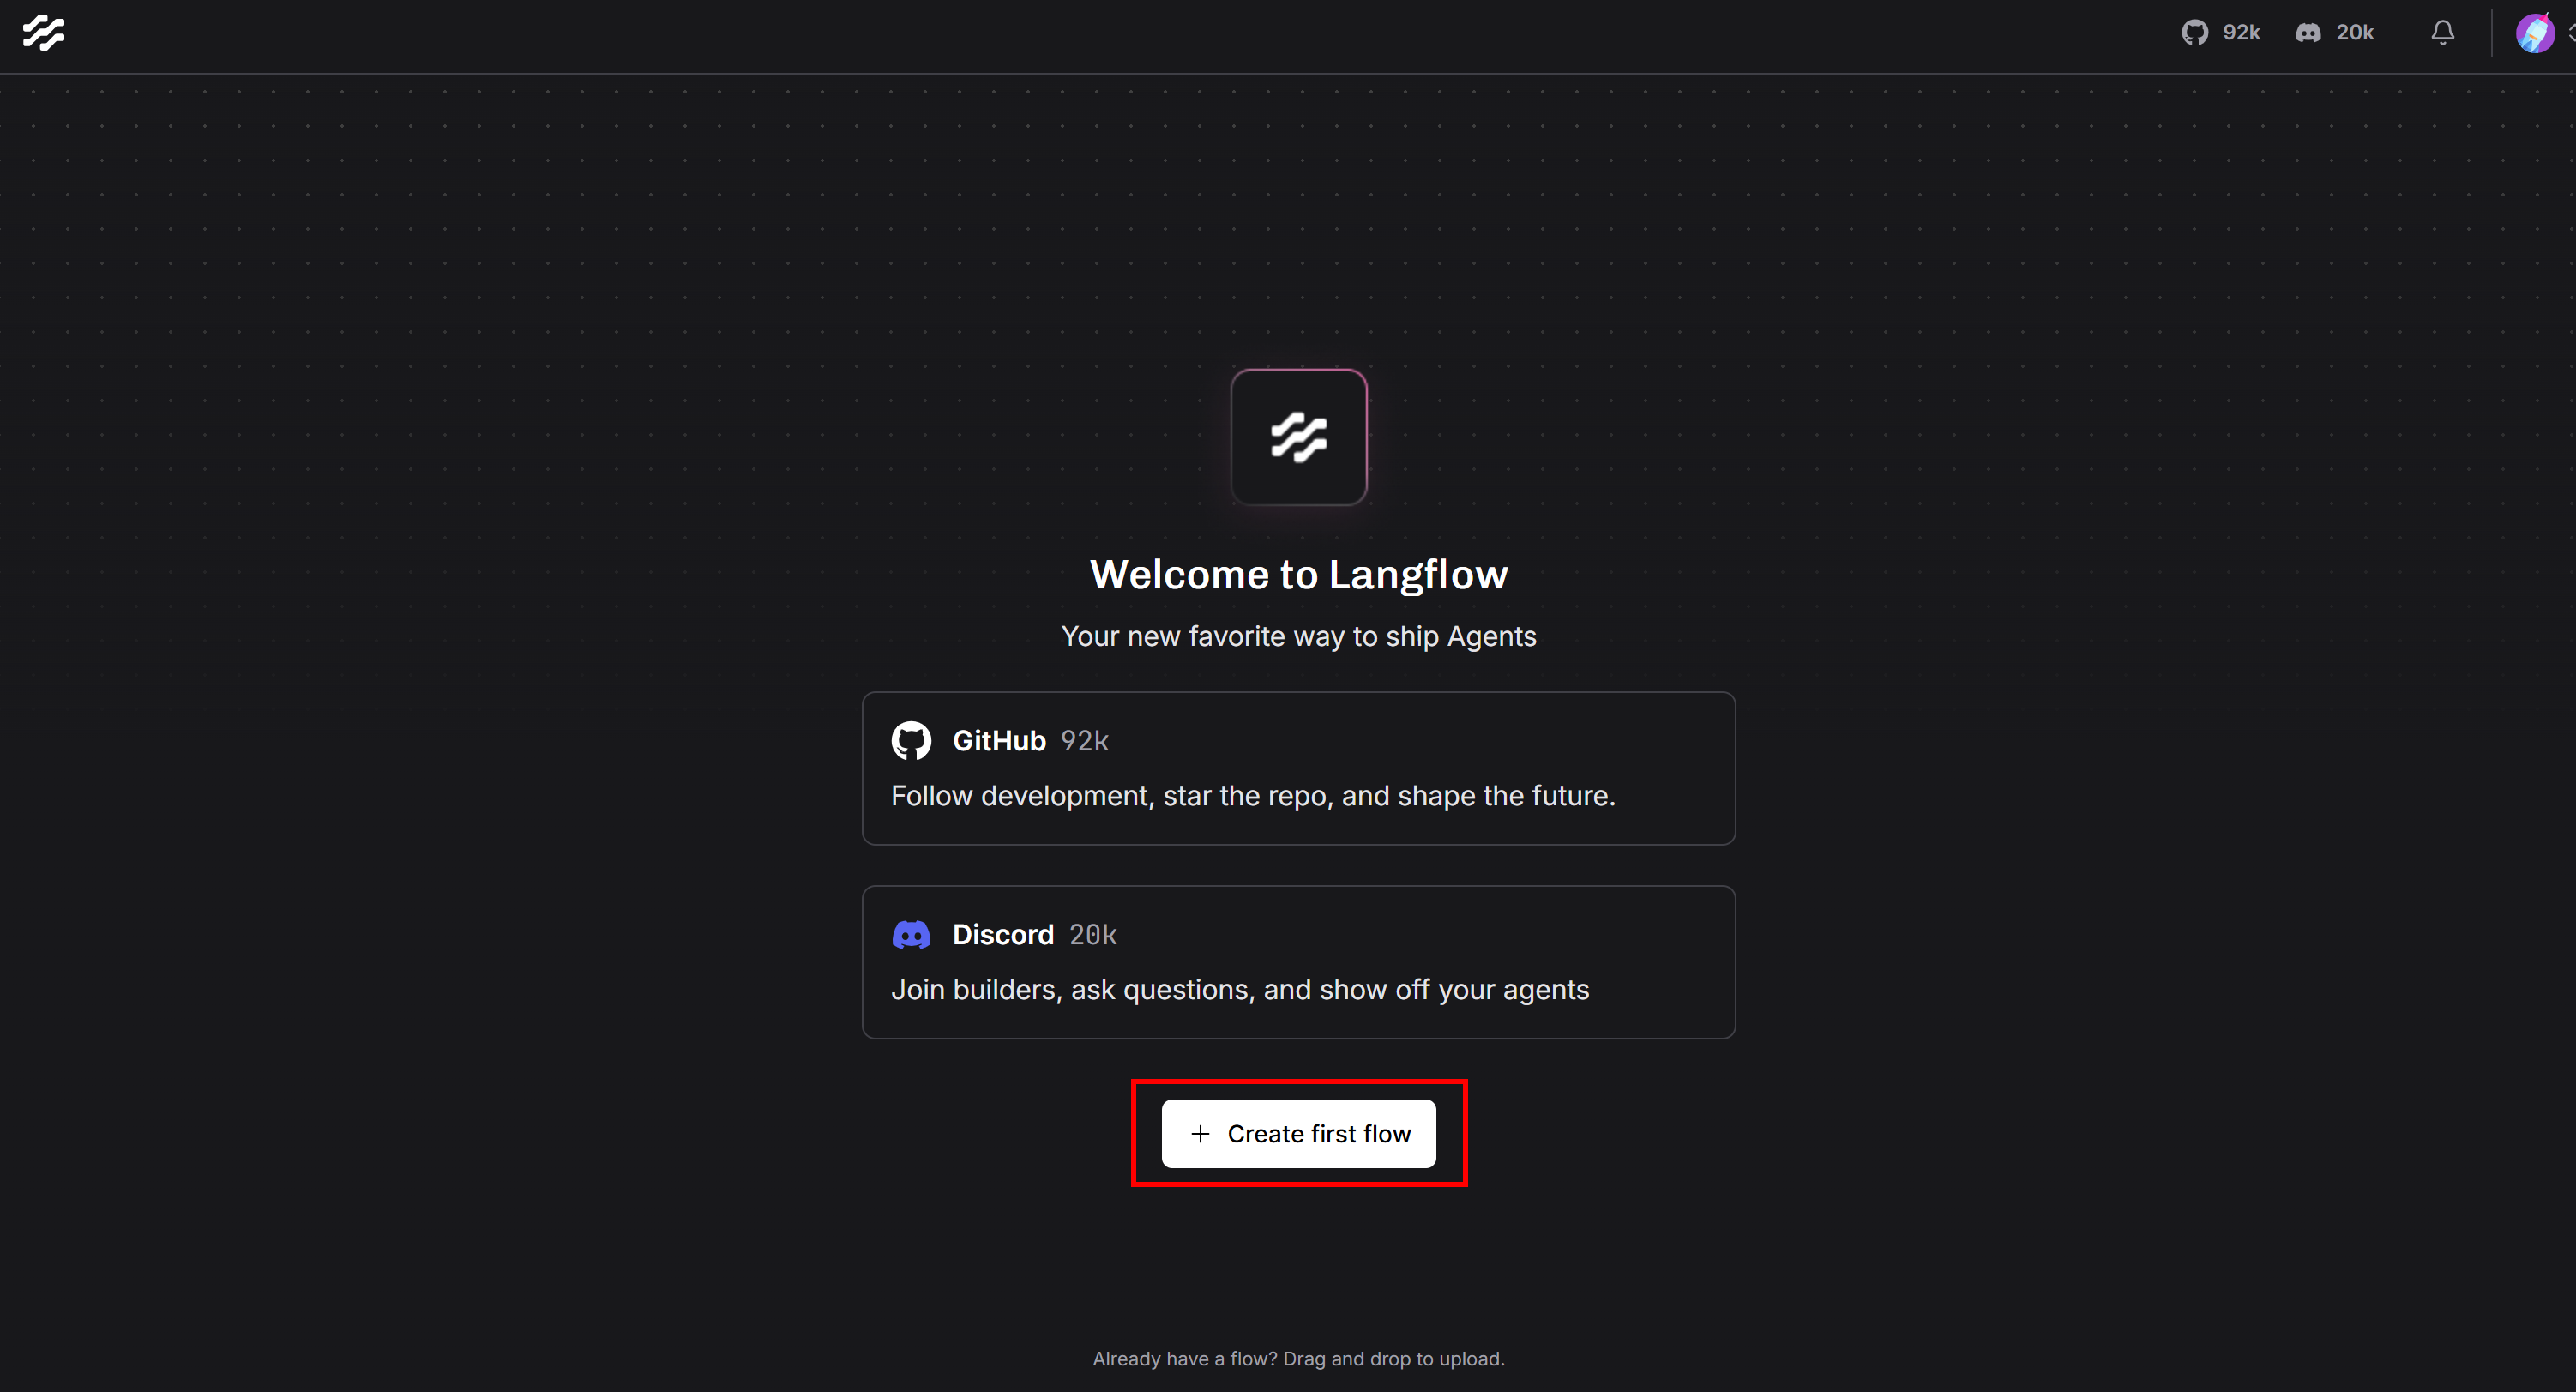
Clicking the “Create first flow” button
The following modal will appear. Press the “Blank Flow” button in the bottom-right corner:
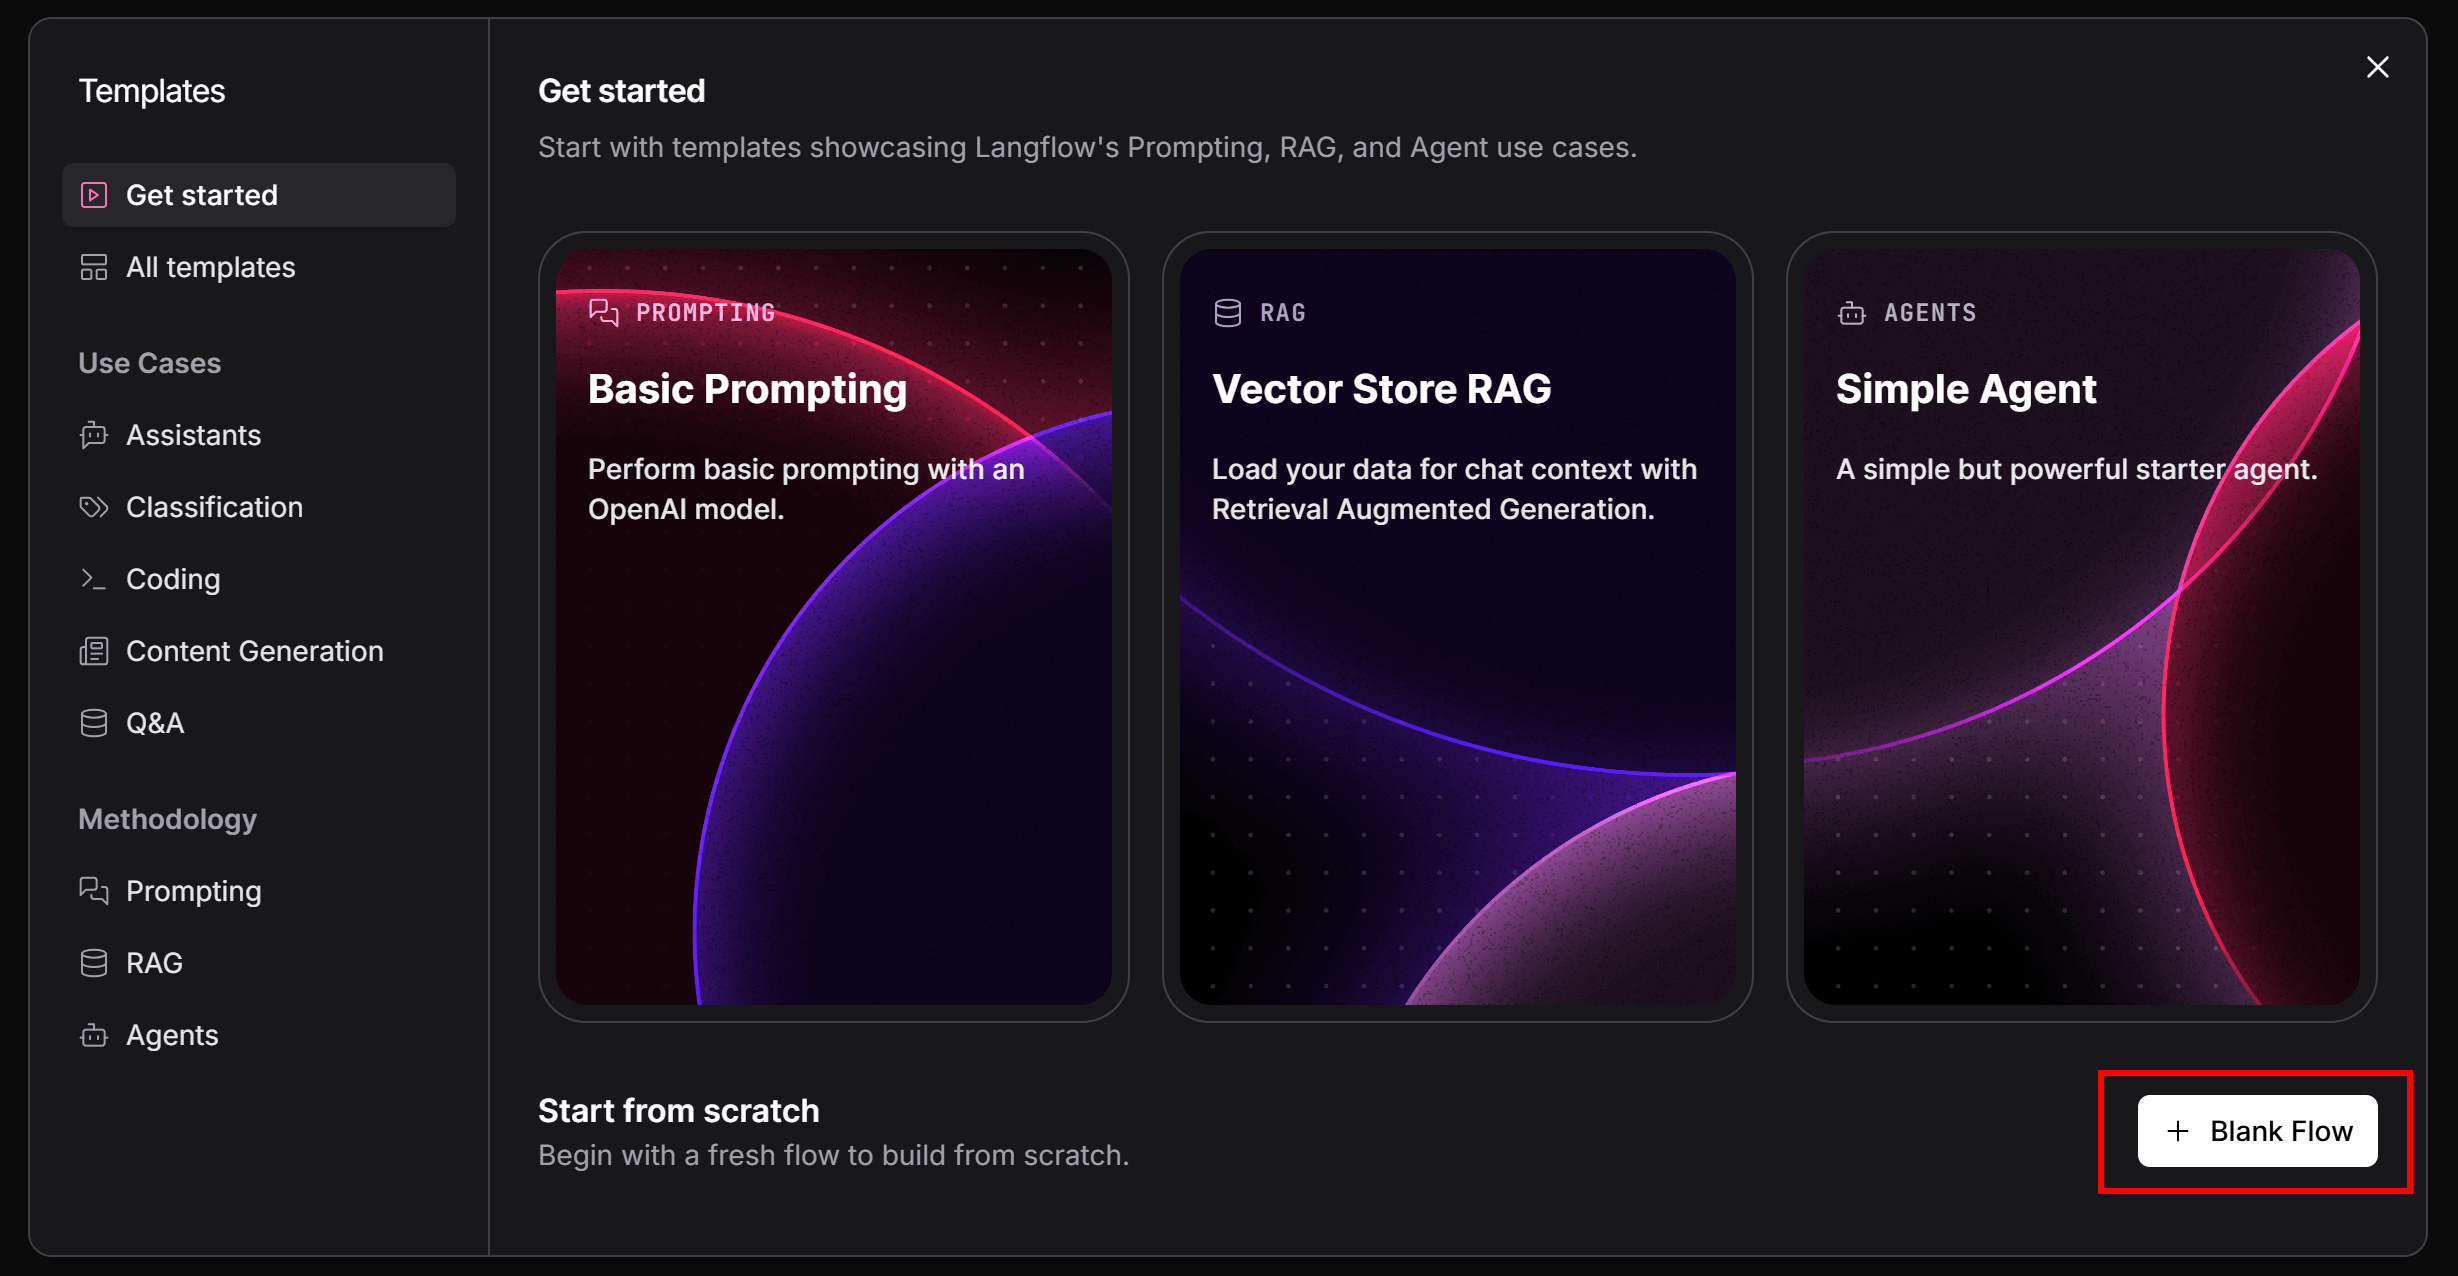
Clicking the “Blank Flow” button
Give your flow a name, such as “Langflow x Bright Data AI App”. Once created, you will see a blank canvas like this:
Your new Langflow blank flow
The above canvas is where you can add and connect components to define your AI application. Well done!
Step #4: Define a Custom Bright Data Component
The easiest way to integrate Langflow with Bright Data is by creating a custom component . This will enable your AI agent to collect web data using Bright Data’s Web Unlocker API.
In Langflow, custom components are Python classes defined by:
Inputs : The data or parameters your component requires.
Outputs : The data your component returns to downstream nodes.
Logic : The internal processing to convert inputs into outputs.
Specifically, your Langflow x Bright Data custom component should:
Accept your Bright Data API key and Web Unlocker zone name as inputs (for authentication).
Receive the target URL of the web page you want to scrape.
Perform a request to the Web Unlocker API, configured to return the page in Markdown format (which is ideal for AI consumption ).
Return the retrieved content as the output.
You can implement all of the above with the following custom Python component:
from langflow.custom import Component
from langflow.io import SecretStrInput, StrInput, Output
from langflow.schema import Data
import httpx

# A Langflow custom component must extend Component
class BrightDataComponent(Component):
    # The component name shown in the Langflow UI
    display_name = "Bright Data"
    # The description in the component details
    description = "Retrieve data from the web in Markdown format using Bright Data"
    icon = "sparkles"  # UI icon identifier
    name = "BrightData"  # Internal name used by Langflow

    # --- INPUTS ---
    # Define the inputs required by the component
    inputs = [
        SecretStrInput(
            name="api_key",
            display_name="Bright Data API Key",
            required=True,
            info="Your Bright Data API key from the dashboard"
        ),
        StrInput(
            name="zone",
            display_name="Web Unlocker Zone Name",
            info="The name of the Web Unlocker zone to connect to (e.g., 'web_unlocker')",
            required=True
        ),
        StrInput(
            name="url",
            display_name="Target URL",
            info="The URL to transform into Markdown data",
            tool_mode=True
        ),
    ]

    # --- OUTPUT ---
    # Define the output returned by the component
    outputs = [
        Output(
            name="web_data",
            display_name="Web Data Result",
            method="get_web_data"  # The name of the method used to generate the output
        )
    ]

    # --- LOGIC ---
    # This method retrieves web data from Bright Data and returns it
    def get_web_data(self) -> Data:
        try:
            # Bright Data Web Unlocker API endpoint
            url = "https://api.brightdata.com/request"

            # Request headers including API key for authentication
            headers = {
                "Authorization": f"Bearer {self.api_key}",
                "Content-Type": "application/json"
            }

            # Payload specifying the zone, URL, and output format
            payload = {
                "zone": self.zone,
                "url": self.url,
                "format": "raw",
                "data_format": "markdown"
            }

            # Send the POST request with a 180-second timeout
            with httpx.Client(timeout=180.0) as client:
                response = client.post(url, json=payload, headers=headers)

                # Raise an error if HTTP status code is not 2xx
                response.raise_for_status()

                # Extract contains the Markdown-formatted web data
                markdown_data = response.text
            return Data(data={"data": markdown_data})

        # Handle timeout errors
        except httpx.TimeoutException:
            error_msg = "The Web Unlocker request timed out"
            return Data(data={"error": error_msg, "data": None})

        # Handle other HTTP errors (e.g., 4xx, 5xx)
        except httpx.HTTPStatusError as e:
            error_msg = f"Request failed with status {e.response.status_code}: {e.response.text}"
            return Data(data={"error": error_msg, "data": None})
The
BrightDataComponent
accepts the following inputs:
Your Bright Data API key.
Your Web Unlocker zone name.
The URL of the page you want to scrape.
Then, it uses the HTTPX Python client to send a request to the Web Unlocker API, configured to return the response in Markdown format . The Markdown representation of the page returned by the API becomes the output of the component.
Note : We used HTTPX because it is the default HTTP client library available in Langflow. To learn more about it, read our guide on how to use HTTPX for web scraping .
Fantastic! See how to add this component to your flow and let the AI agent consume its output.
Step #5: Add the Custom Bright Data Component
To register the component you defined earlier, click on the “New Custom Component” button in the bottom-left corner. A new generic “Hello, World” custom component will appear on your canvas. Hover over it and click the “Code” section to customize its logic:
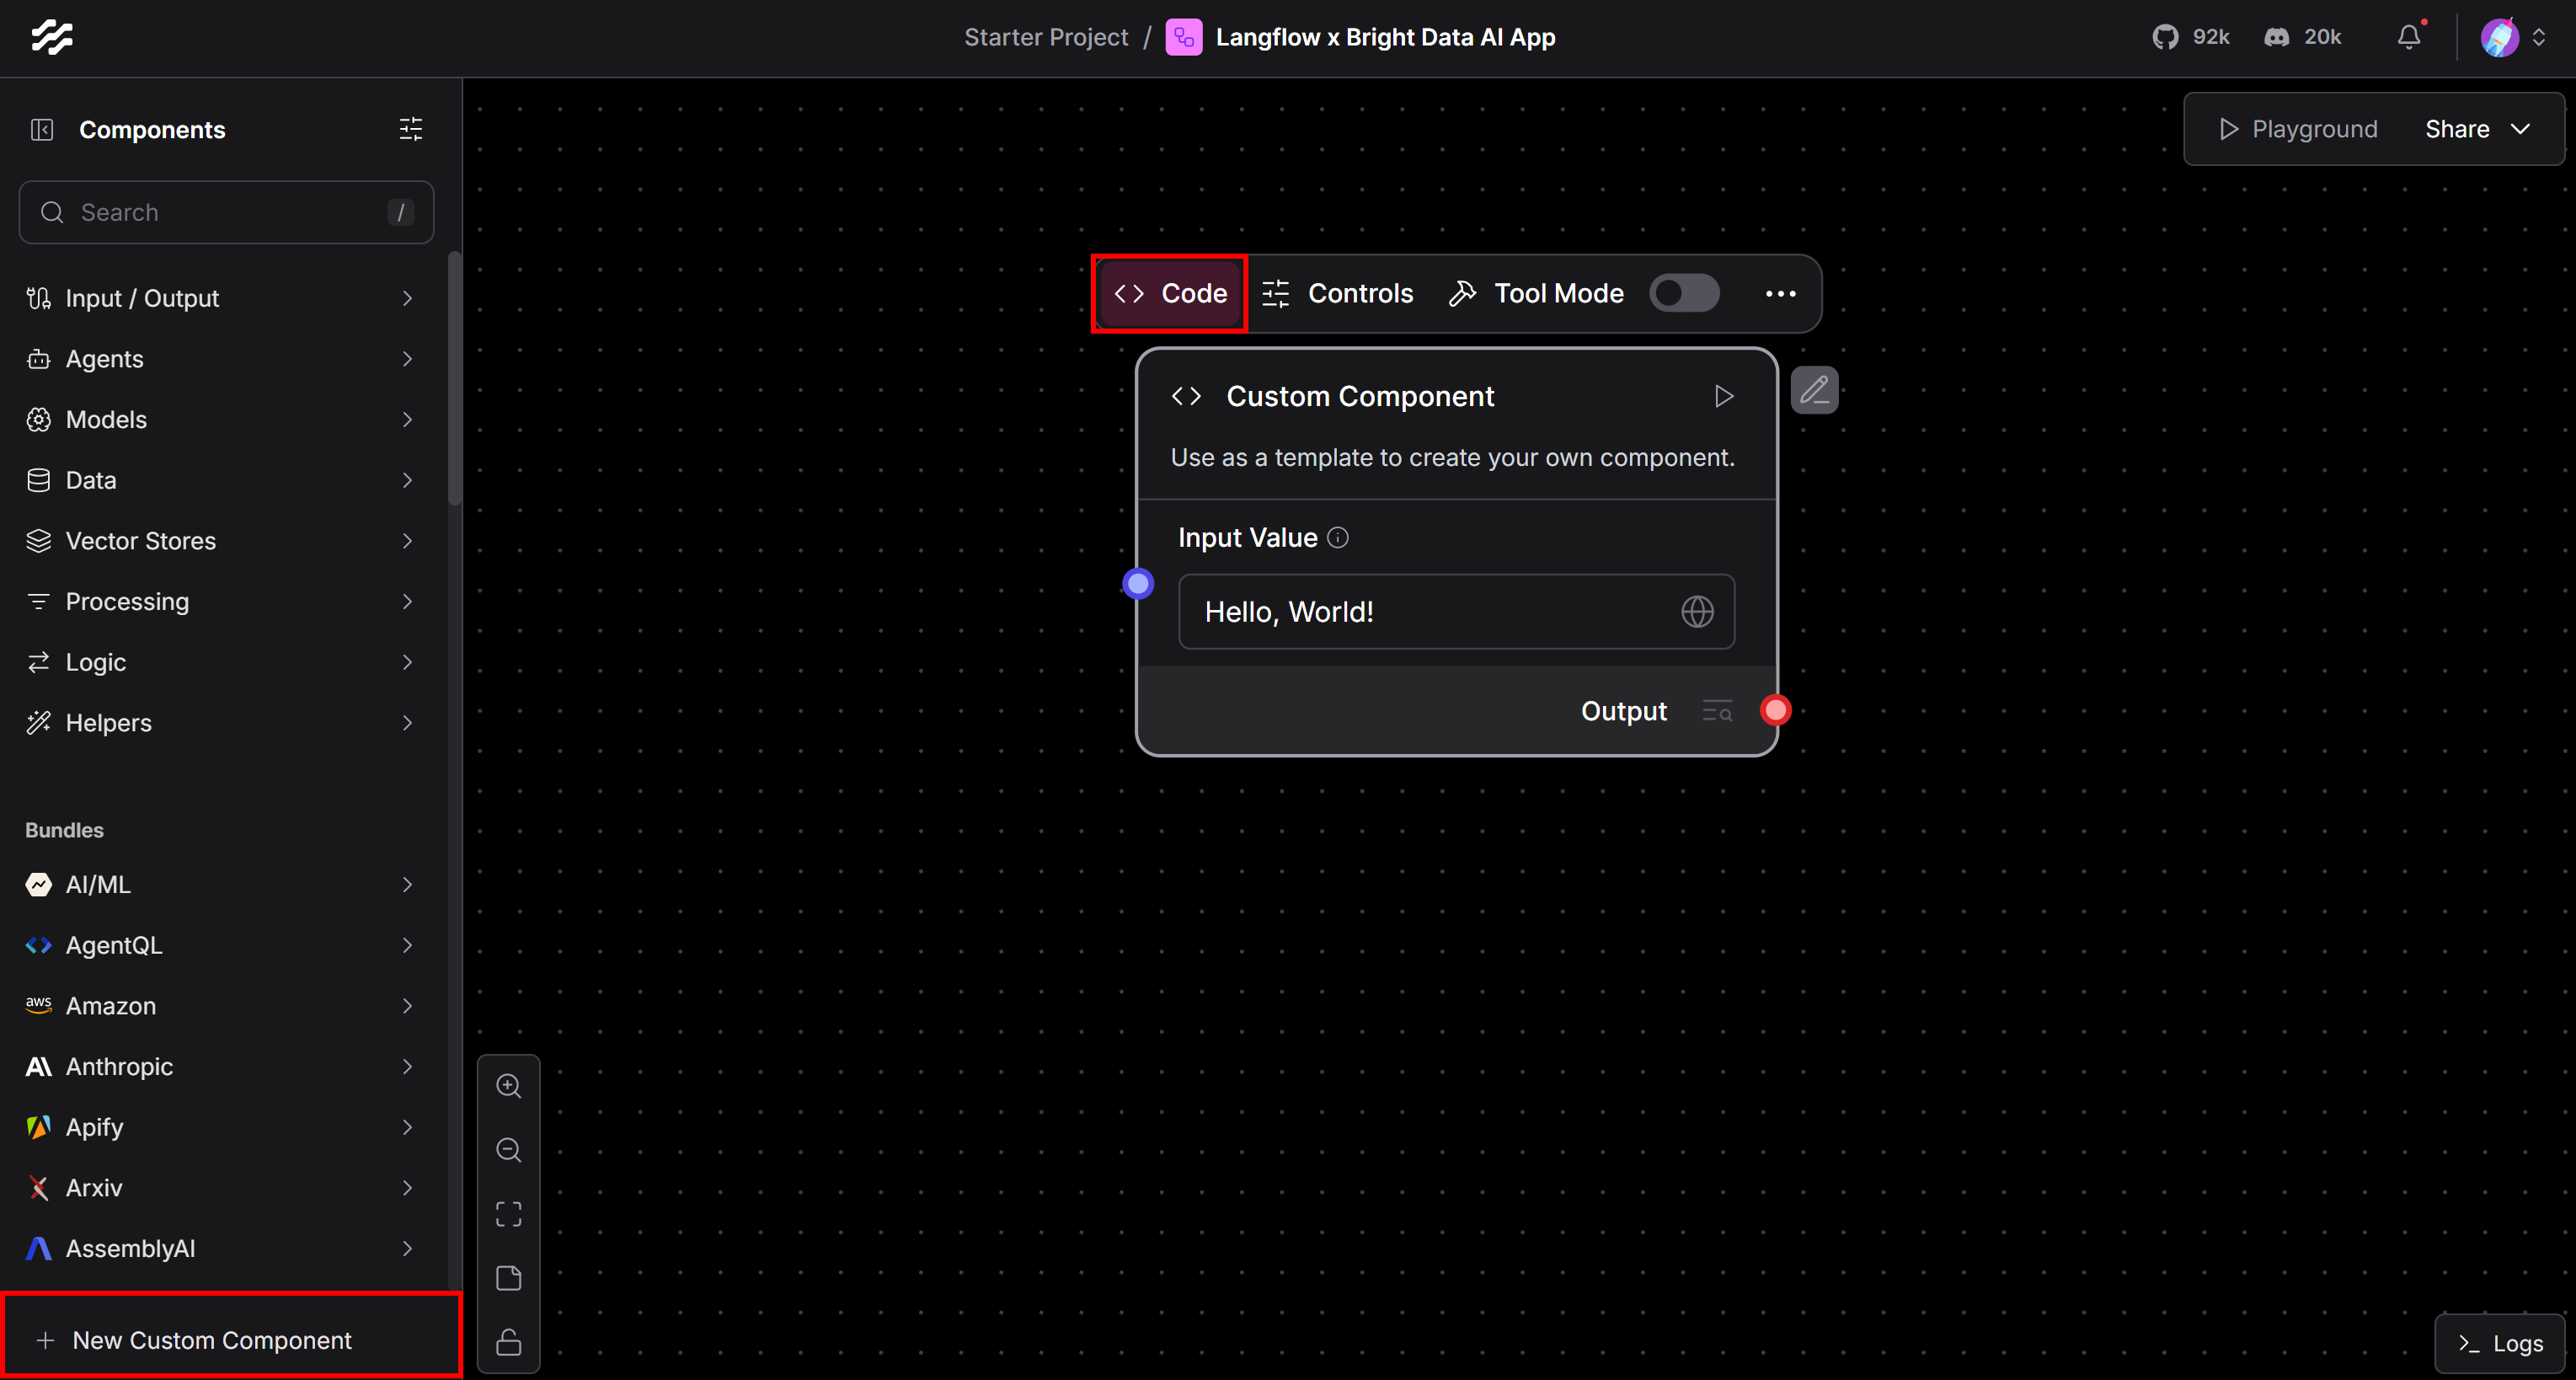
Dealing with the “Hello, World!” custom component
In the code editor that appears, paste the full source code of your
BrightDataComponent
class:
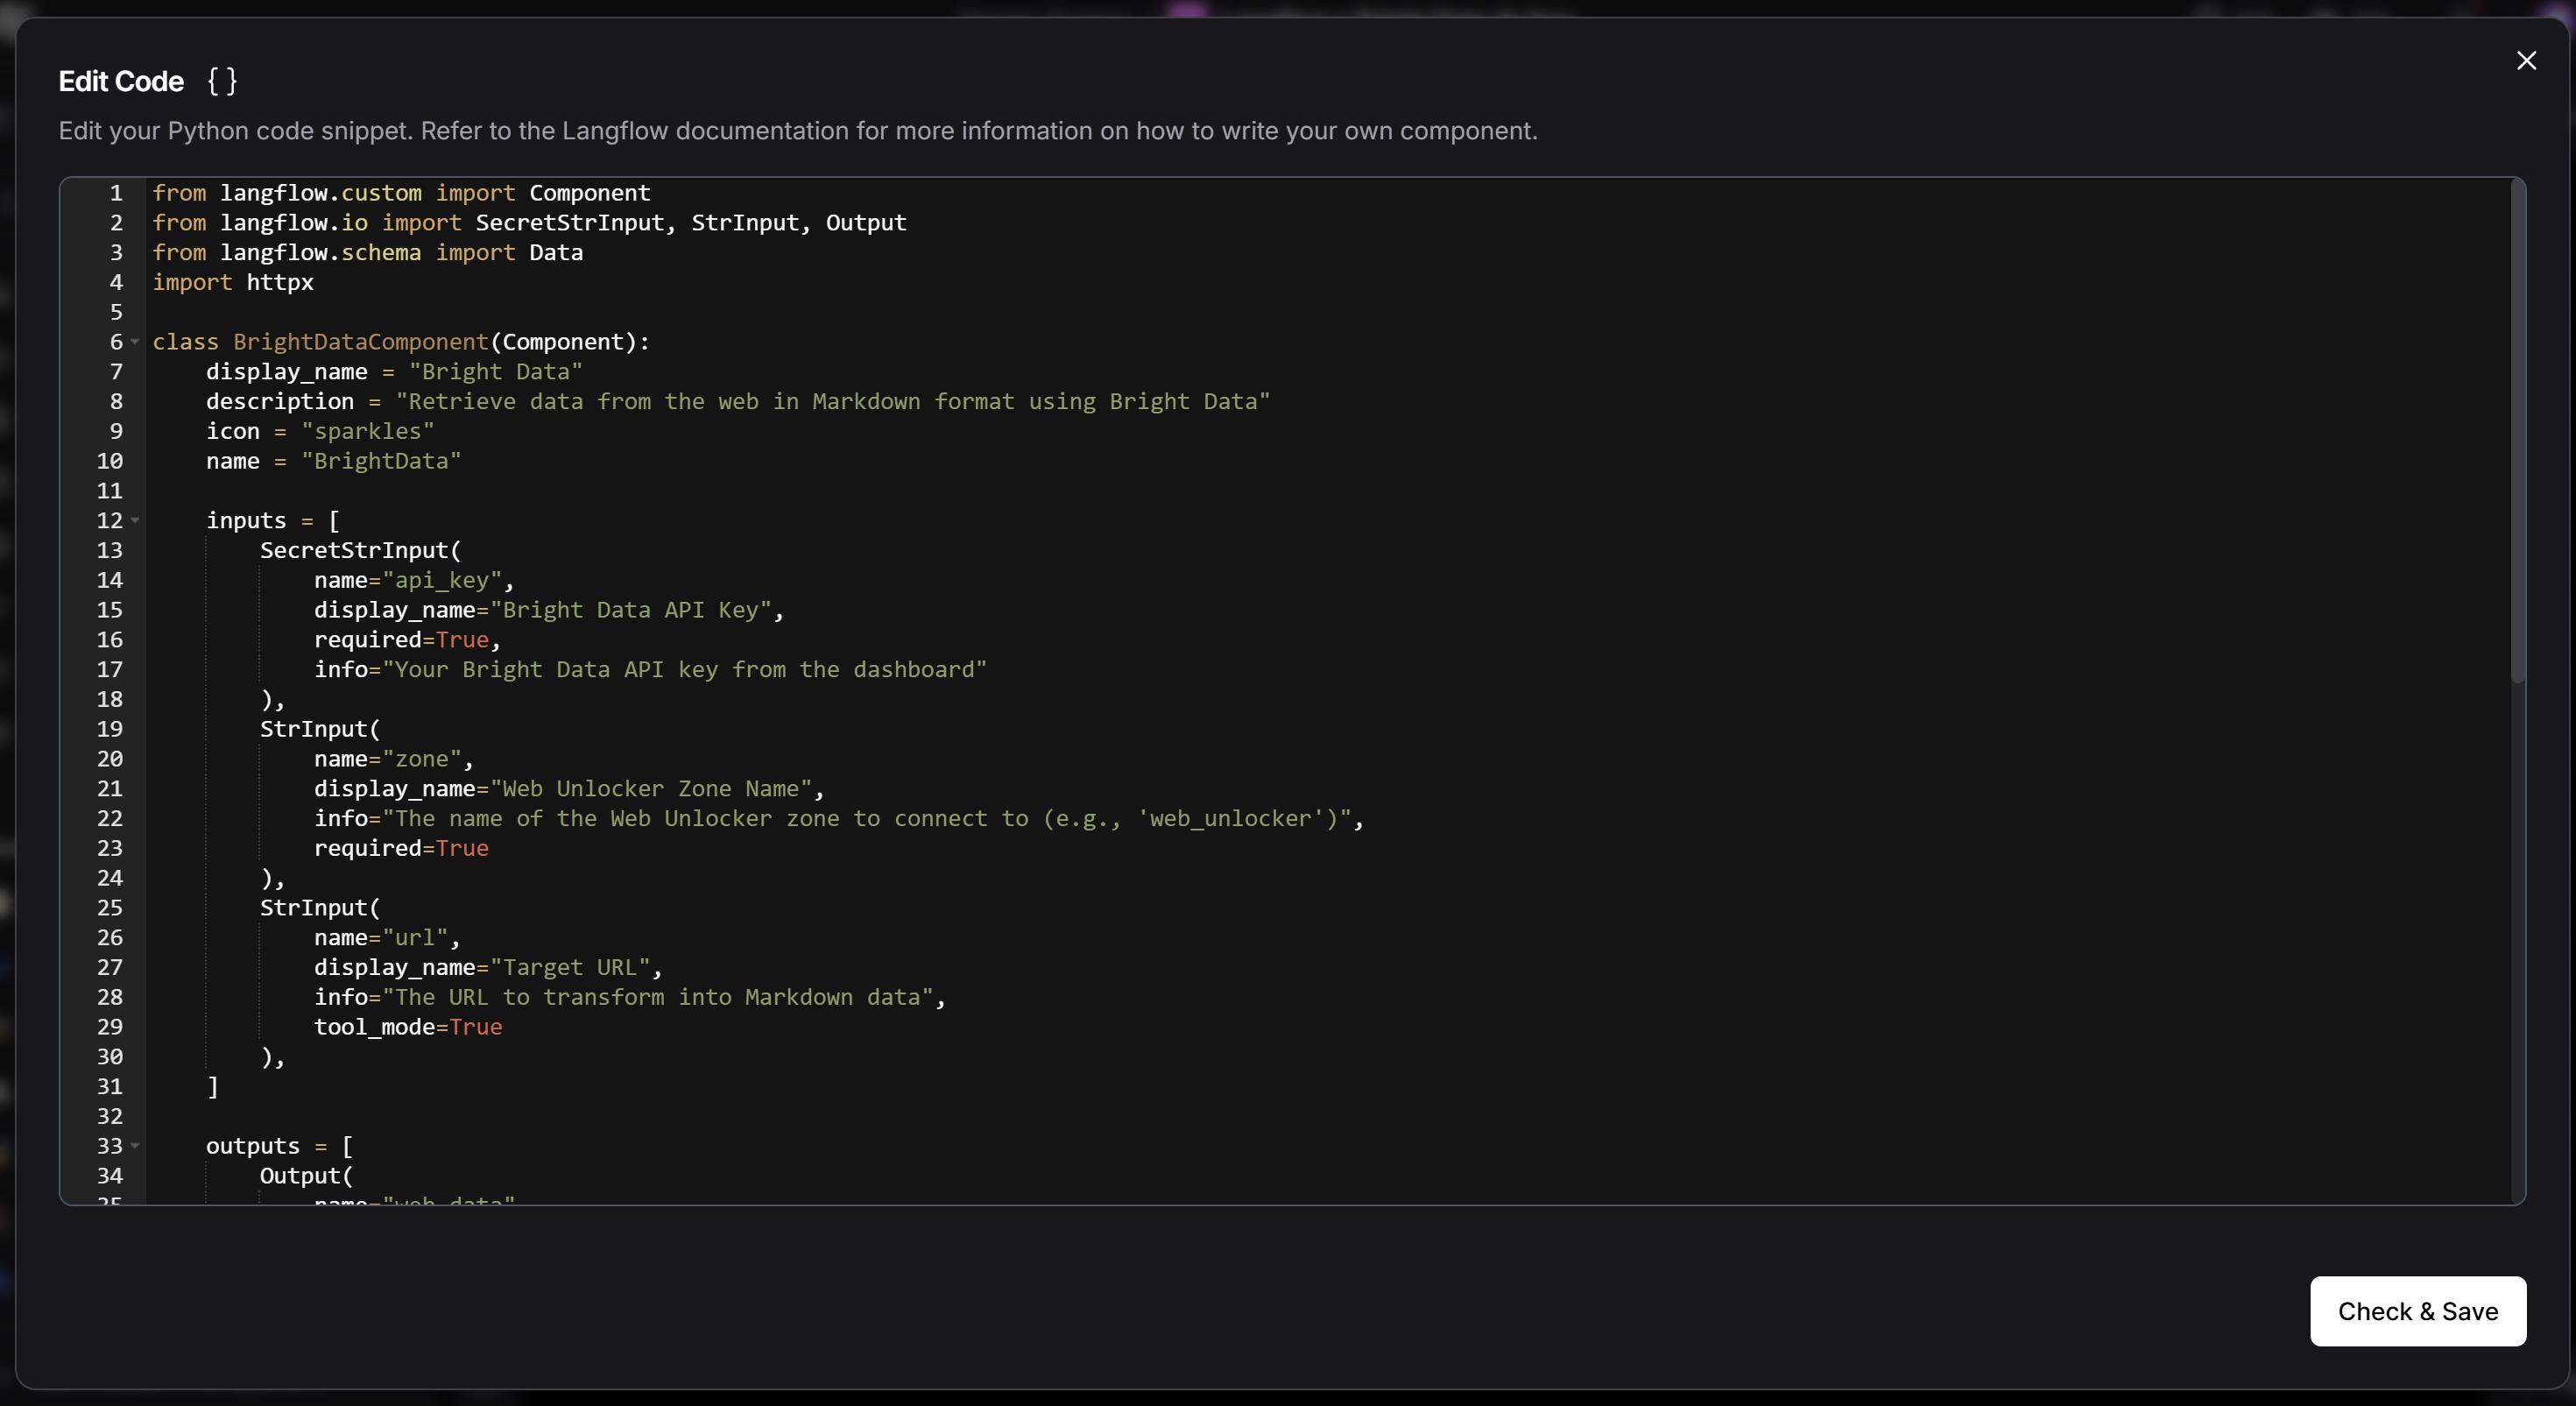
Pasting the code of the BrightDataComponent
Press the “Check & Save” button. You should now see the generic “Custom Component” replaced with your Bright Data component:

The new Bright Data component
As you can see, the placeholder custom component has been updated with your custom component for integration with Bright Data.
Note : You do not have to recreate the Bright Data component manually in every flow. Just store your custom component in a Python file and load it automatically using the method described in the Langflow documentation .
Wonderful! Your AI flow can now integrate with Bright Data to retrieve web data.
Step #6: Connect the AI Agent to Bright Data
You can use the Bright Data component directly within your Langflow app, or turn it into a tool AI agents can interact with. By transforming it into a tool, you are giving the agent the ability to fetch live content from any web page in AI-friendly Markdown format. In other words, you are enabling your AI to access and retrieve real-time info from any site.
To make the Bright Component a tool:
Hover over your Bright Data component.
Toggle the “Tool Mode” switch to enable it.
Fill in the required fields:
Your Bright Data API key.
Your Web Unlocker zone name (e.g.,
"unlocker"
).
Your Bright Data API key.
Your Web Unlocker zone name (e.g.,
"unlocker"
).
This is what you should now see:
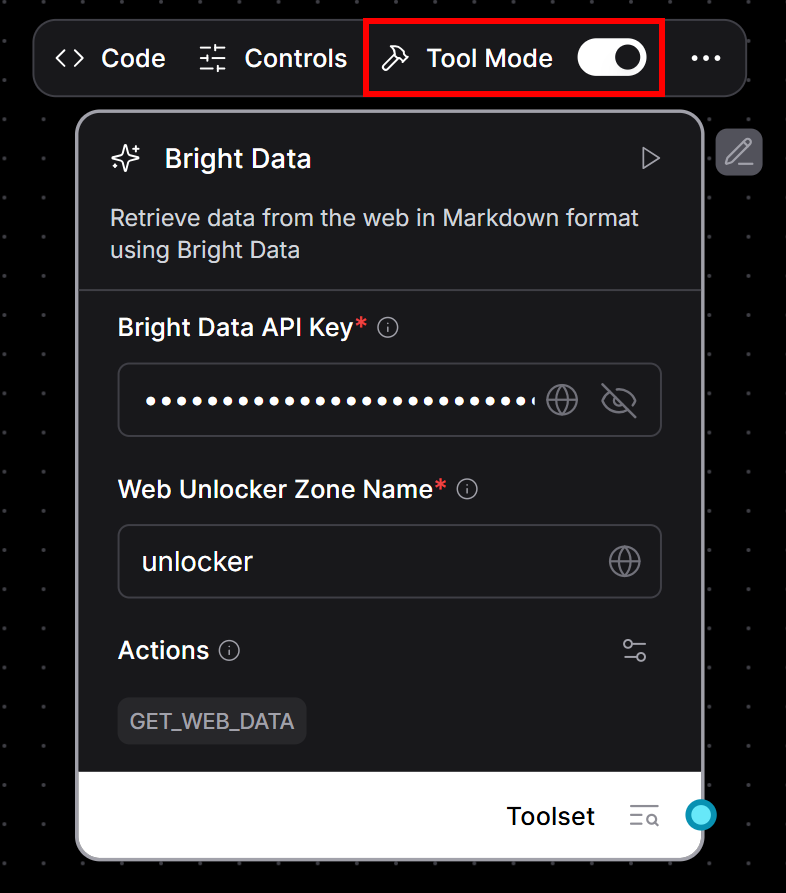
The Bright Data component is now an AI tool
Now that your Bright Data component is ready as a tool, connect it to an AI agent:
In the left sidebar, find the “Agents > Agent” component.
Drag it onto the canvas.
Configure the agent to use your preferred LLM (In this example, we will use Gemini, selecting a free model like
gemini-2.5-flash
and pasting
your Gemini API key
).
Connect the output of the Bright Data component “Tools” input of the Agent component:
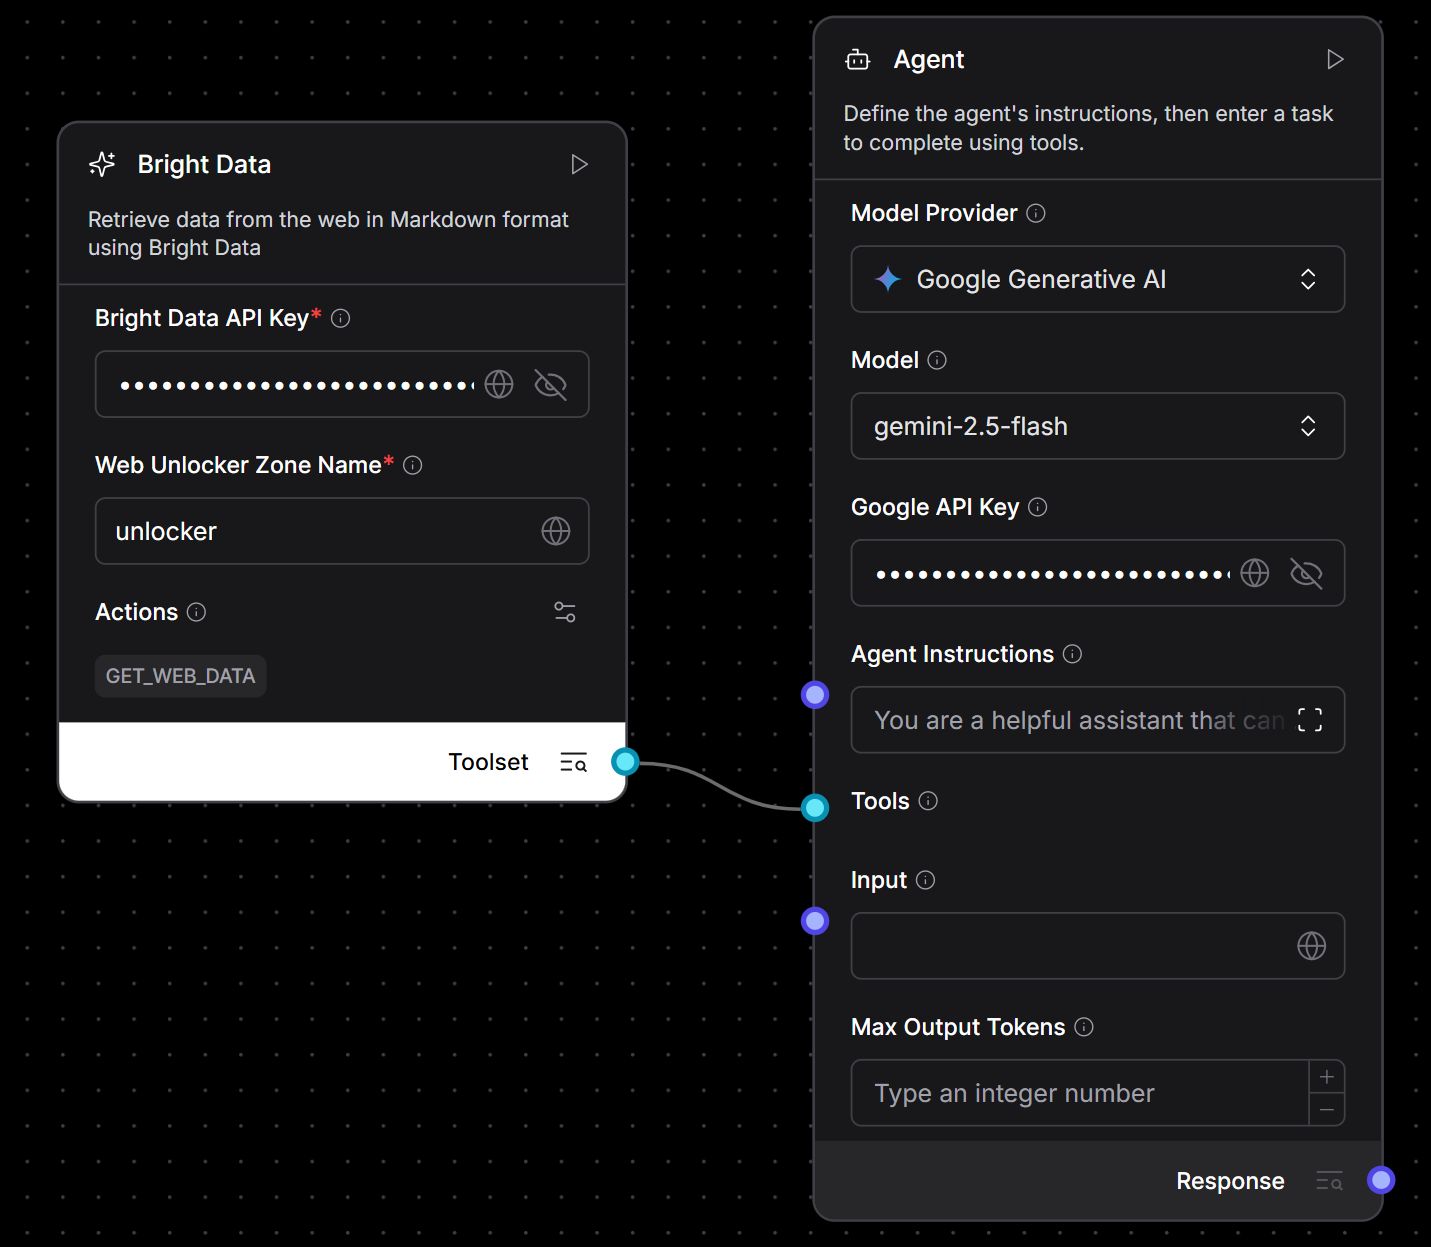
Connecting the Bright Data component to the Agent component
Here we go! The core of your AI application is now fully wired. You just built a Gemini-powered agent that can dynamically retrieve live web content using Bright Data’s scraping infrastructure.
Step #7: Complete the Flow
For your AI flow to be fully functional, it needs both an input and an output component . So go ahead and connect an Input Chat component to your AI agent, and an Output Chat component to receive its response.
After that, your flow should look like this:
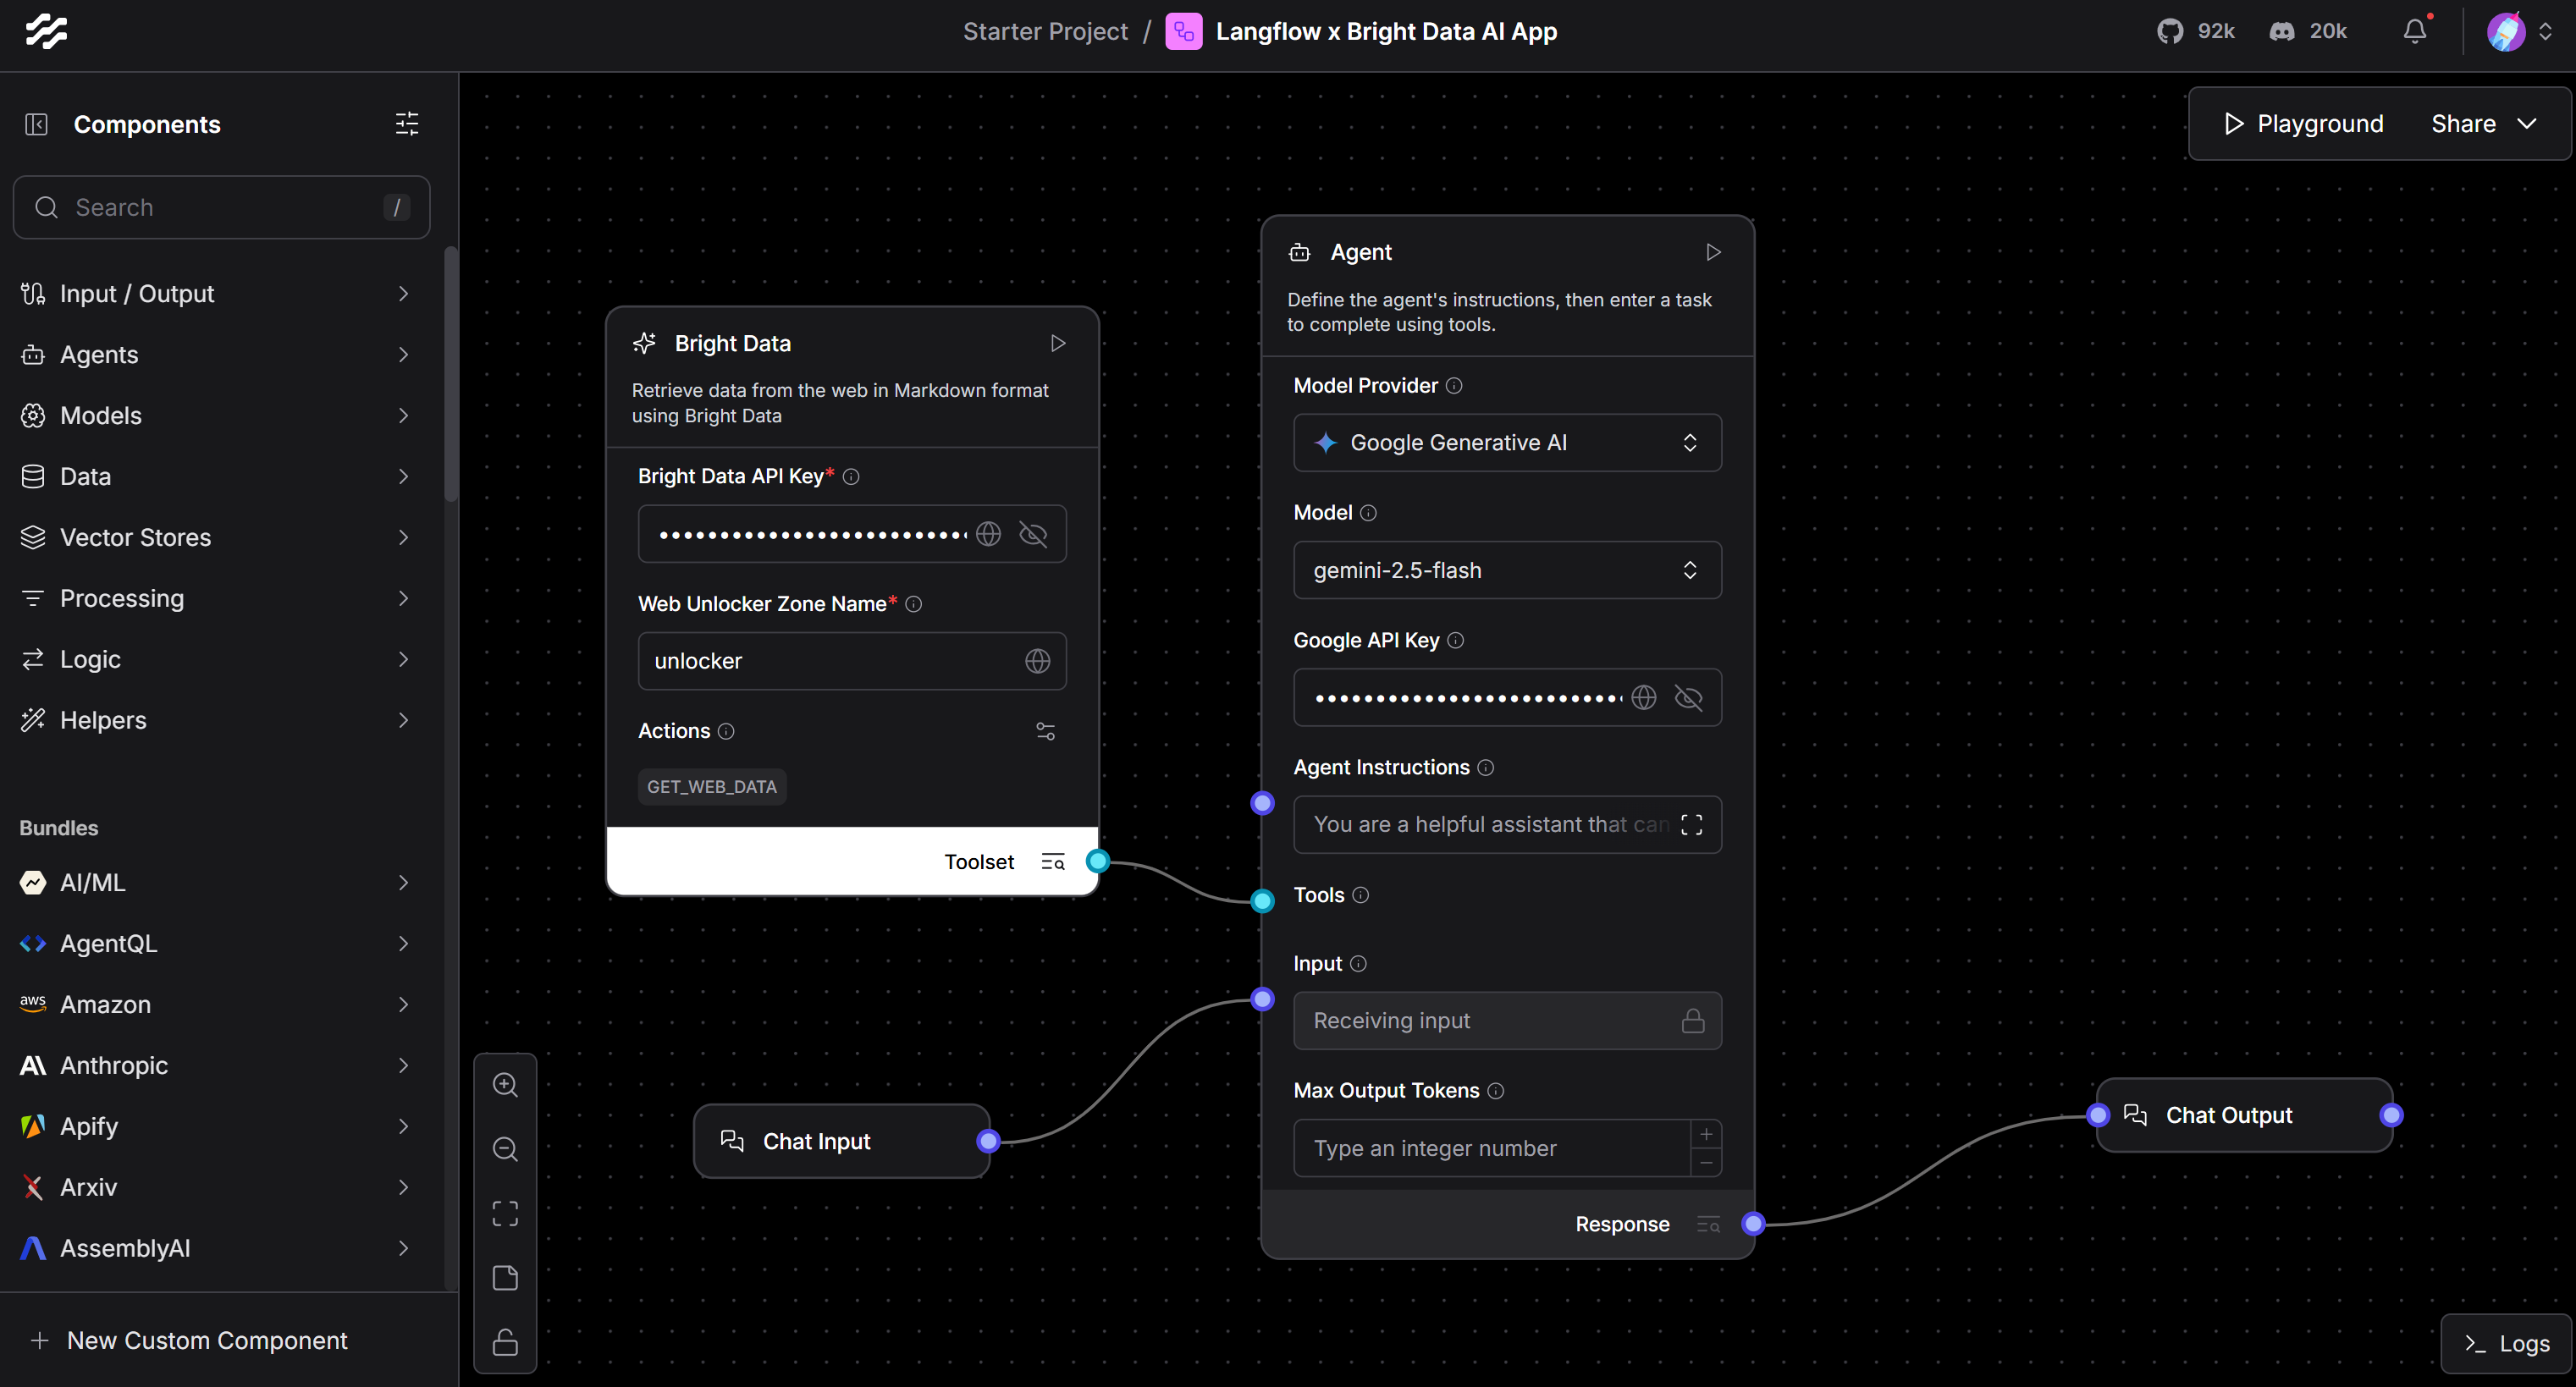
The final Langflow x Bright Data flow
The above setup gives you a chat-like interface to interact with your AI agent.
This is it! Your Langflow × Bright Data AI app is now complete and ready to use.
Step #8: Test the AI App
To launch your AI app, click the “Playground” button in the top-right corner of the Langflow interface:

Pressing the “Playground” button
This is what you should see:
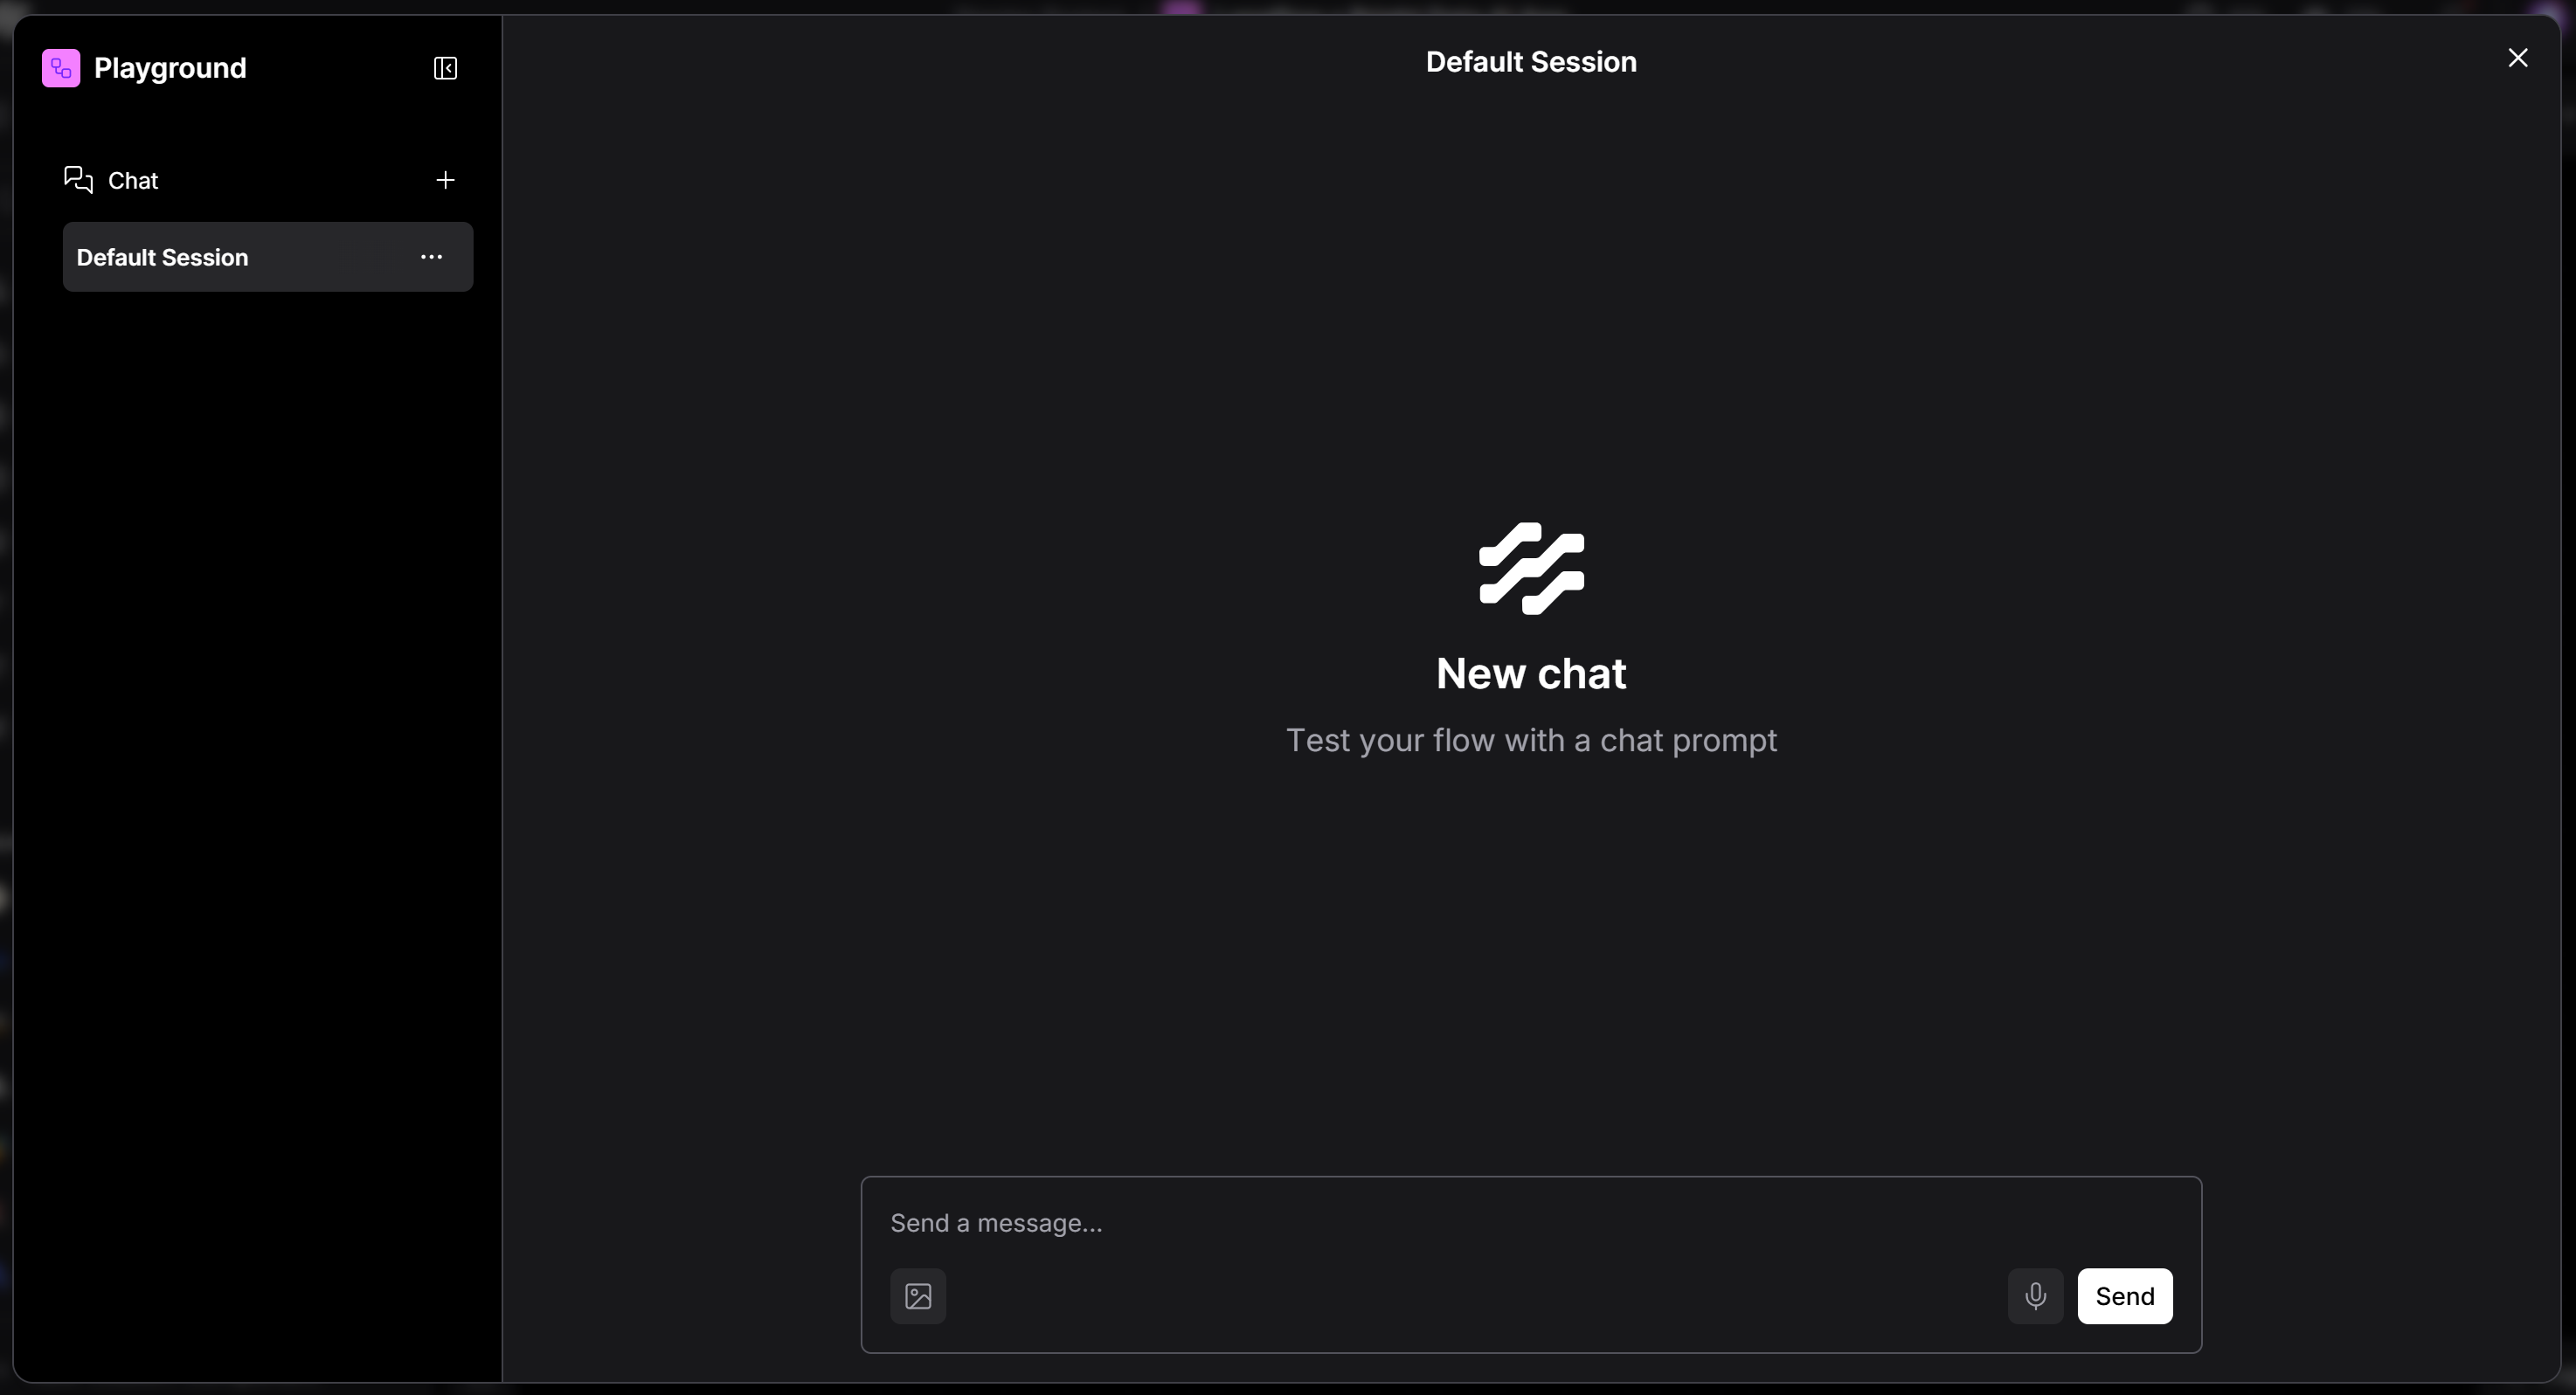
The Langflow chat experience
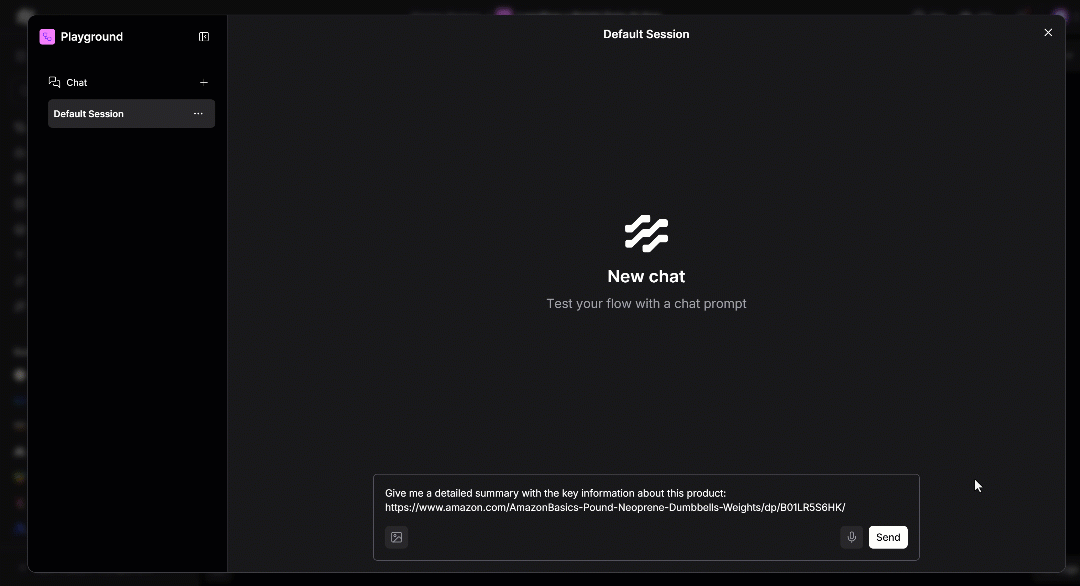
What you get is a ChatGPT-style experience, but powered by your own AI agent. To verify everything works, try entering a prompt like:
Give me a detailed summary with the key information about this product:
https://www.amazon.com/AmazonBasics-Pound-Neoprene-Dumbbells-Weights/dp/B01LR5S6HK/
Below is what will happen behind the scenes:
The prompt goes from Chat Input to the AI Agent component.
The agent uses the configured LLM (Gemini in this case) and triggers the required tool coming from the Bright Data component.
The agent receives the scraped web content, processes it, and passes the final response to Chat Output (which corresponds to the answer you will see in the chat).
The above prompt is a great test because Gemini alone cannot scrape sites like Amazon due to their anti-bot protections . Bright Data’s Web Unlocker solves that by bypassing the Amazon CAPTCHA , extracting data from the page, and providing it in AI-ready Markdown format.
Run the prompt and that is what you should see:
Executing the prompt in Langflow
To confirm the agent used Bright Data, expand the “Accessing web_get_data” dropdown:
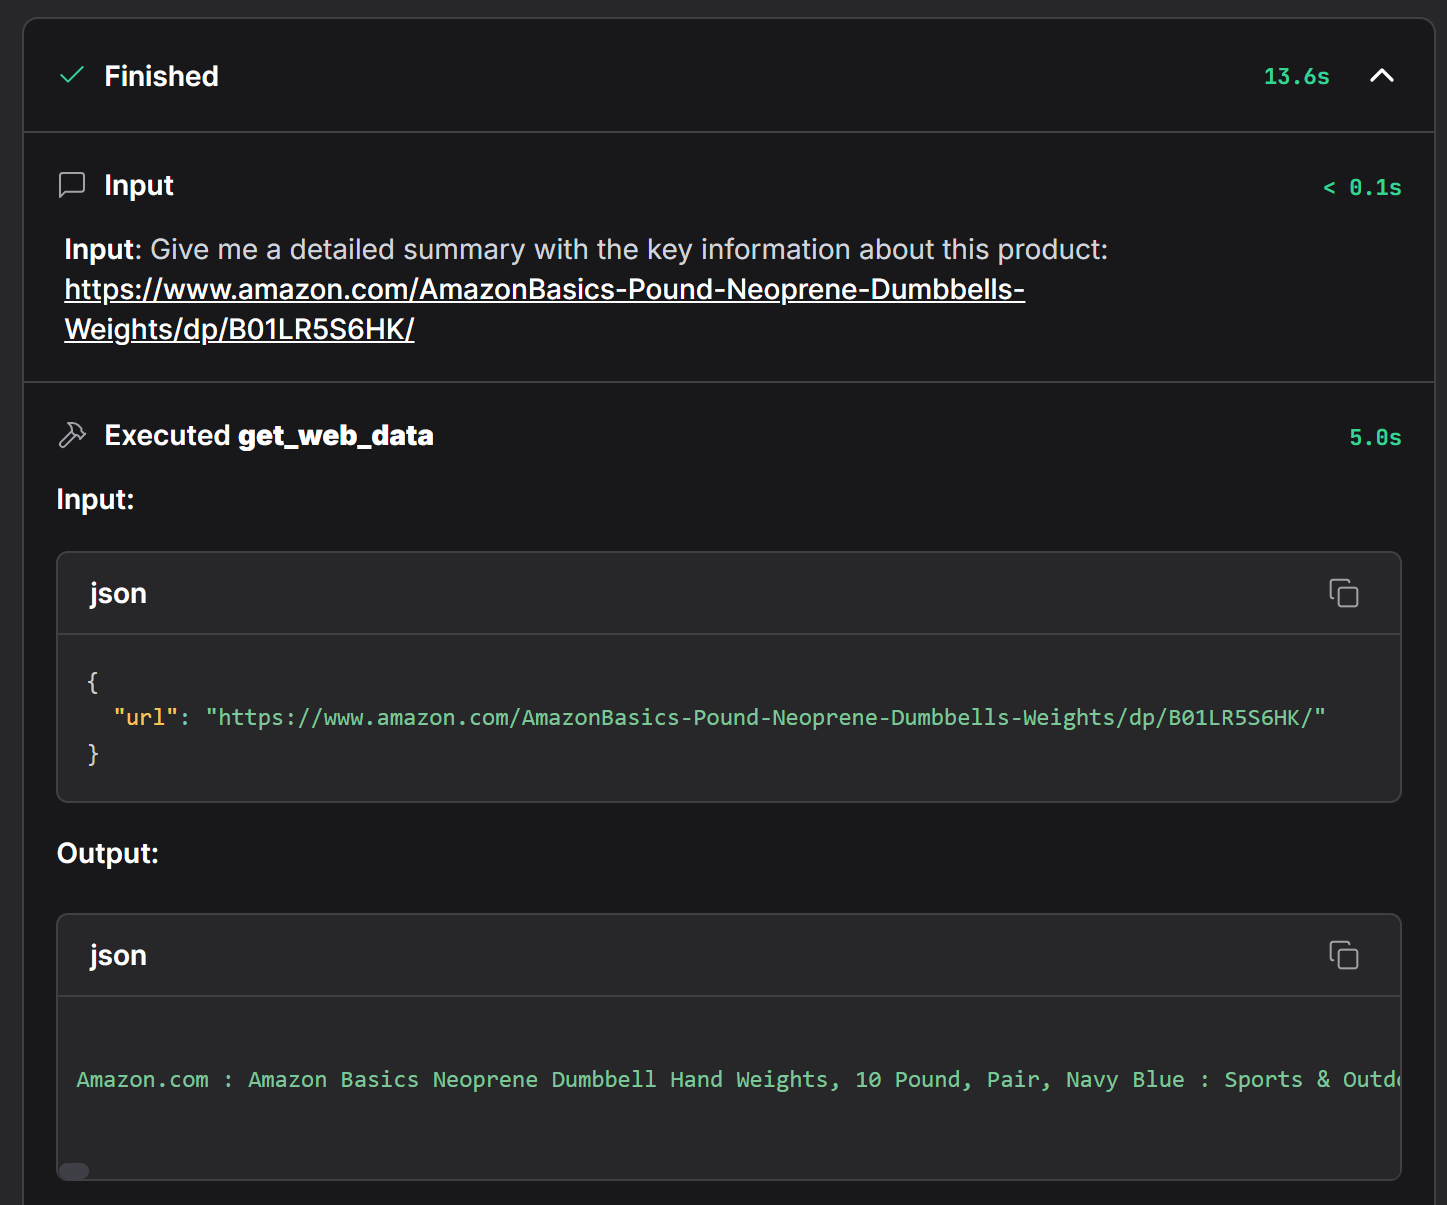
The "Accessing web_get_data" dropdown
This shows the full details of the
get_web_data
function call, which is the core method in your Bright Data component. There, you can check that the data was successfully retrieved from the Amazon product page.
Here is a partial screenshot of the actual output produced by the AI agent:
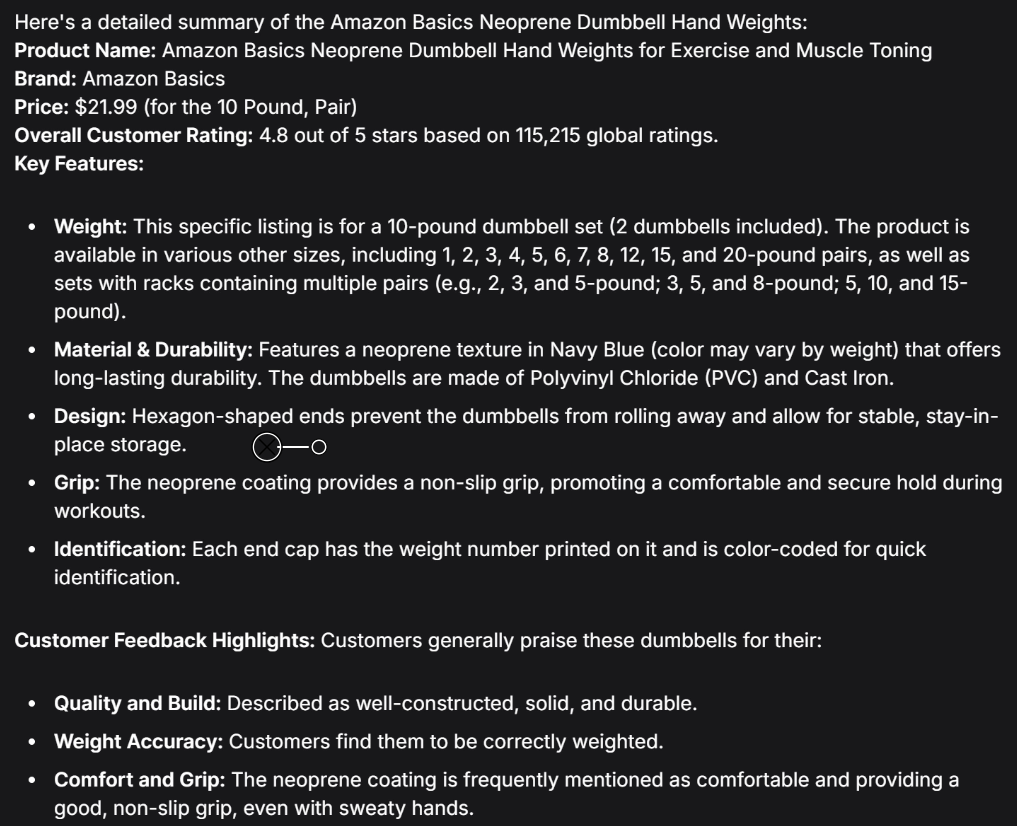
Partial screenshot of the actual output
Every piece of information in this AI-generated summary is real and not hallucinated, as you can verify by visiting the original Amazon page :

original Amazon page
Et voilà! You have just built and tested an AI app with web data access using Langflow and Bright Data.
Next Steps
Now that your integration is up and running, here are the next steps you can take:
Deploy your agent using one of the officially supported methods , either to the cloud or to your own server.
Extend the integration by connecting other Bright Data products, such as the Web Scraper APIs or SERP APIs. To do this, simply modify the logic in your
BrightDataComponent
to call different Bright Data APIs
as described in the official documentation
.
Recombine your components to create more advanced use cases, including RAG pipelines, data workflows, AI automation flows, and more.
Connect your AI agent to the Bright Data MCP server to integrate it with 50+ tools out of the box.
Conclusion
In this article, you learned how to use Langflow to build an AI agent with web data access. That was made possible through a custom integration with Bright Data tools. This setup gives your LLM the ability to retrieve and process data from virtually any website in real time.
Keep in mind that what we presented here was just a basic example. If you are aiming to build more advanced agents, you need tools for fetching, validating, and transforming live web data into information optimized for AI consumption. That is specifically what you can find in the Bright Data AI infrastructure .
Create a free Bright Data account and start experimenting with our AI-ready data retrieval tools!