Boost Cline AI Agents with Web Scraping via Bright Data MCP
In this blog post, you will learn:
What Cline is and why it is gaining popularity in the coding community.
How integrating its AI coding agents can take your development experience to the next level.
How to connect Cline with the Bright Data MCP server to build AI coding agents with web data retrieval tools.
Let’s dive in!
What Is Cline?
Cline is a Visual Studio Code extension that serves as an autonomous AI-powered coding assistant. It integrates with both your command line and code editor to assist you throughout the development process.
The Cline VS Code extension goes beyond basic code completion. It can analyze project structures, generate and edit code, run terminal commands, and even help debug web applications.
Cline supports multiple AI APIs, allowing you to connect to different models and providers. You can also extend its functionality by adding custom AI-powered tools via MCP ( Model Context Protocol ).
As of this writing, the Cline extension has over 48k stars on GitHub and more than 1.9 million downloads in the Visual Studio Marketplace .
Why Cline Agents Should Be Able to Extract Data from the Web?
No matter how powerful the LLM integrated into Cline is, it still faces a common limitation shared by all language models: outdated knowledge. An LLM can only answer based on the static data it was trained on , which represents a snapshot of the past.
Given how fast the tech world evolves, that is even a bigger issue. That is why it is not unusual for LLMs to suggest outdated coding approaches, deprecated methods, or miss recently introduced features entirely.
Now, imagine giving your Cline AI coding assistant the ability to fetch up-to-date tutorials, documentation pages, and guides—and learn from them. This becomes possible by integrating Cline with a solution that extends LLMs with web search and data access capabilities.
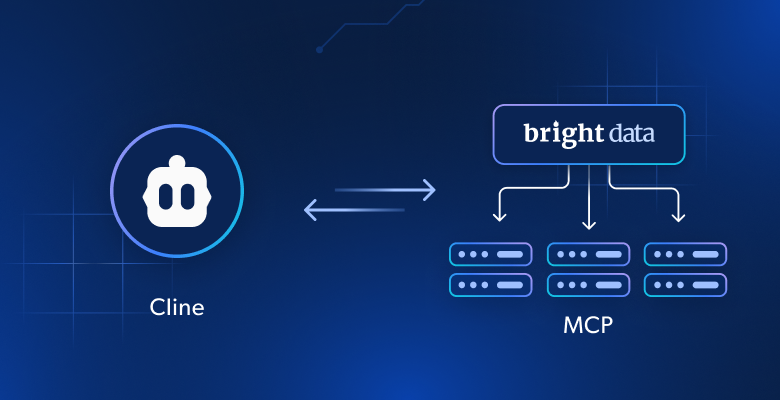
That is exactly what the Bright Data MCP server offers. This server provides a collection of over 60 AI-ready tools for real-time web data collection, powered by Bright Data’s AI data infrastructure .
For the complete list of tools exposed by the Bright Data MCP server, refer to the documentation .
Other possible use cases include:
Retrieving live SERP data and inserting contextual links into your Markdown reports when using VS Code as a text editor.
Asking for tutorials or documentation based on the code you’re actively writing.
Scraping data from real sites on the fly and saving it locally for mocking or further analysis purposes
Let’s now see the Bright Data MCP server in action within Cline. We will go through one of the use cases above to understand what this integration truly enables!
How to Add Data Retrieval Capabilities to an AI Coding Agent in Cline
Learn how to add Cline to Visual Studio Code and integrate it with the Bright Data MCP server. The result of this step-by-step section will be an AI coding agent that can fetch data from the web and interact with it. This will enable the agent to deliver more accurate results and smarter task outcomes.
In particular, you will build an enhanced Cline AI agent with data retrieval capabilities and use it to:
Scrape an Amazon product page.
Store the data locally.
Create a Node.js script to load and process that data.
Follow the steps below!
Prerequisites
To follow this tutorial, you need:
Node.js installed locally (we recommend the latest LTS version )
A Cline account
A Bright Data API key
(Optional) An API key for your preferred LLM (such as the Google Gemini API key )
Do not worry if you do not yet have a Bright Data API key or a Cline account. We will guide you through setting them up in the next steps.
Step #1: Install Cline in Visual Studio Code
Open Visual Studio Code, click the Extensions icon in the left sidebar, search for “cline”, and select the Cline extension from the list. In the Cline extension tab, click the “Install” button:
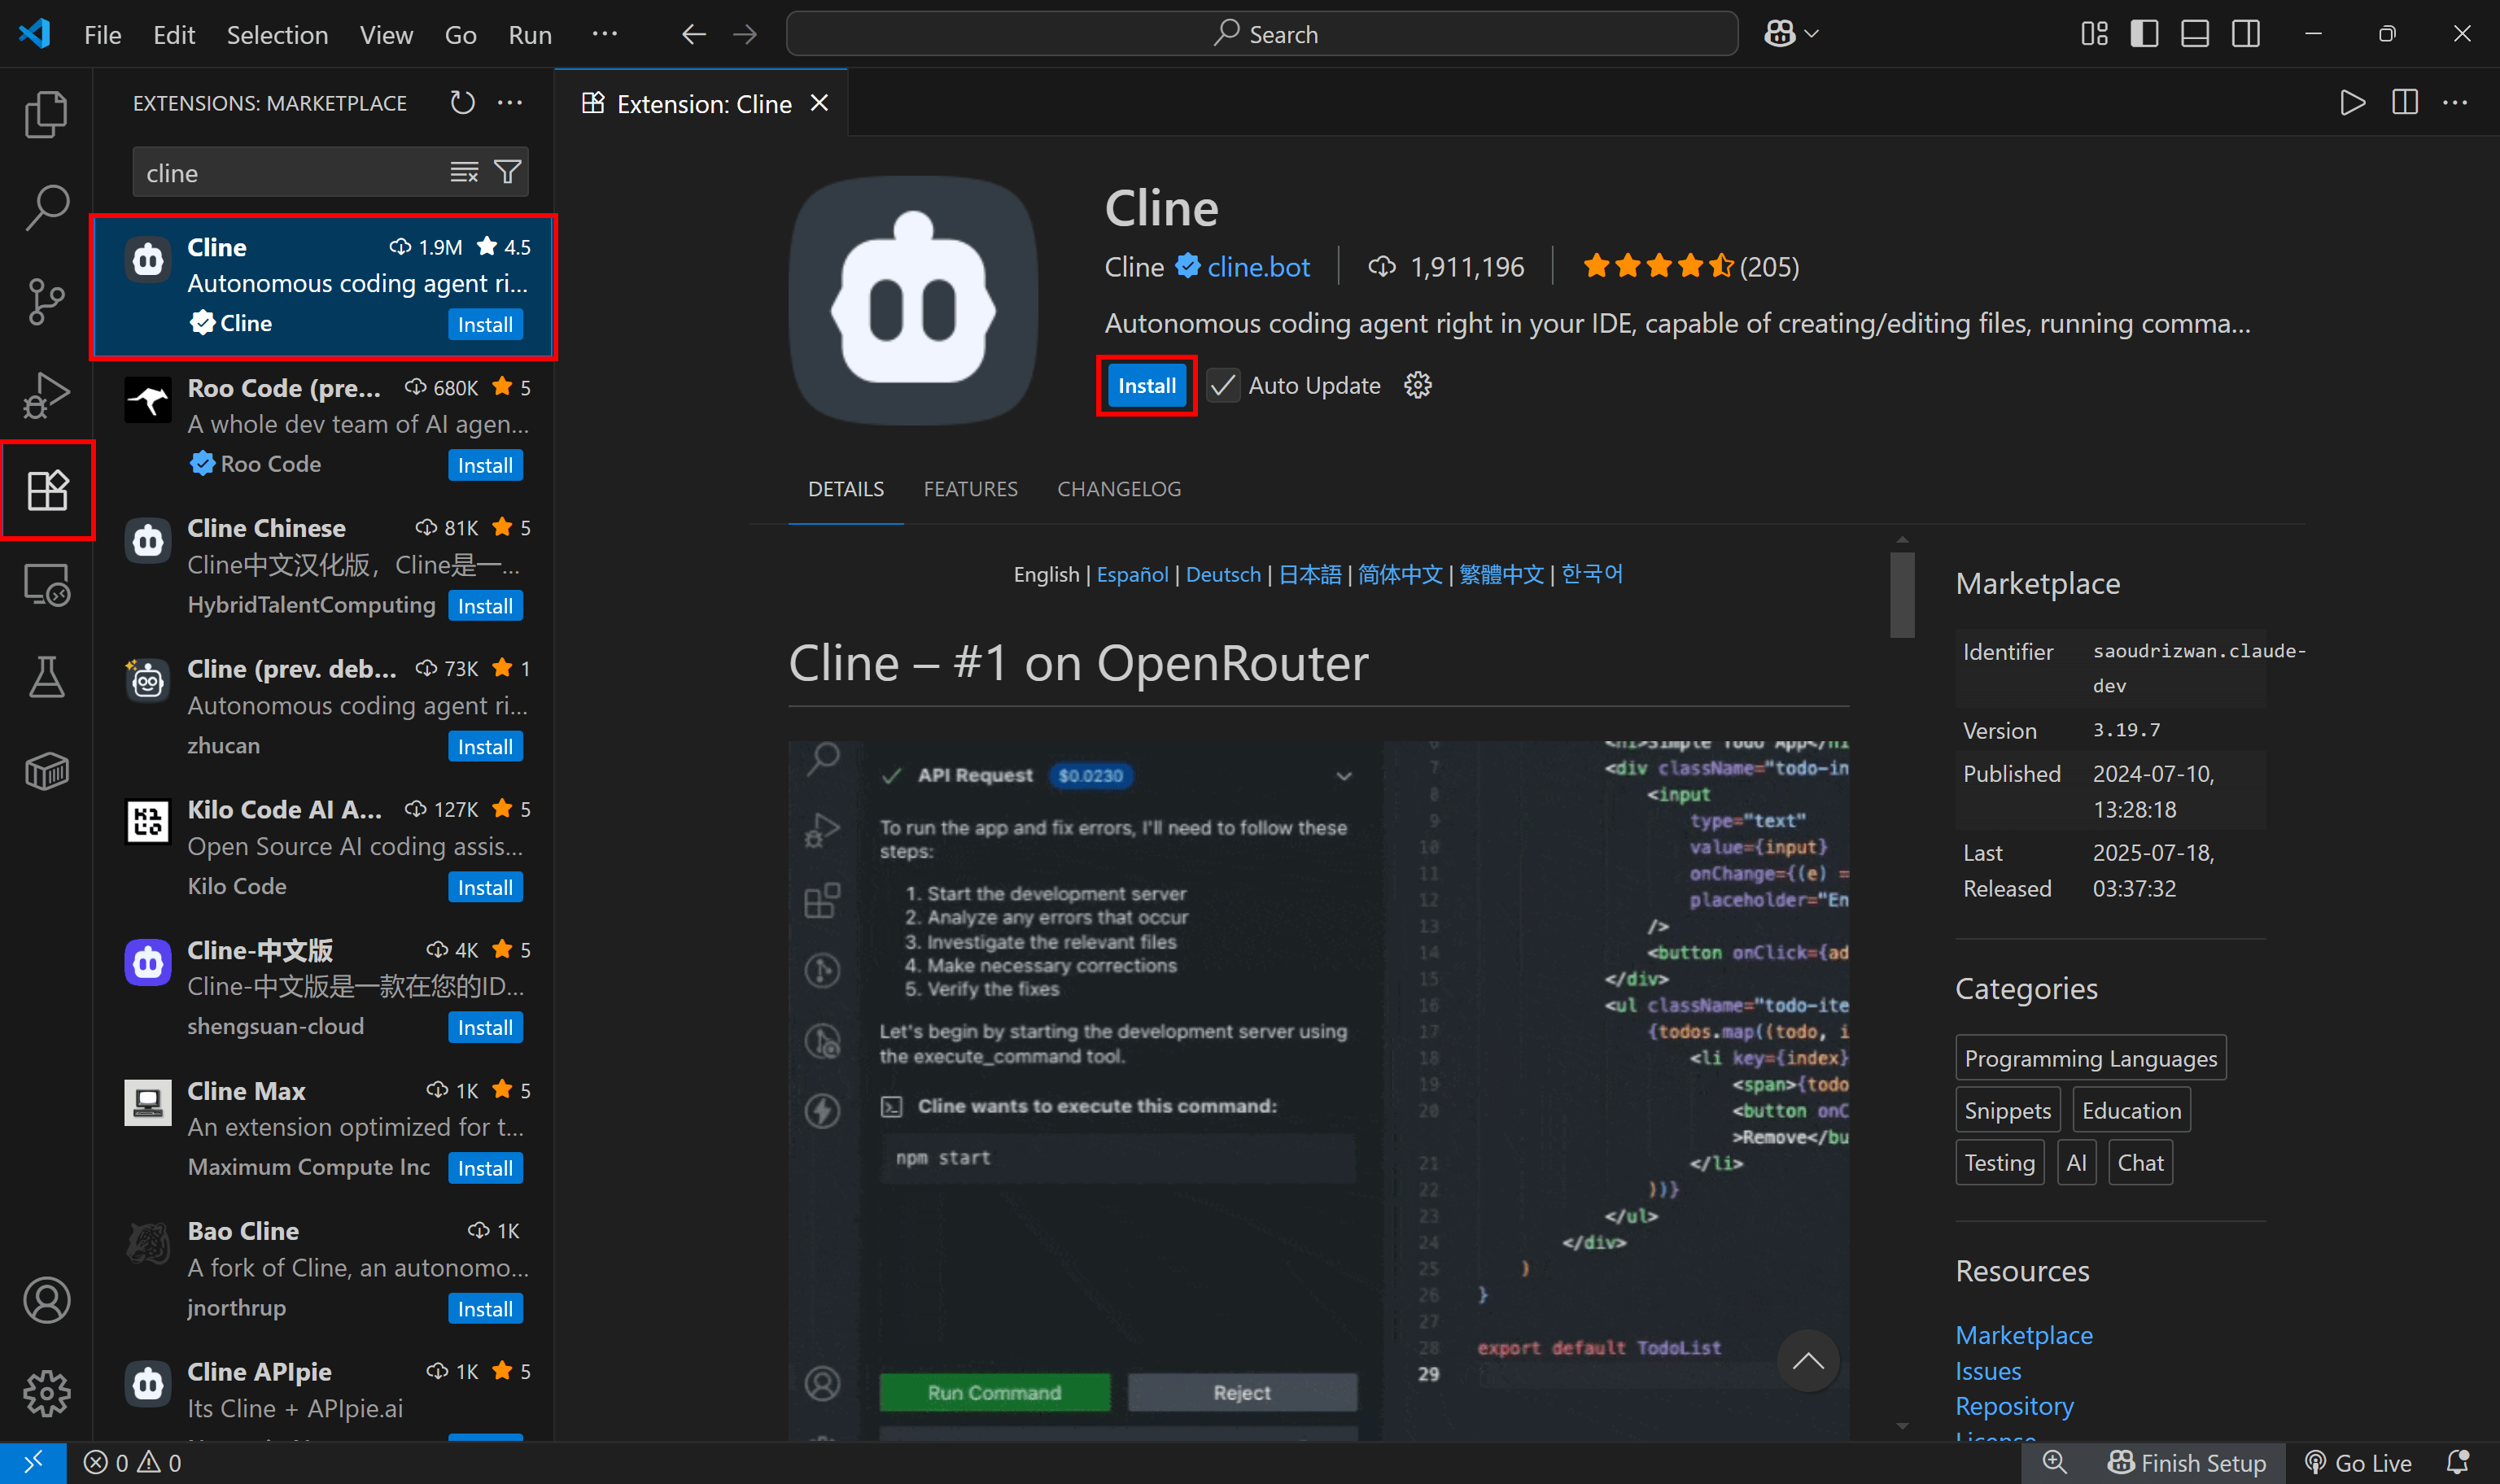
Clicking the “Install” button to install Cline in VS Code
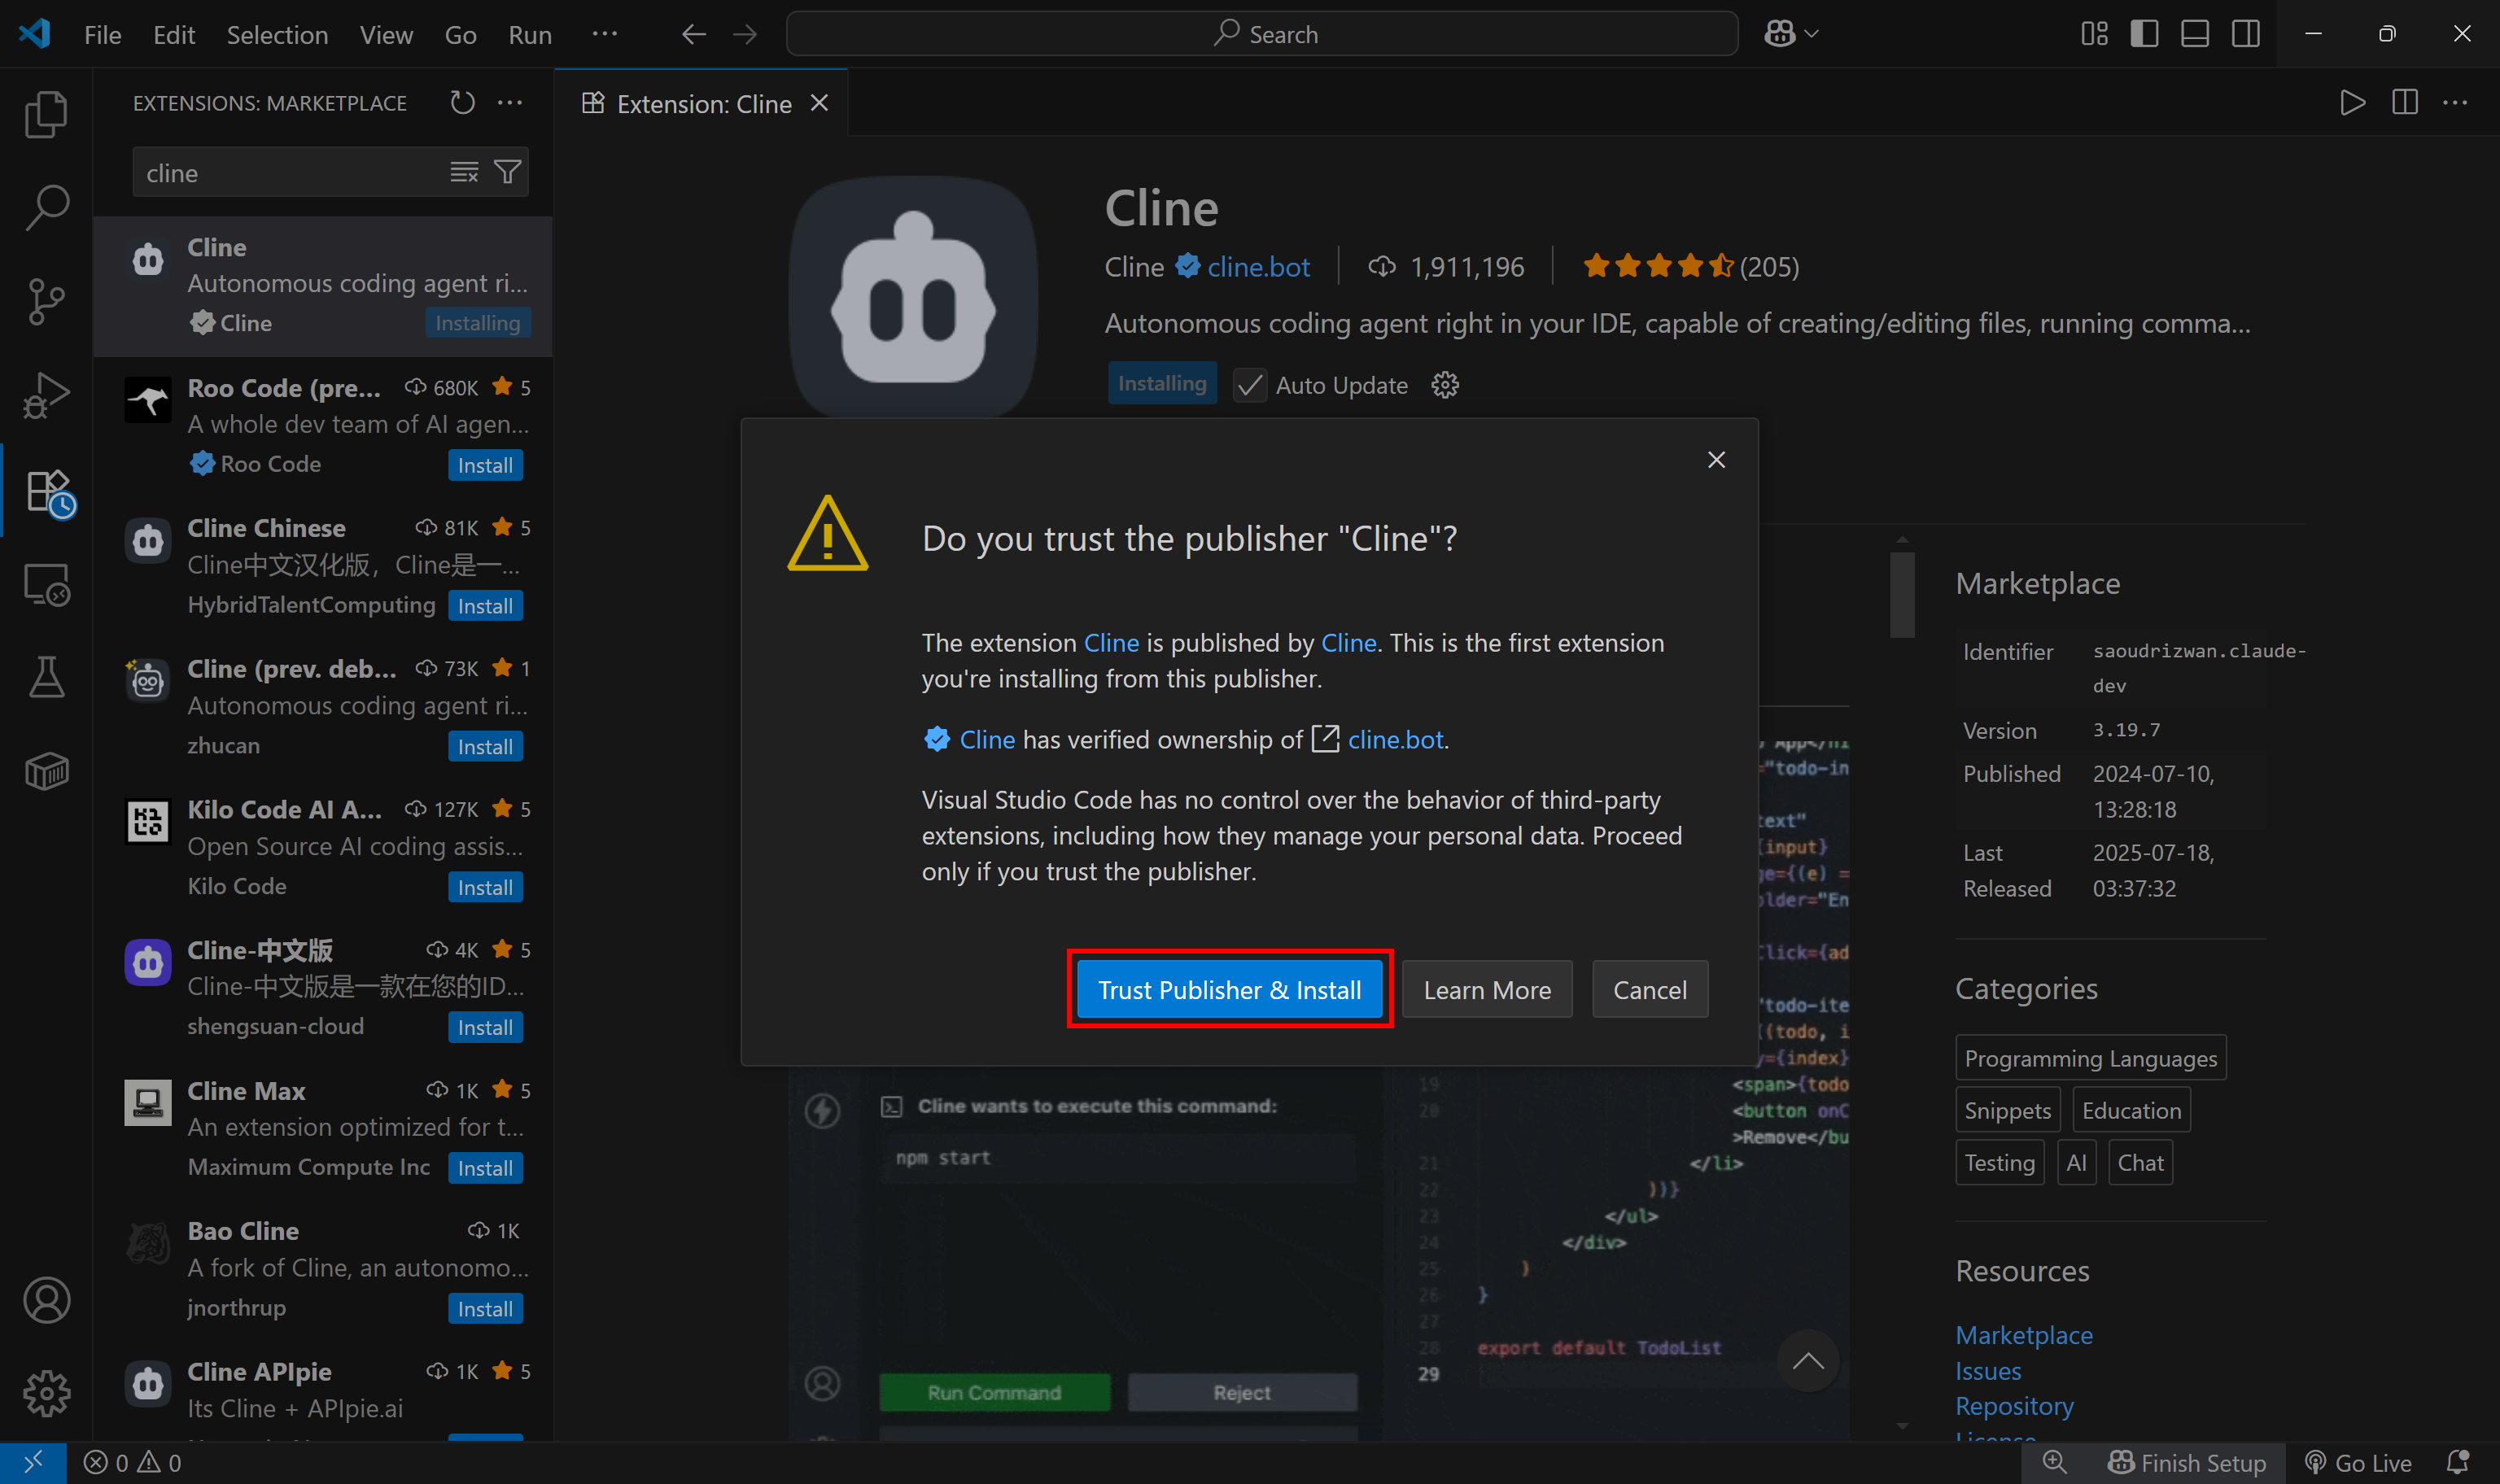
If this is your first time installing an extension from Cline, you will be prompted to trust the publisher. Click “Trust Publisher & Install” to proceed:
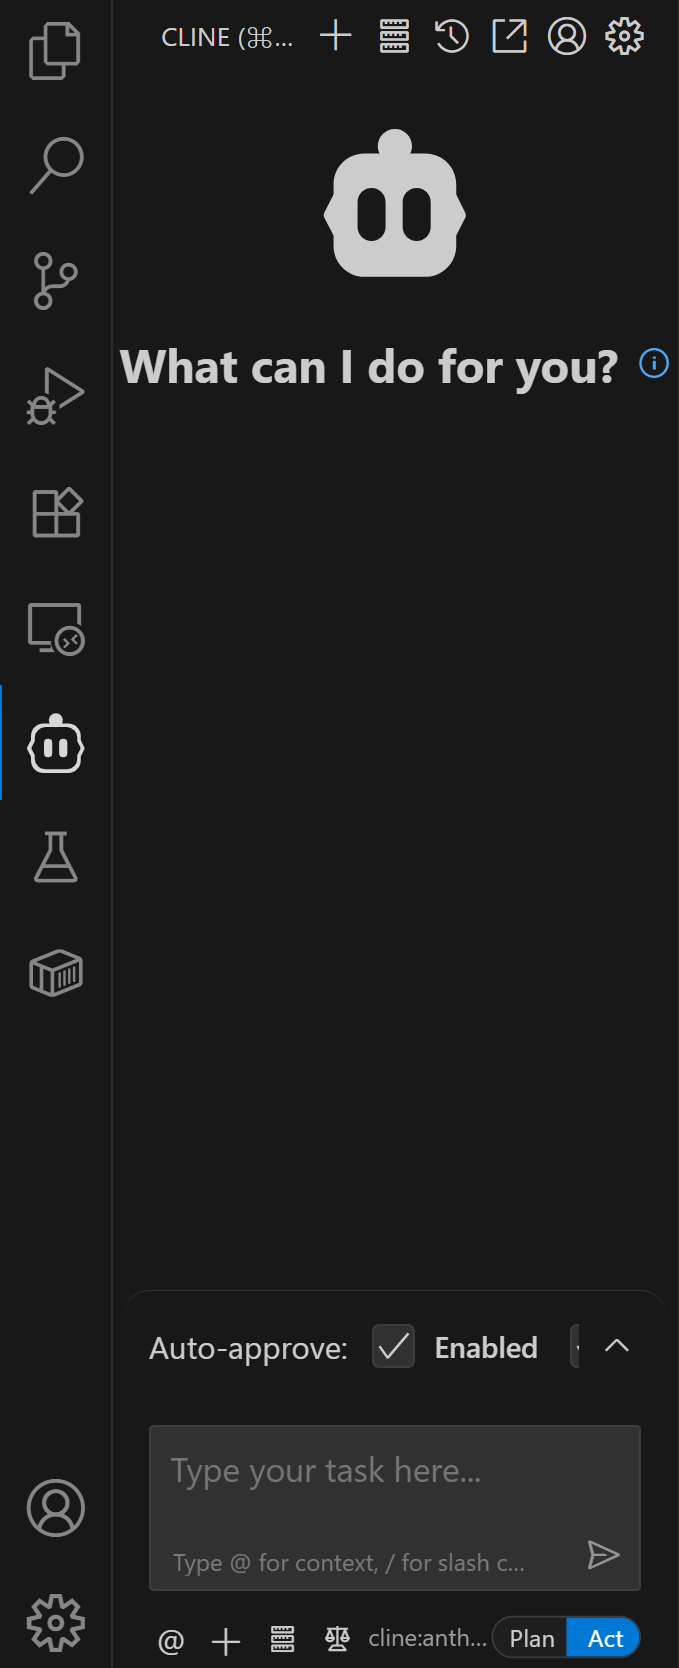
Once installed, you should see a Cline icon in the left sidebar. Click it to open the Cline panel:
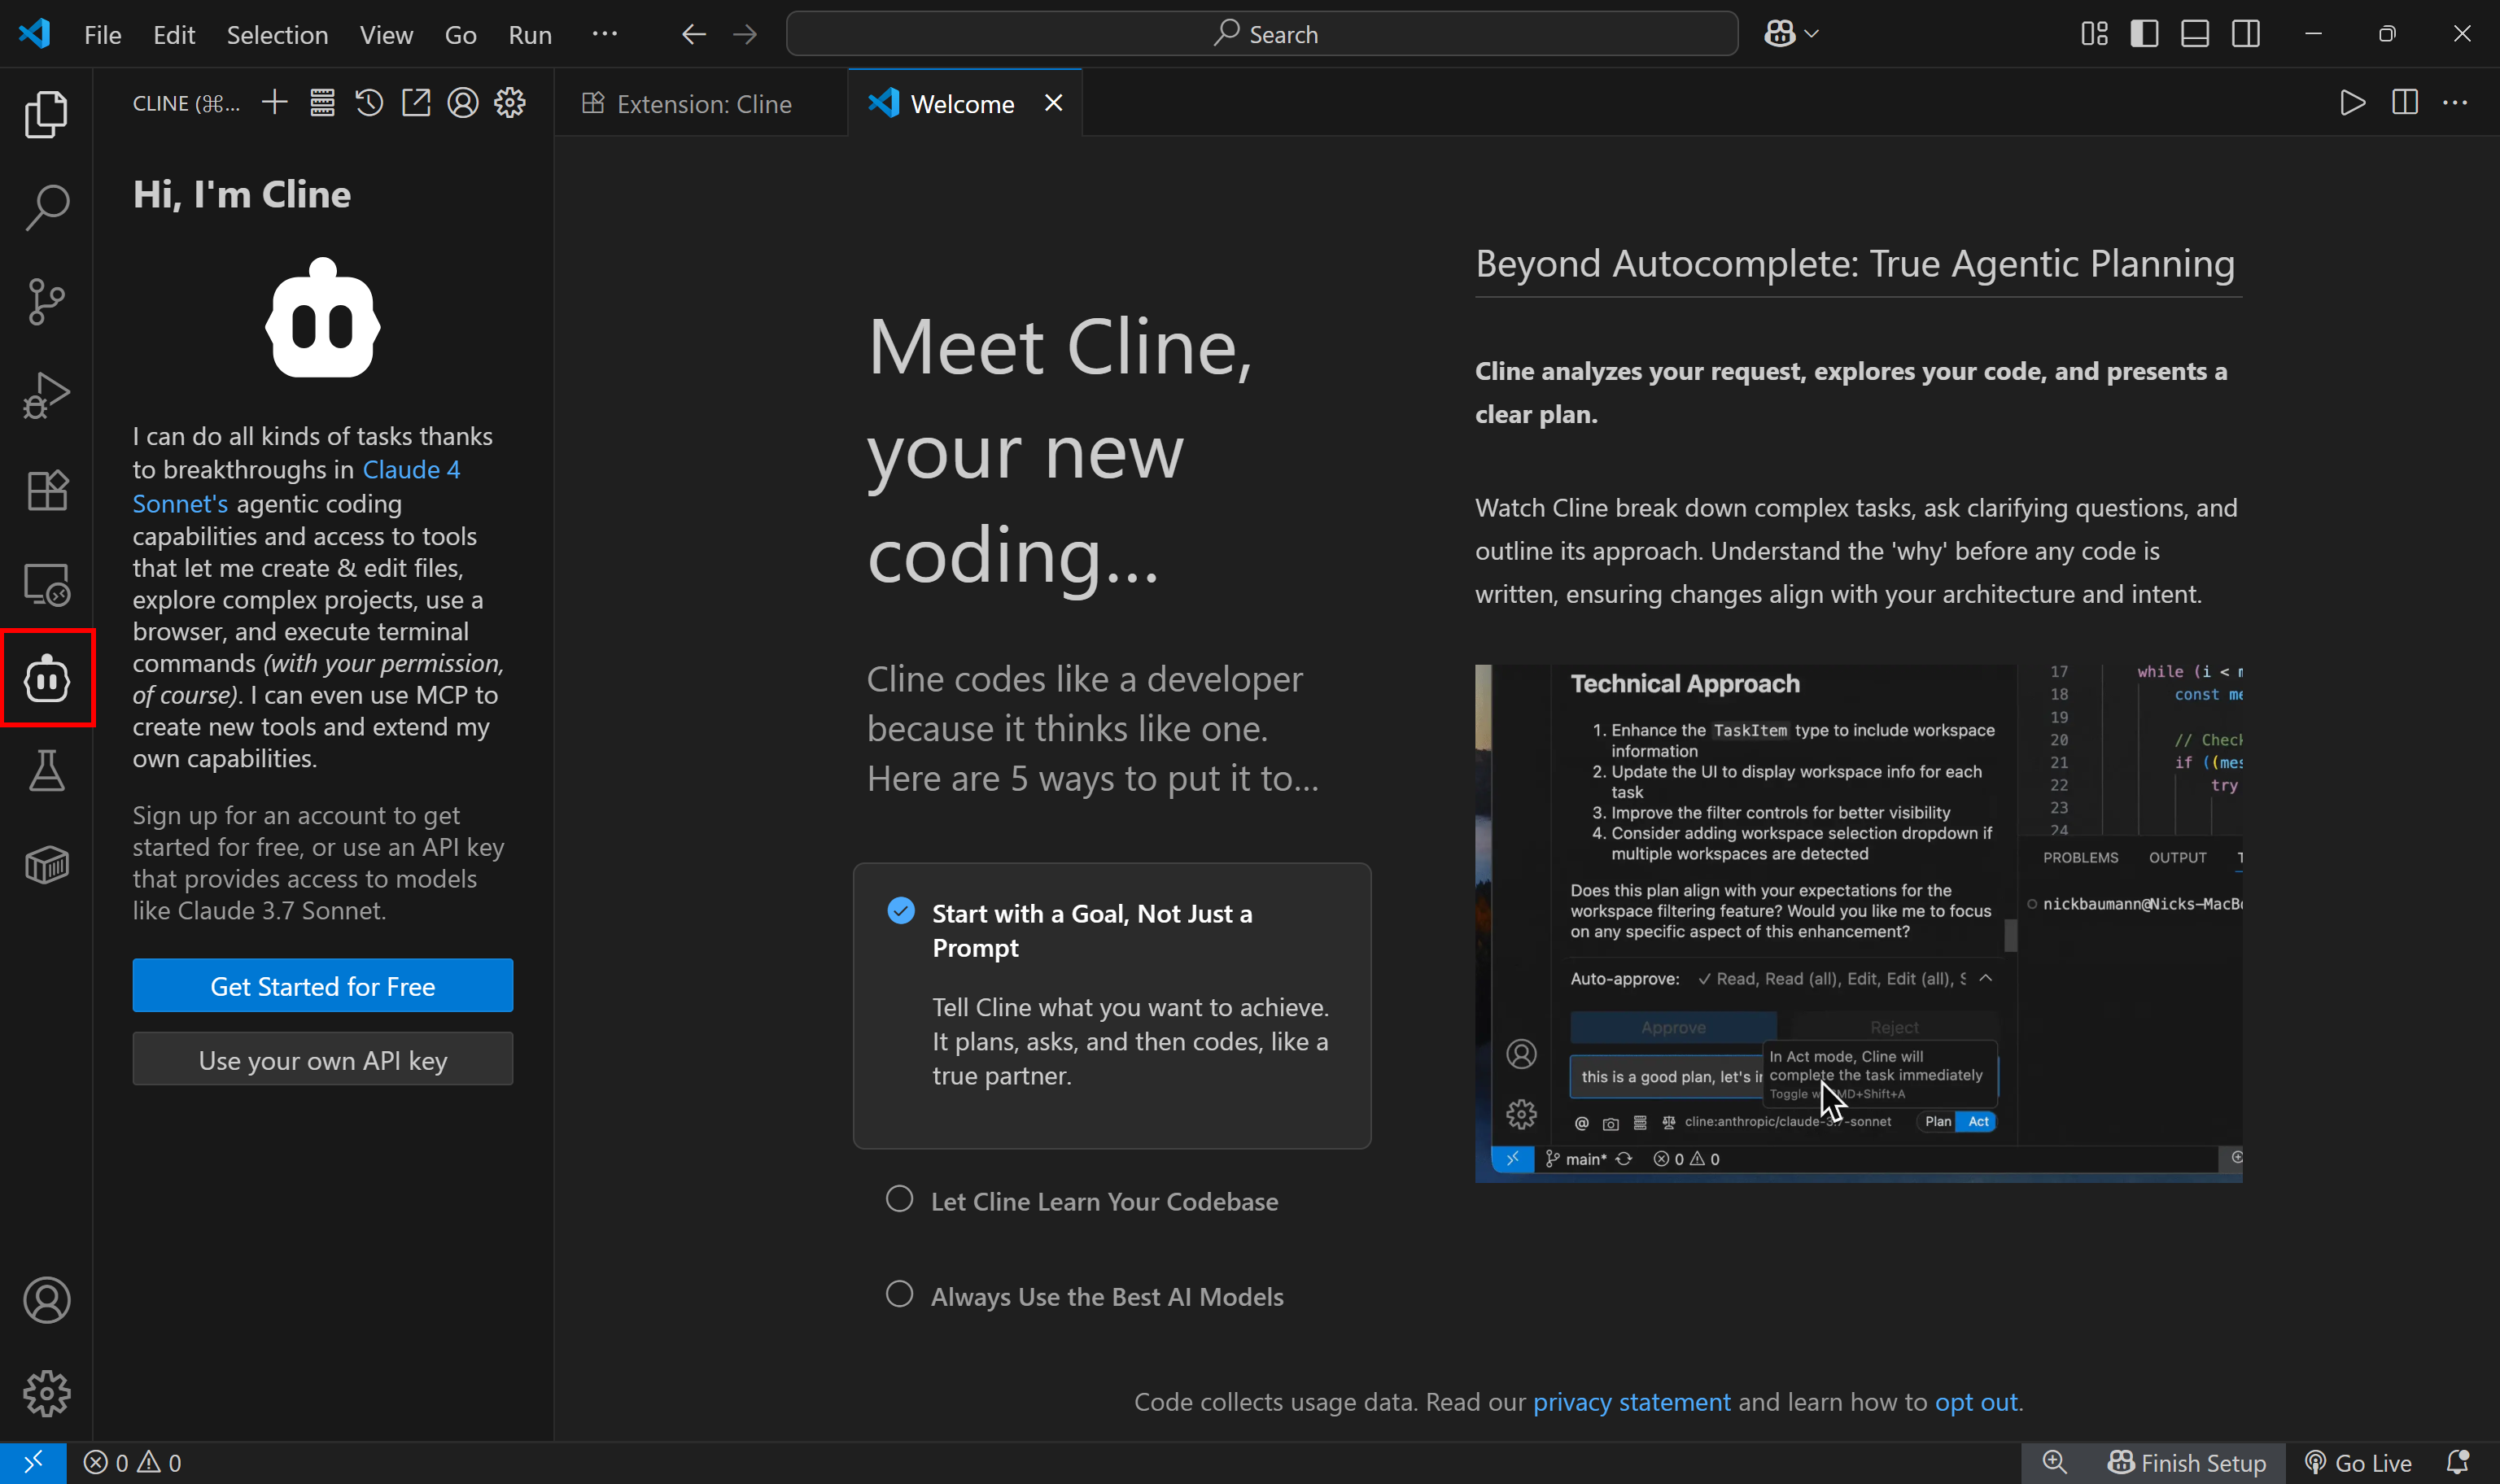
Cline activated in VS Code
Note : If the Cline icon does not appear, try reloading Visual Studio Code. For any other issues, refer to the official installation documentation page .
Wonderful! Cline has been installed in VS Code.
Step #2: Set Up Your Cline Connection
You now need to connect your Cline account to the previously installed extension. To achieve that, click the “Get Started for Free” button:
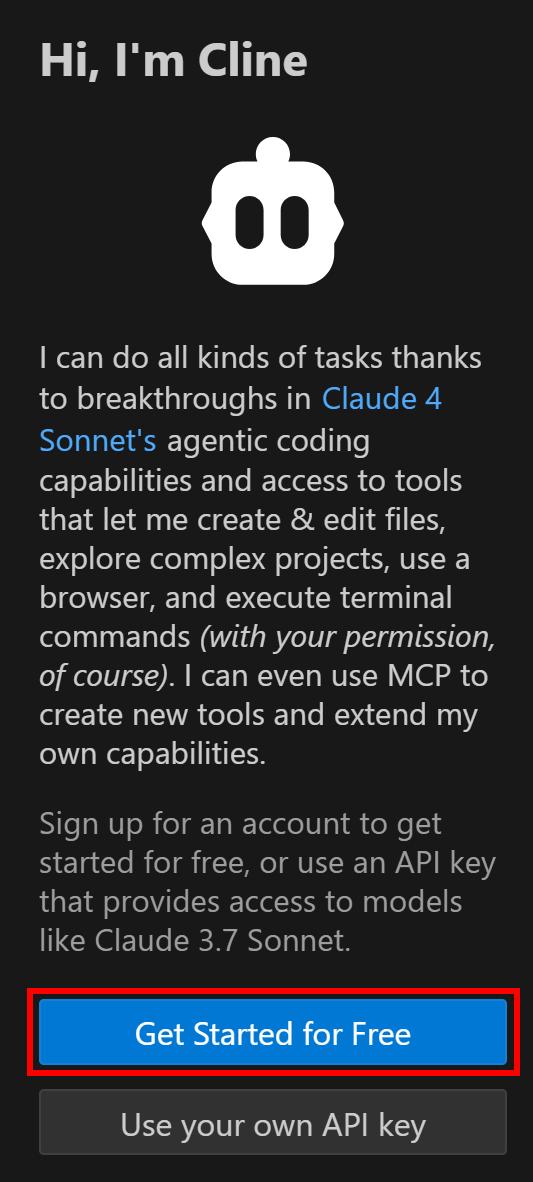
Clicking the “Get Started for Free” button
You will be redirected to the following page in your browser:
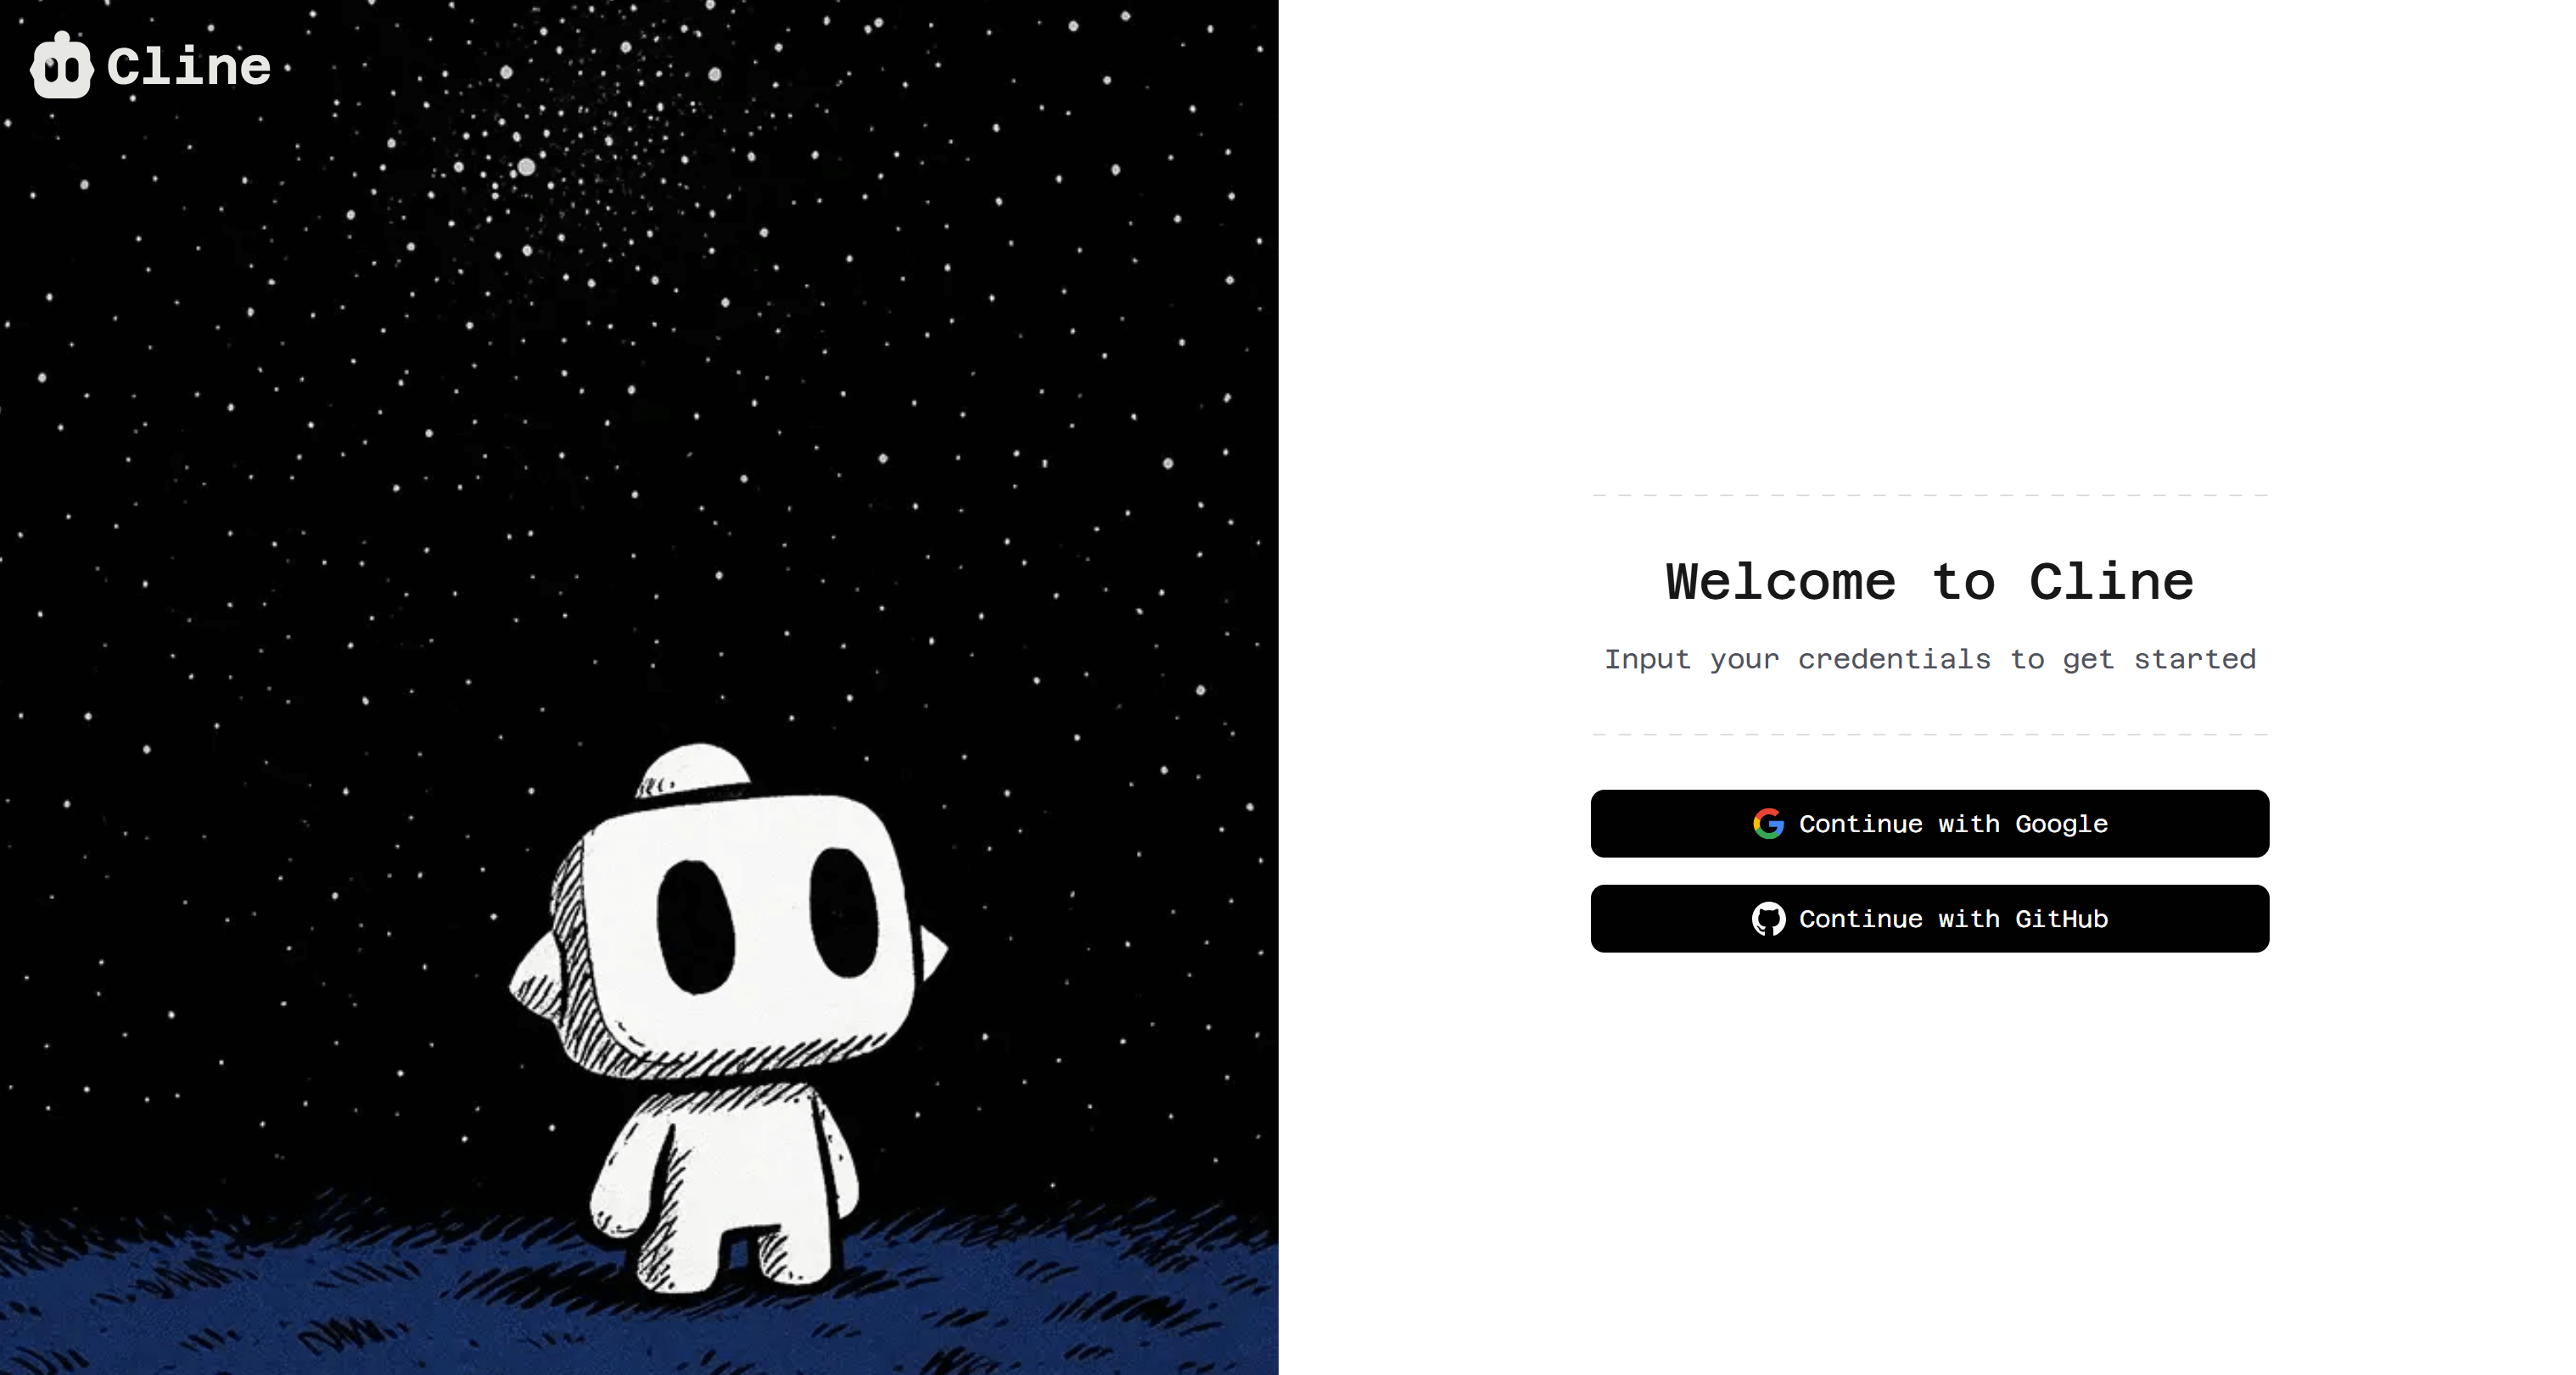
The Cline login / account creation page
Sign up (or sign in if you already have an account), and you will be redirected back to the VS Code window:
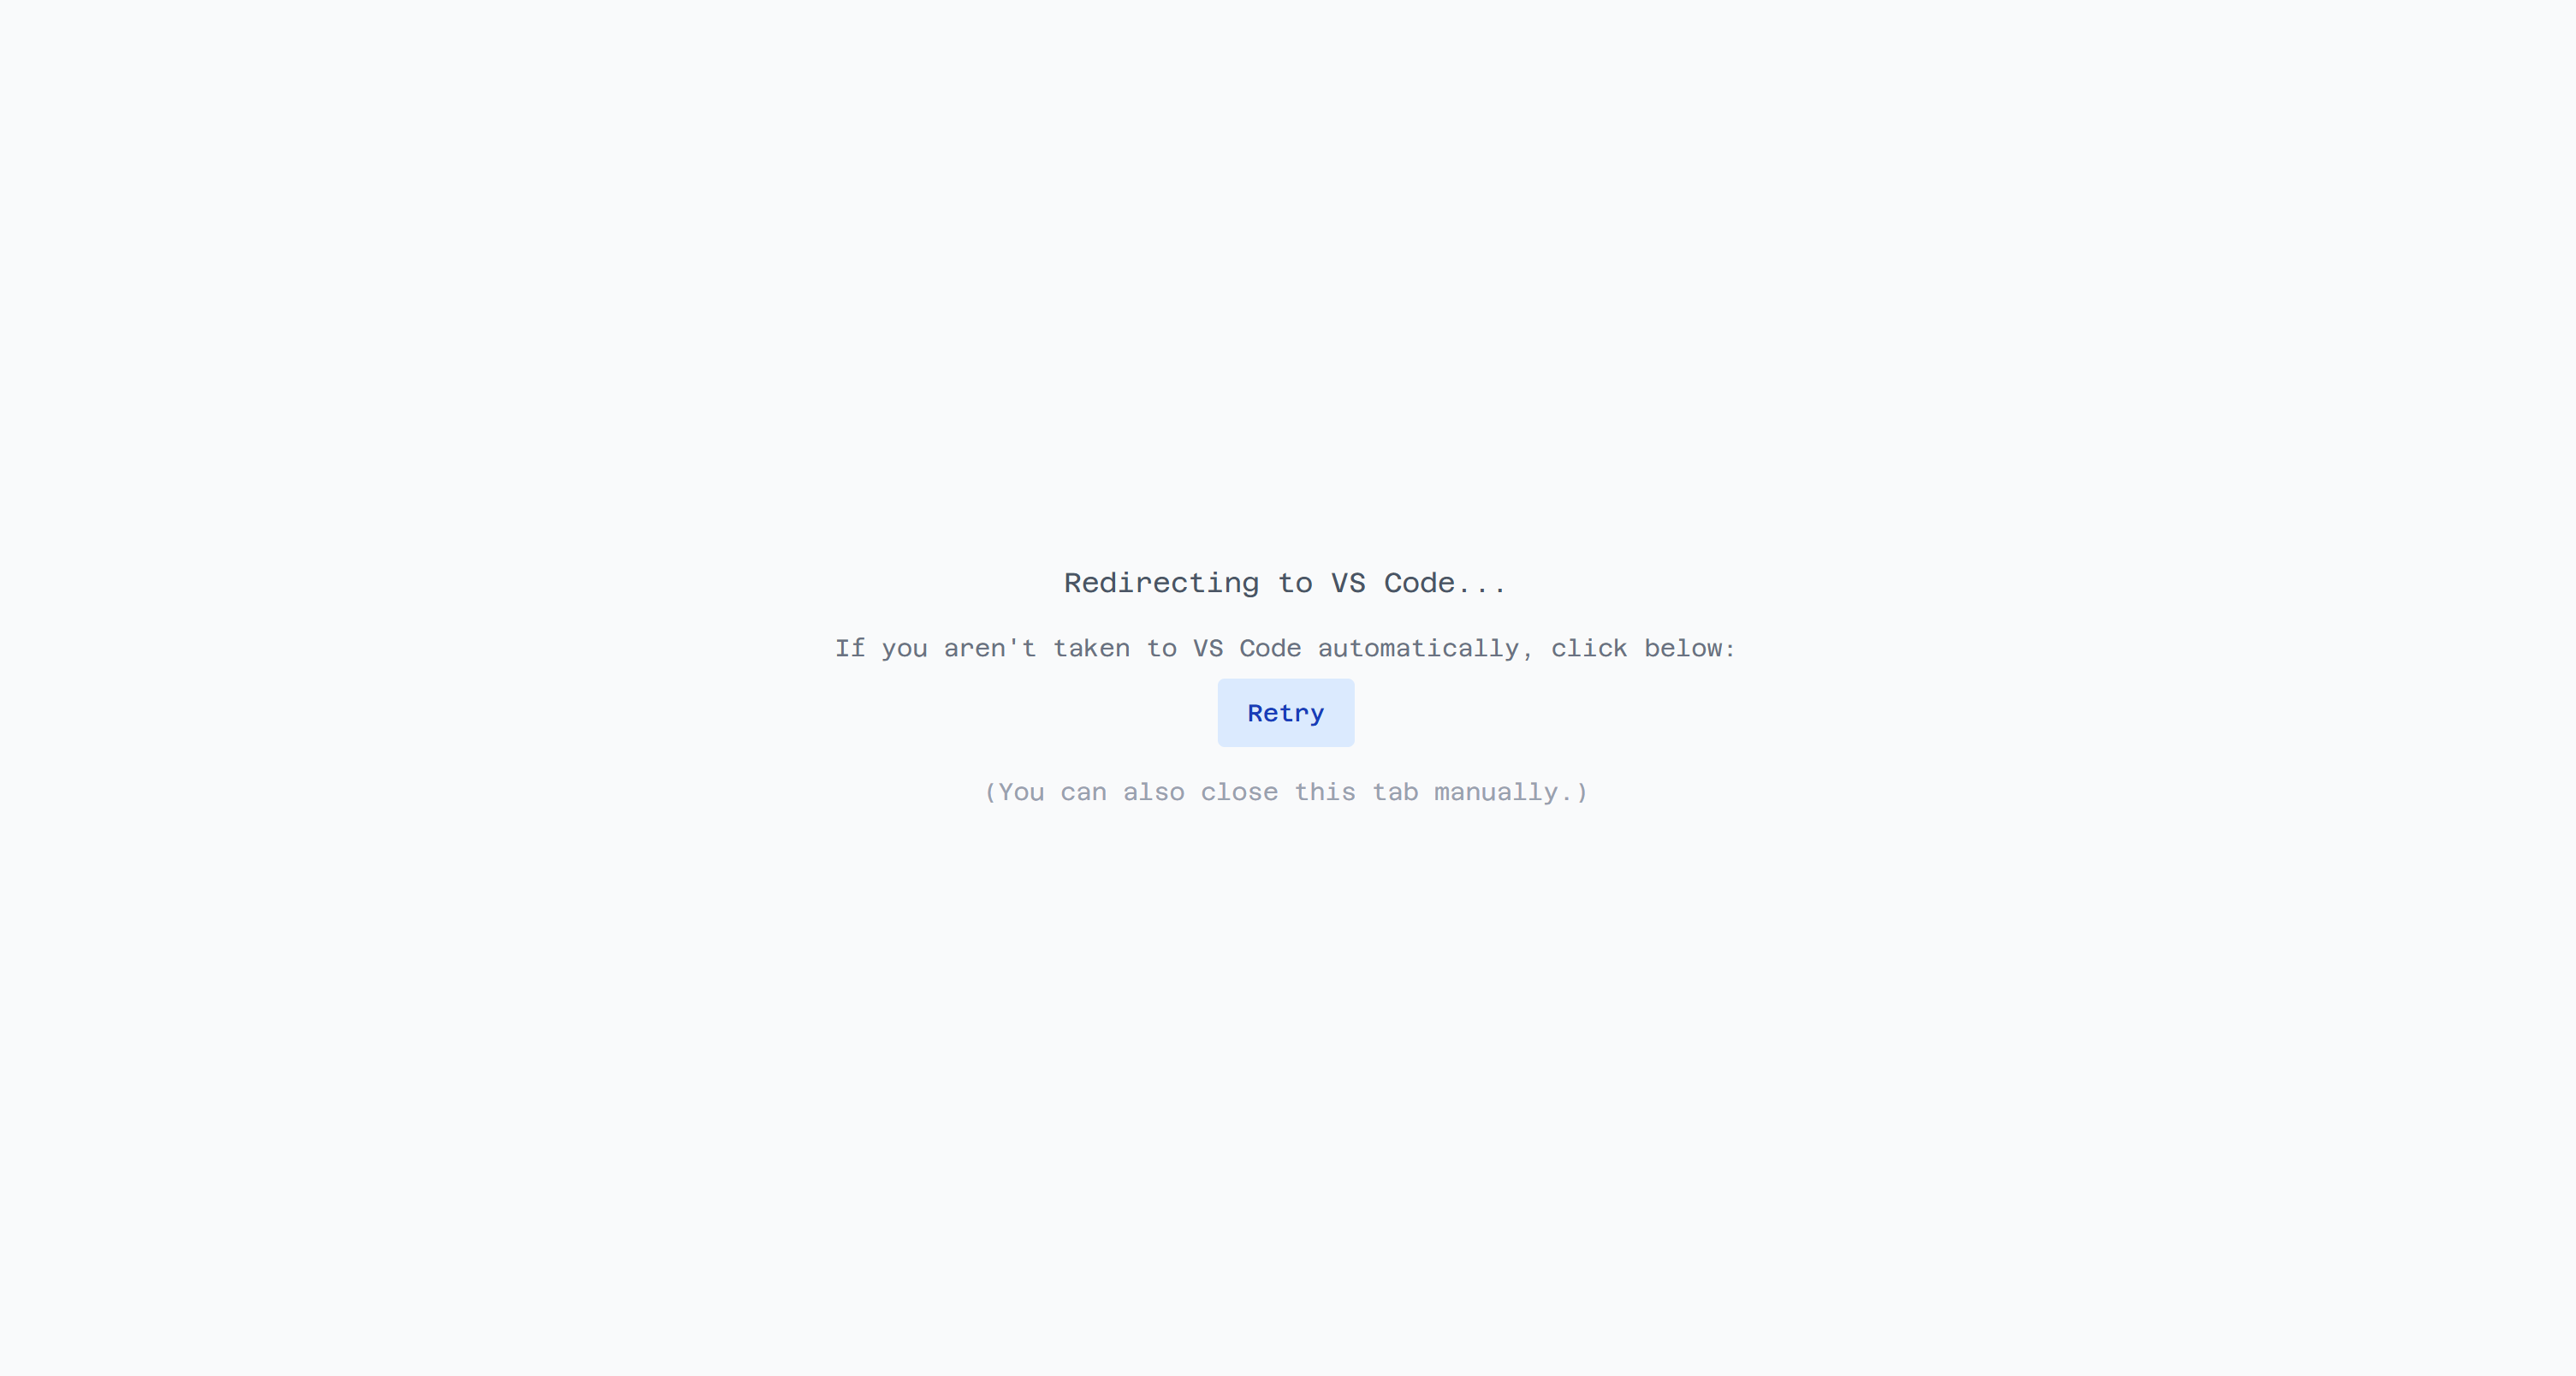
Cline's redirection page back to VS Code
In Visual Studio Code, you should now see the following modal. Click “Open” to authenticate the Cline extension:
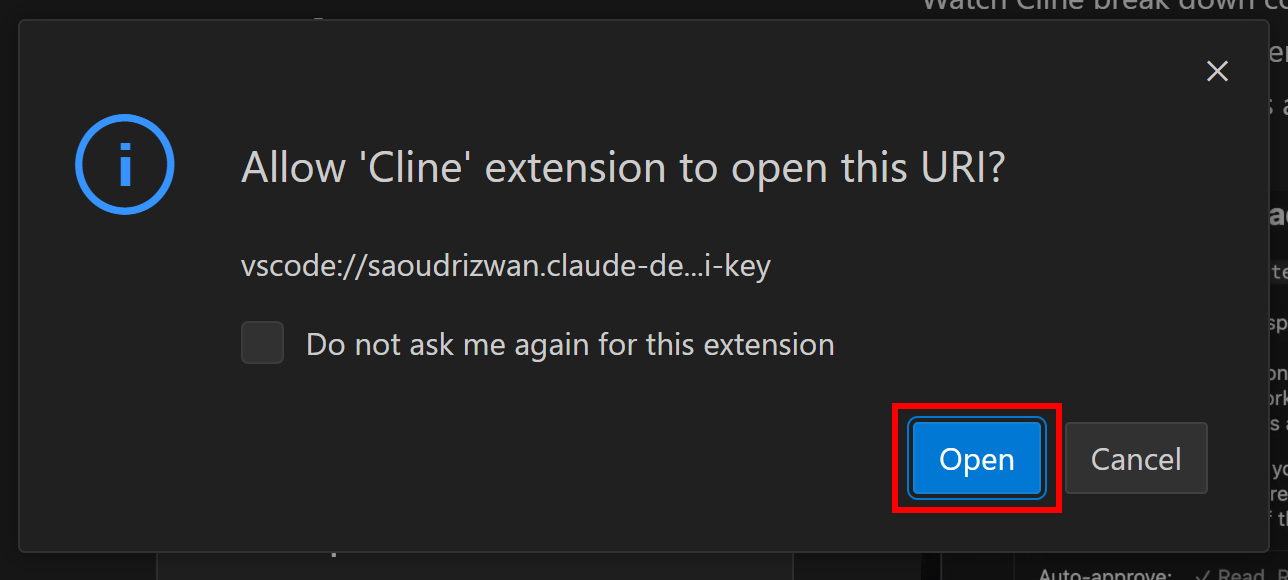
Clicking “Open” to authenticate the Cline extension
The Cline extension should now look something like this:
The Cline extension panel in VS Code
If you return to your Cline account in the browser, you will notice that it comes with $0.50 in free credits by default:
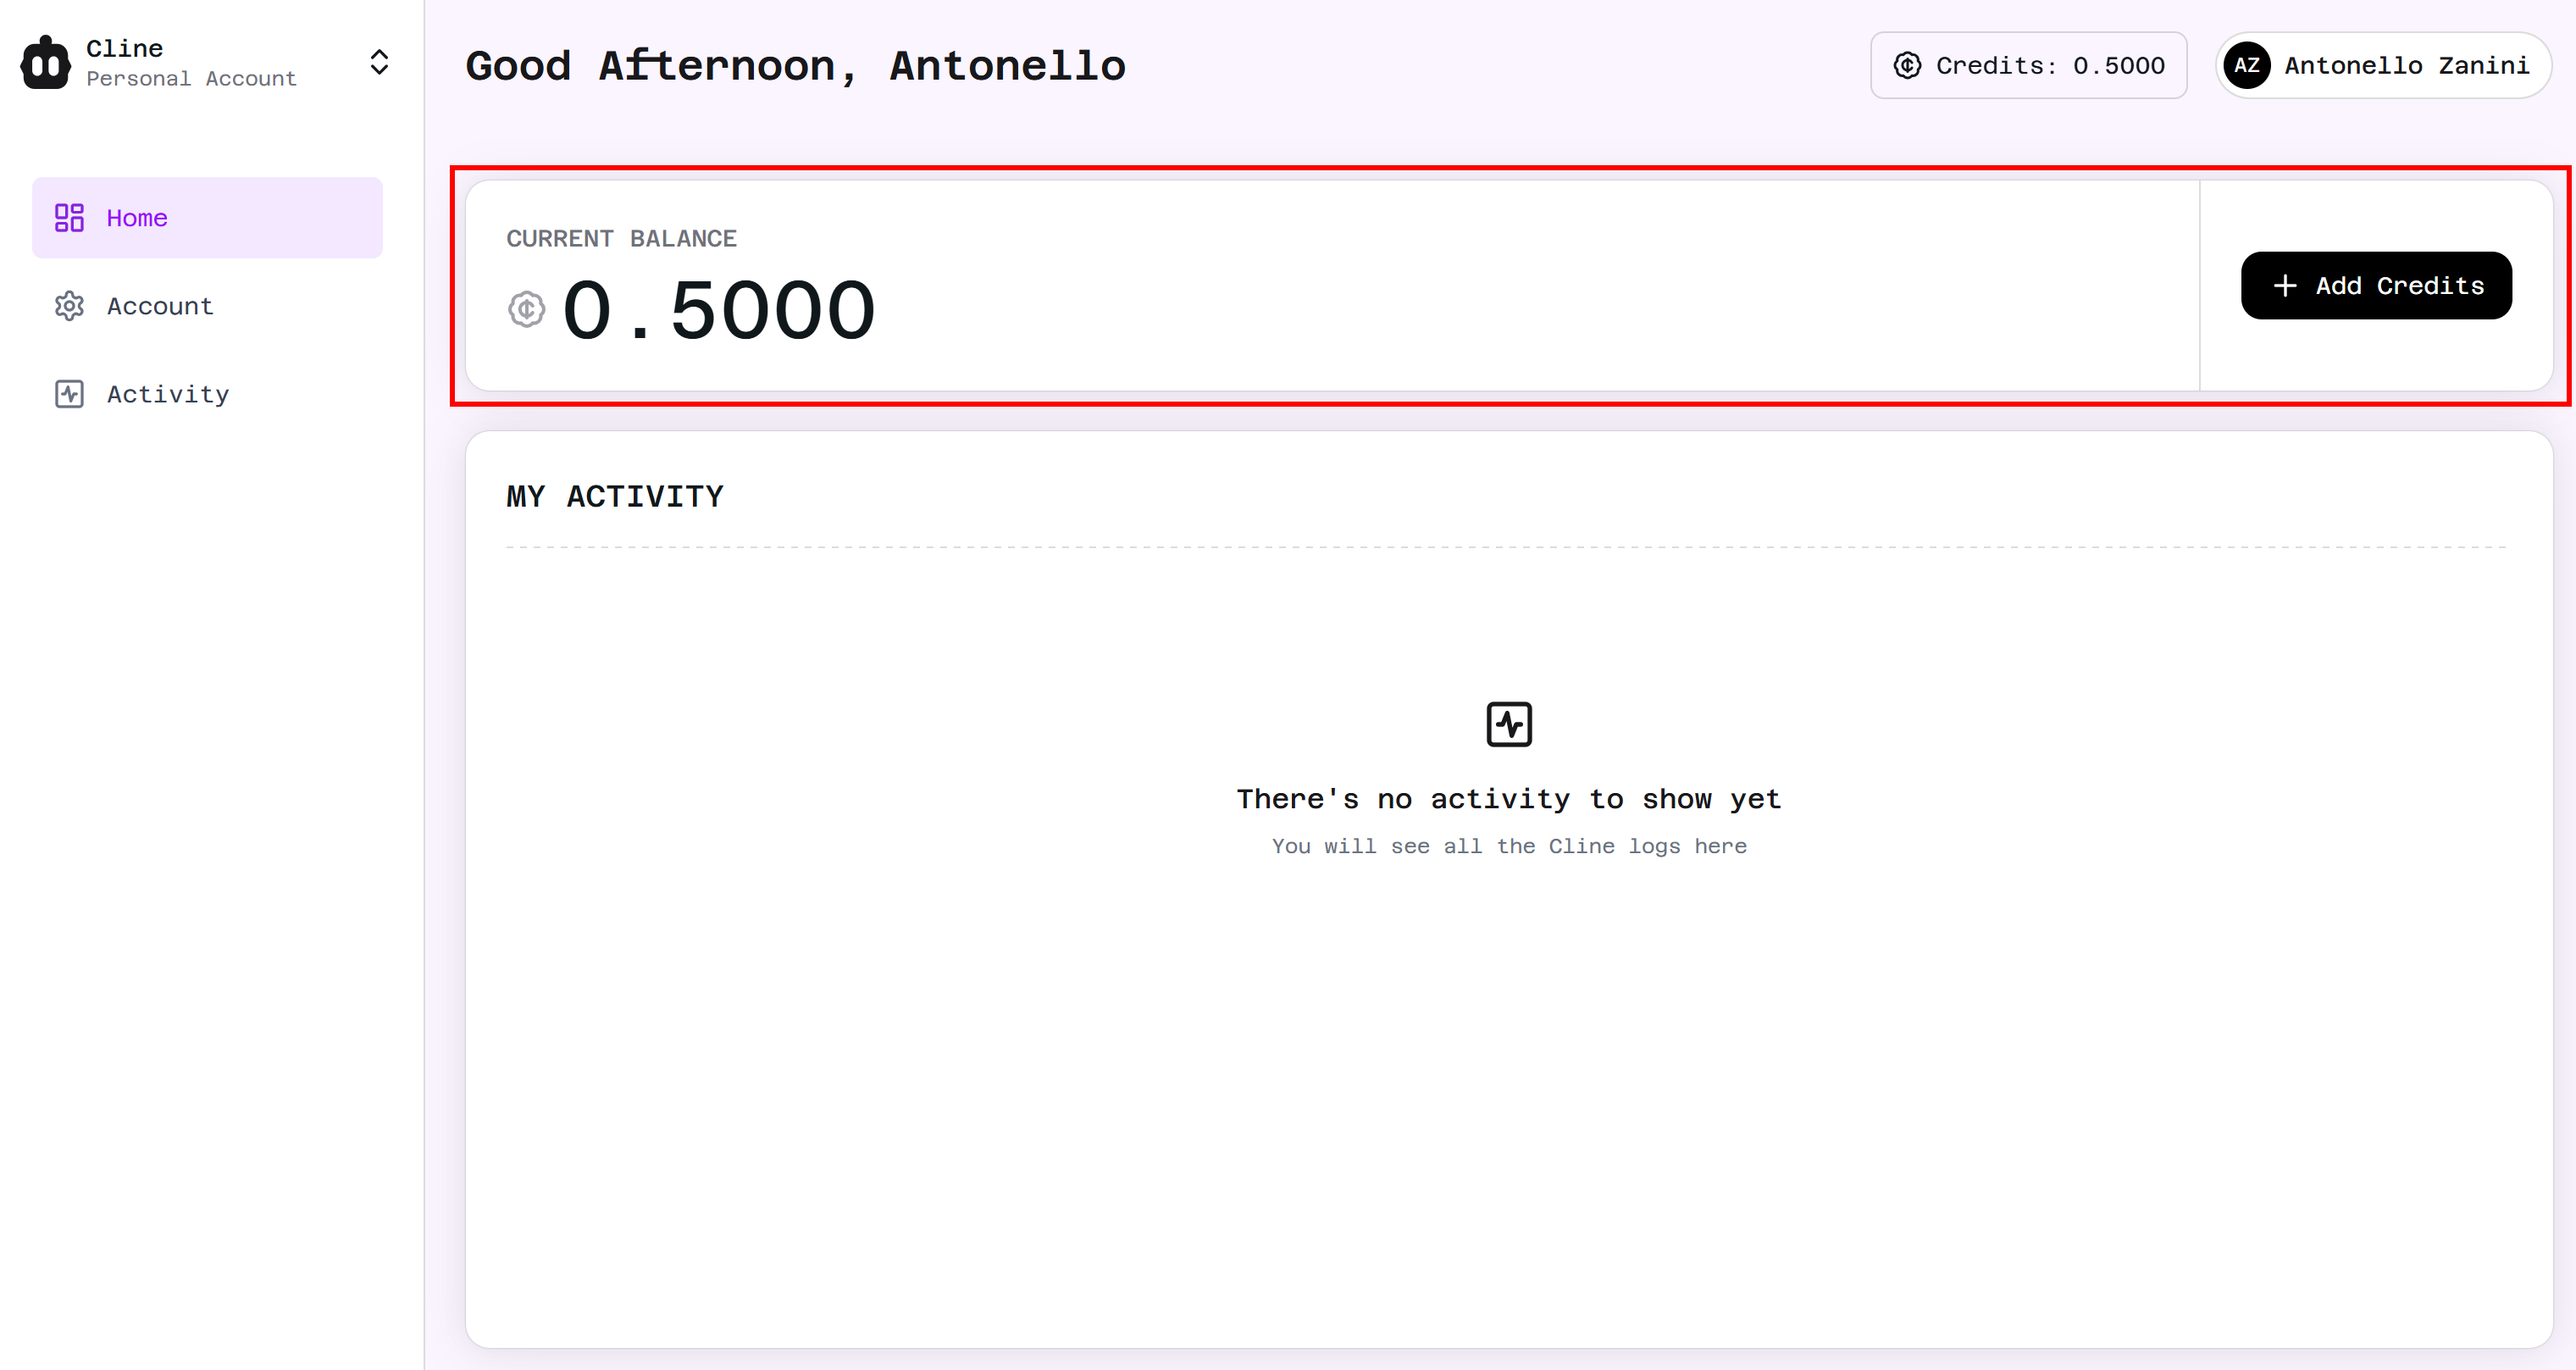
The default credit offered by Cline
If you plan to use premium LLMs via Cline, consider adding credits. (The reason is that the default balance only allows limited testing.)
Alternatively, if you want to avoid spending money or prefer using your own LLM provider, you can connect your API key directly. To do so, click the gear icon in the Cline panel. Next, select “API Configuration” and paste your API key to configure your LLM integration:
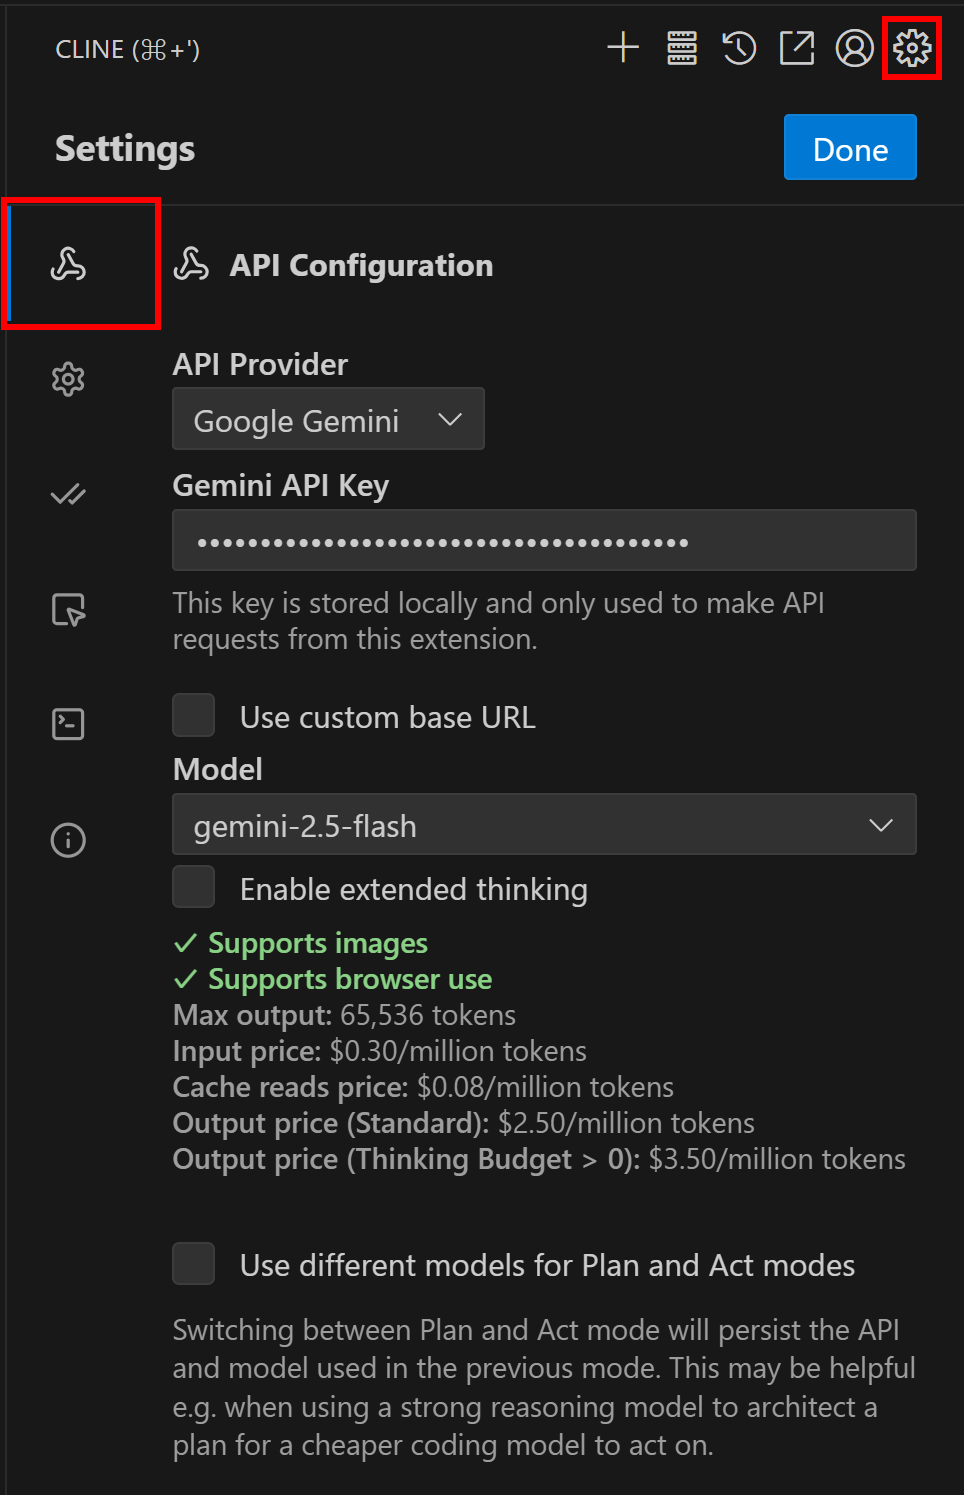
Configuring your own LLM in Cline
In the example above, we integrated Cline with
gemini-2.5-flash
model
, which is free to use via API.
Awesome! Cline is now fully set up in VS Code and ready to help you build an AI coding agent with web scraping capabilities.
Step #3: Install the Bright Data MCP Server
If you have not already, create a Bright Data account . If you already have one, simply log in.
Then, follow the official instructions to retrieve your Bright Data API. For simplicity, the instructions below assume you are using an API token with Admin permissions.
You can now install the Bright Data MCP server globally in your Node.js environment using:
npm install -g @brightdata/mcpThen, test that everything works with the Bash command below:
API_TOKEN="<YOUR_BRIGHT_DATA_API>" npx -y @brightdata/mcpOr, on Windows, the equivalent PowerShell command is:
$env:API_TOKEN="<YOUR_BRIGHT_DATA_API>"; npx -y @brightdata/mcp
In the above command, replace the
<YOUR_BRIGHT_DATA_API>
placeholder with the actual Bright Data API you retrieved earlier. This command sets the required
API_TOKEN
environment variable and starts the MCP server using the
@brightdata/mcp
npm package.
If everything is set up correctly, your terminal should display something like this:

The Bright Data MCP server startup logs
As you can see, the first time you launch the command, the
@brightdata/mcp
package initializes the required Bright Data zones in your account. More specifically, it creates one zone for
Web Unlocker
and another for the
Scraping Browser API
. These two zones enable the MCP server to run all the tools it exposes.
To verify this, log in to your Bright Data dashboard and go to the “ Proxies & Scraping Infrastructure ” page. You will see the following zones automatically created:
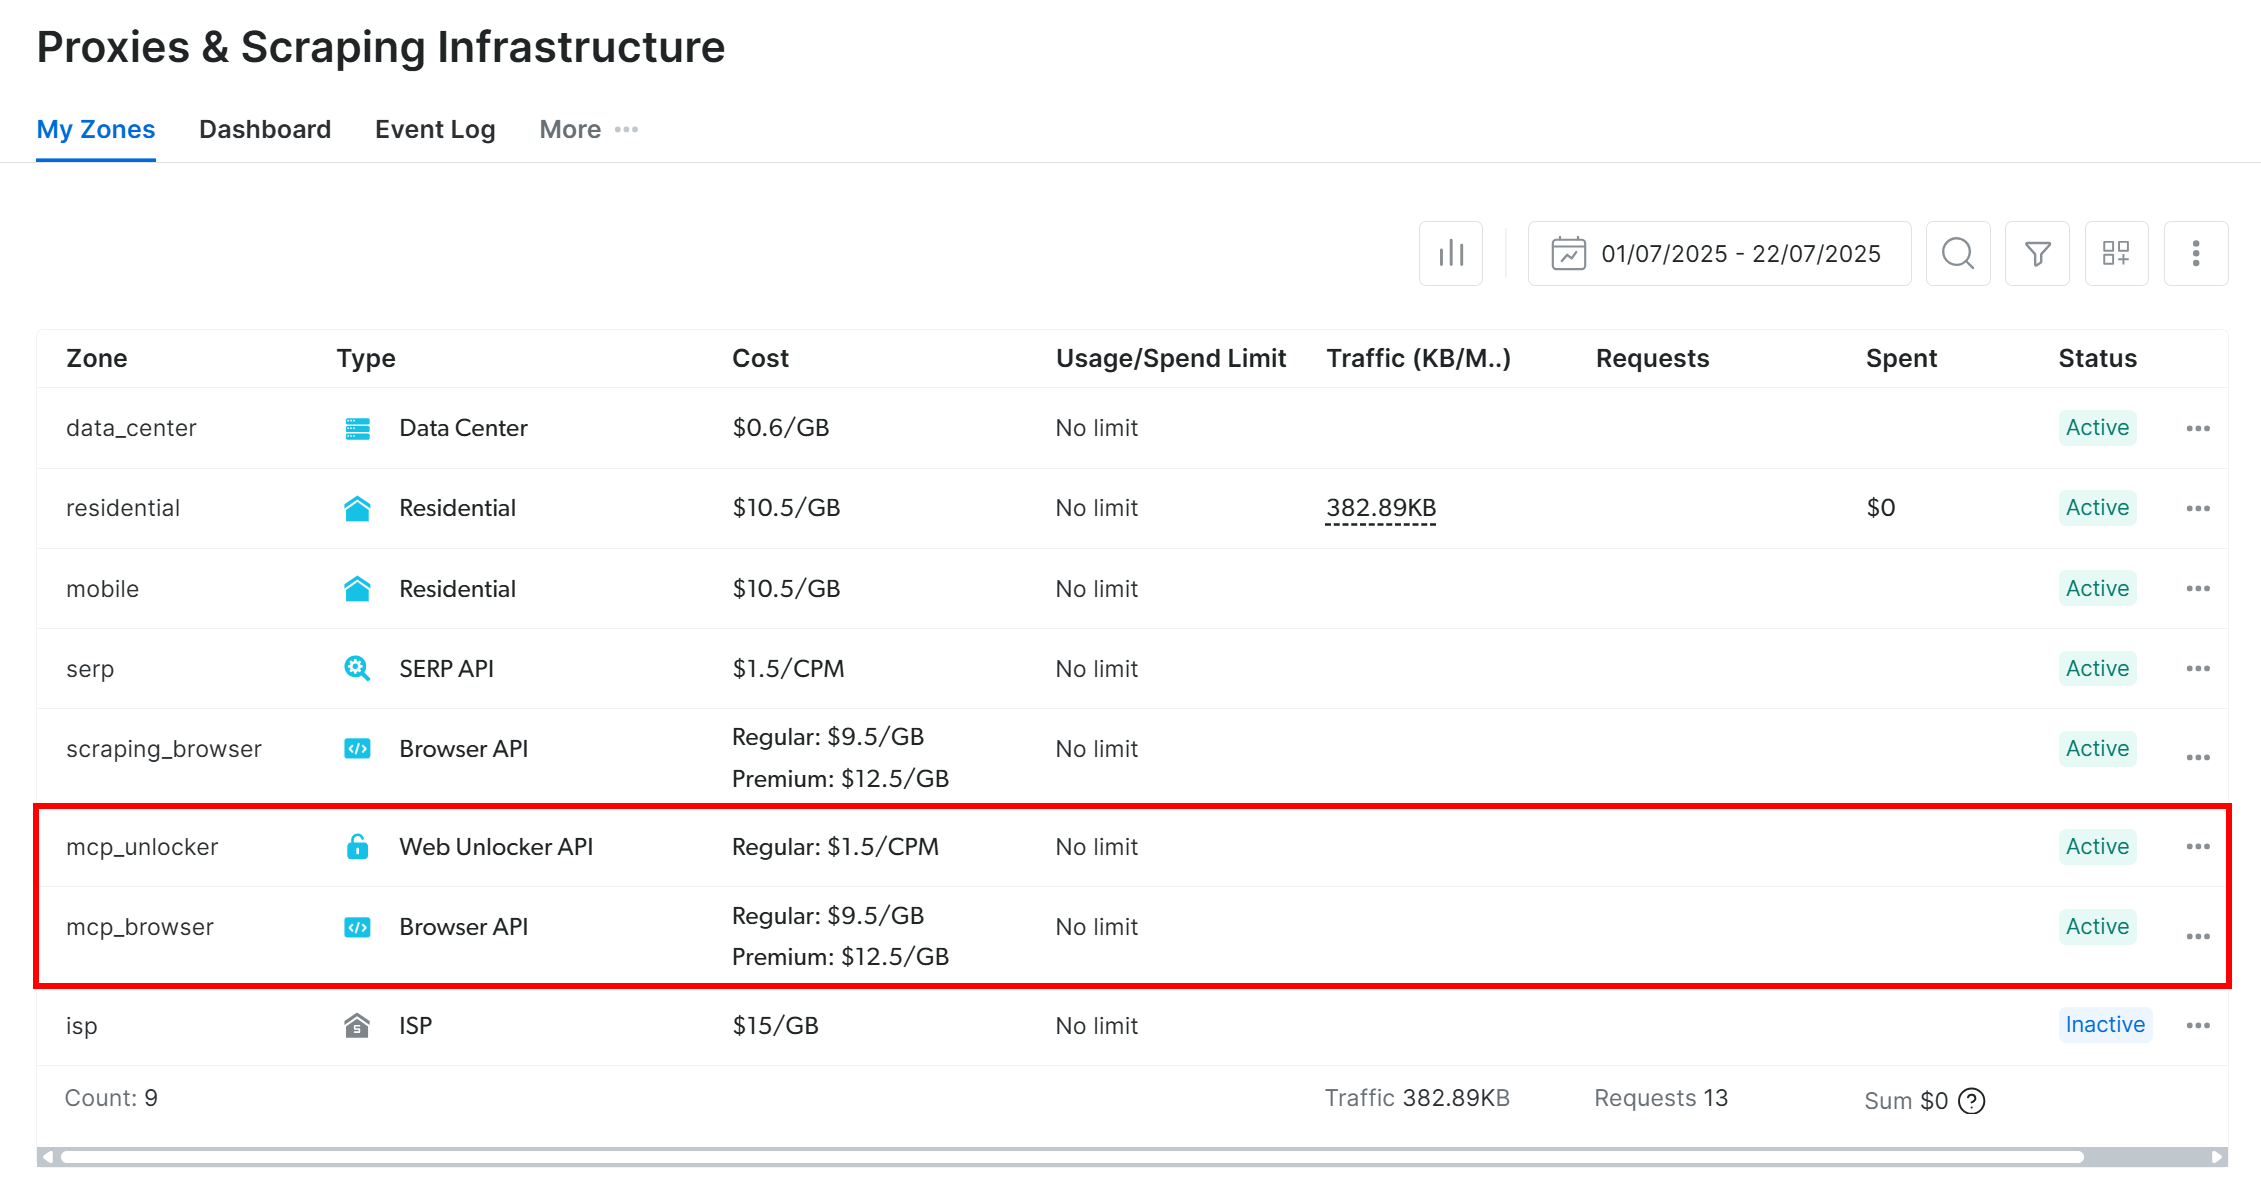
New zones created in Bright Data's dashboard
Note : If you are not using an API token with Admin permissions, you will need to create the zones manually. Refer to the official documentation for detailed guidance .
Terrific! The Bright Data MCP server works like a charm.
Step #4: Connect Cline to the Bright Data MCP Server
It is time to integrate the Cline extension with the locally running Bright Data MCP server. Start by clicking the “MCP Servers” button in the Cline panel:
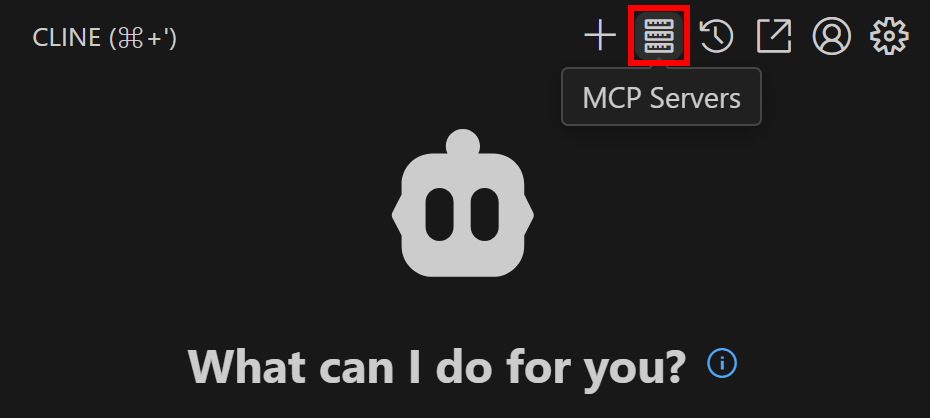
Clicking on "MCP Servers" in the upper right menu on Cline
You will be taken to the Cline MCP Servers configuration section. Switch to the “Installed” tab and click the “Configure MCP Servers” button:
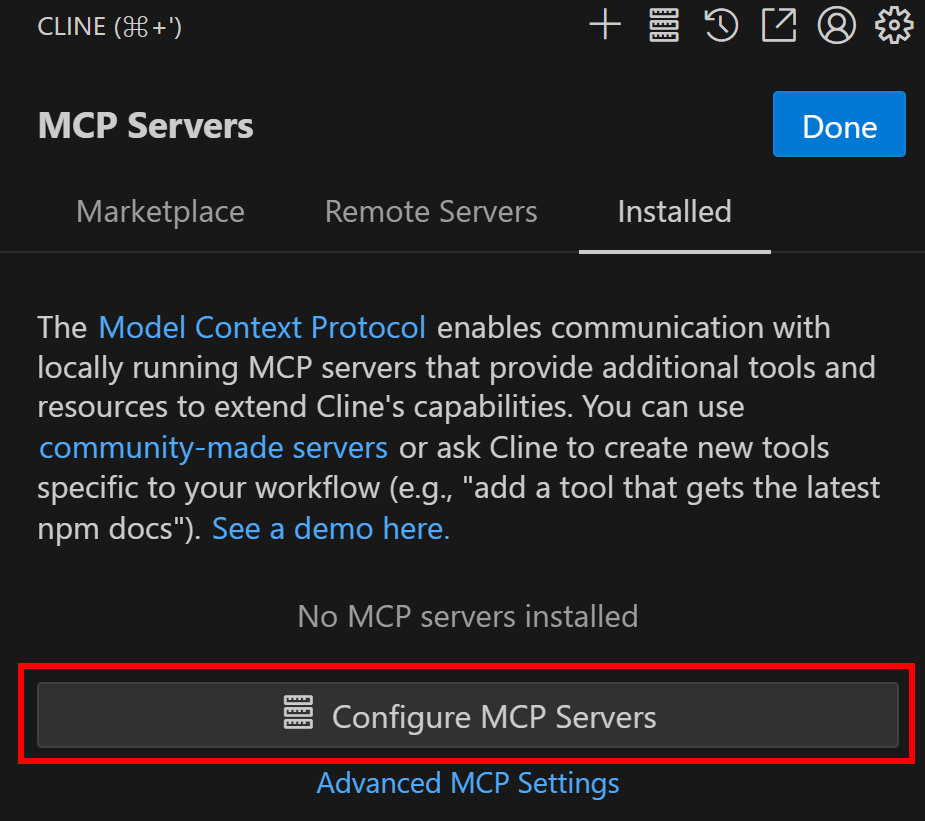
Clicking on the "Configure MCP Servers" button
A
cline_mcp_setting.json
file will open in Visual Studio Code. There, you can define which MCP servers the Cline extension can connect to. For integration with the Bright Data MCP server, configure it as follows:
{
  "mcpServers": {
    "Bright Data": {
      "autoApprove": [],
      "disabled": false,
      "timeout": 300,
      "type": "stdio",
      "command": "npx",
      "args": [
        "@brightdata/mcp"
      ],
      "env": {
        "API_TOKEN": "<YOUR_BRIGHT_DATA_API>"
      }
    }
  }
}
Note : For more details, see the official GitHub issue .
In other words, add the “Bright Data” configuration inside the
mcpServers
field. Make sure to replace
<YOUR_BRIGHT_DATA_API>
with your actual Bright Data API token.
You should see something like this:
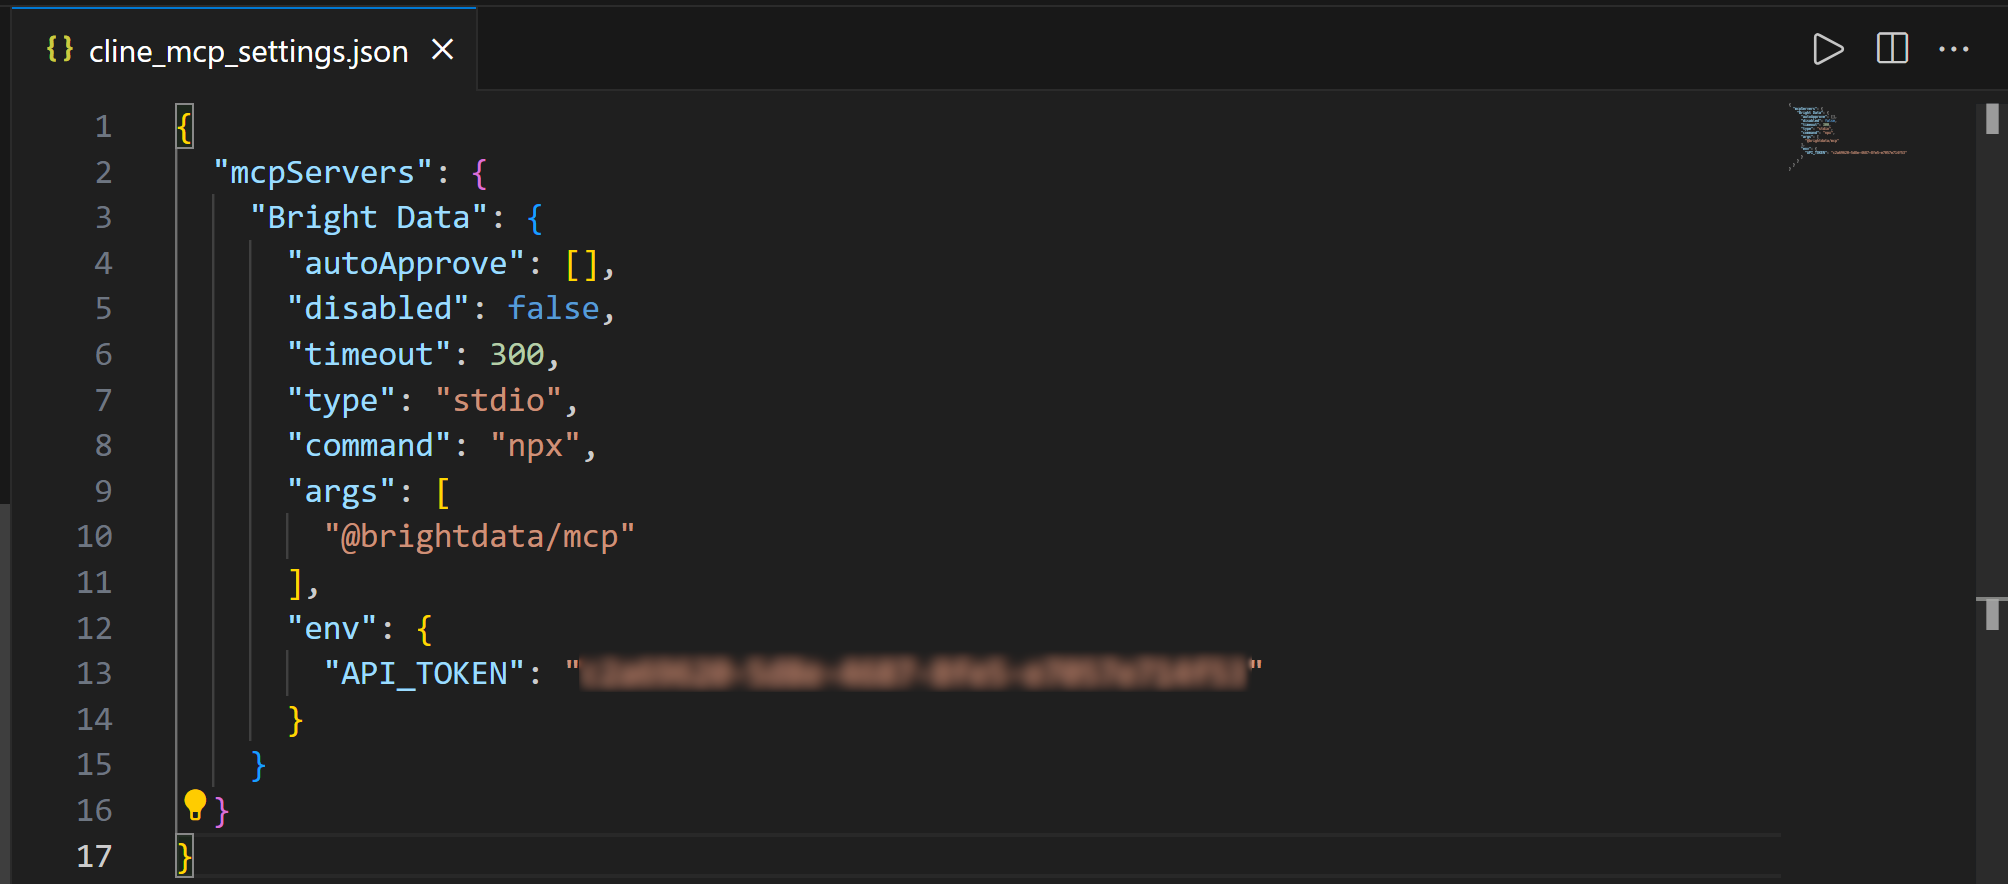
The JSON code for the MCP server connection
Perfect! Now, if you enter the “Installed” tab, you will see an entry for the Bright Data MCP server. Expand it to view all the tools it supports:
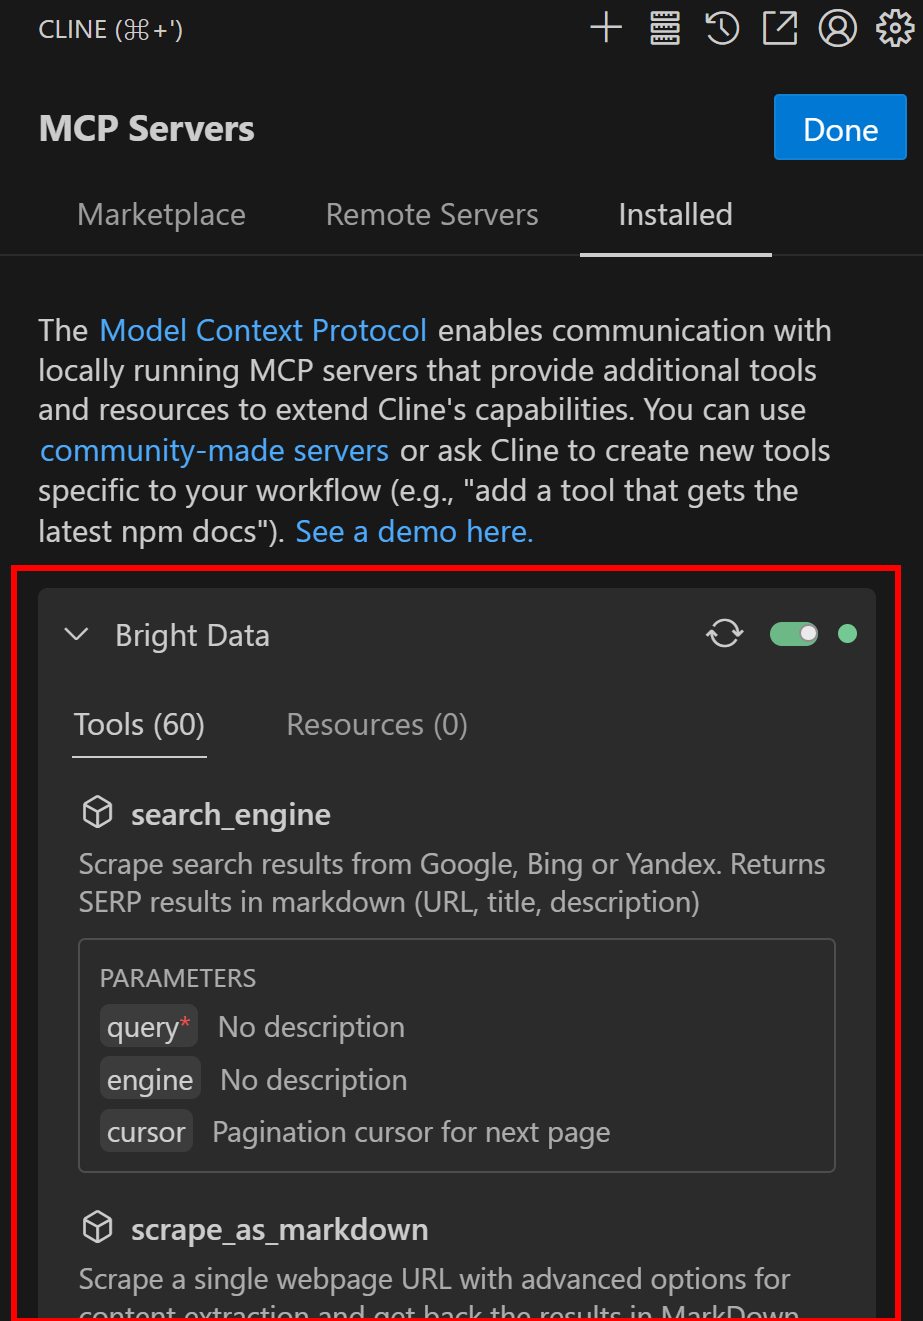
The Bright Data MCP server connected
Here, you can configure the Bright Data MCP server and its tools. For this workflow, the default settings are fine.
For more information, take a look at the official docs .
Great! The Cline extension can now connect to the Bright Data MCP server and utilize its tools.
Step #5: Utilize the Cline AI Agent
You are ready to test the Cline AI coding agent connected to the Bright Data MCP server in Visual Studio Code.
Start by opening Cline. Then, click click the arrow on the right to access the “Auto-approve Settings” menu. In the menu, check the option “Use MCP Servers” to allow automatic connection to configured MCP servers:
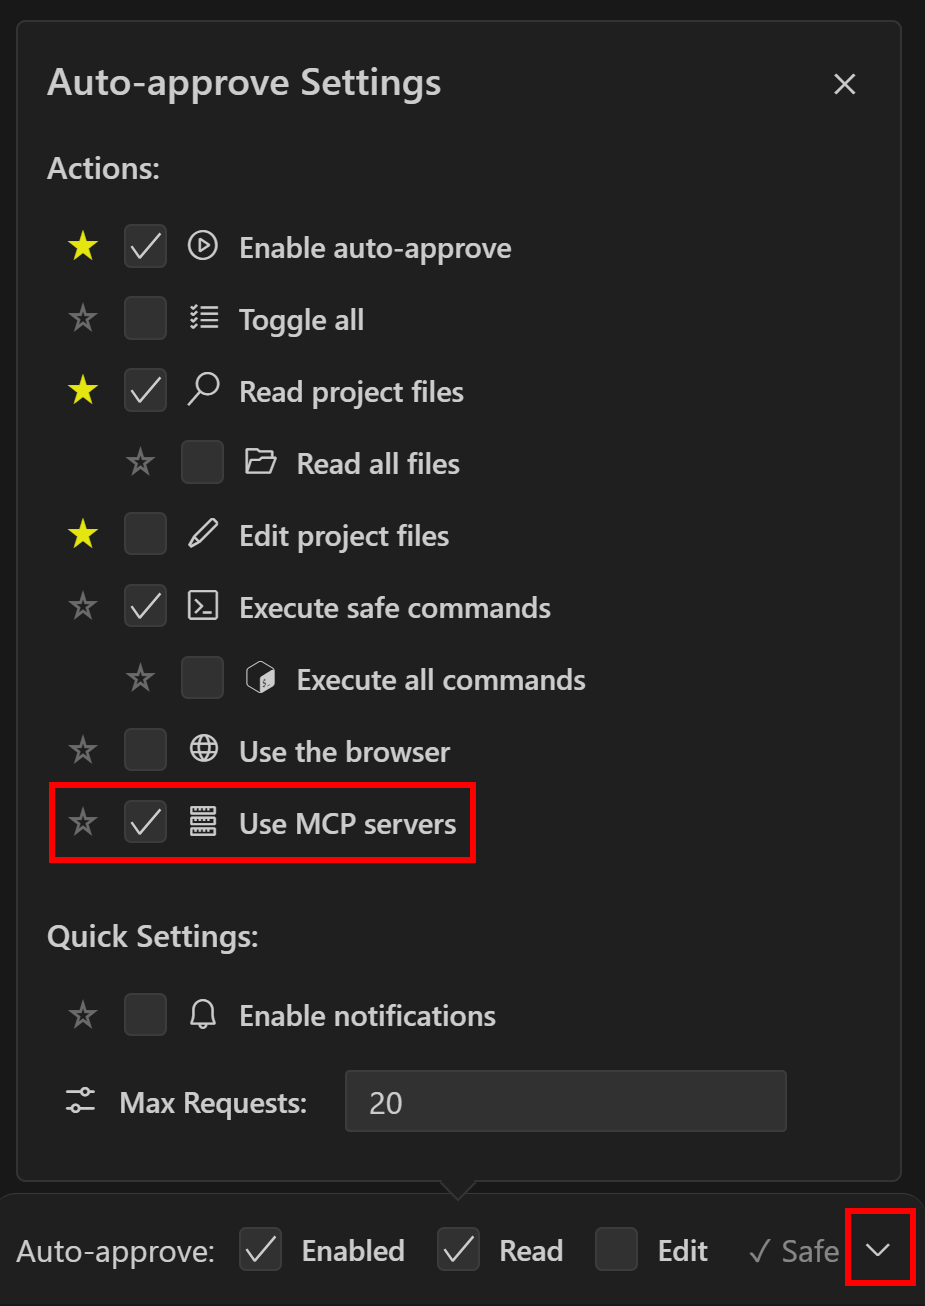
Turning on MCP Server usage in the settings
With this setting enabled, Cline will automatically connect to the MCP server without asking for permission. You will still be prompted before a tool is used, so that should be enough.
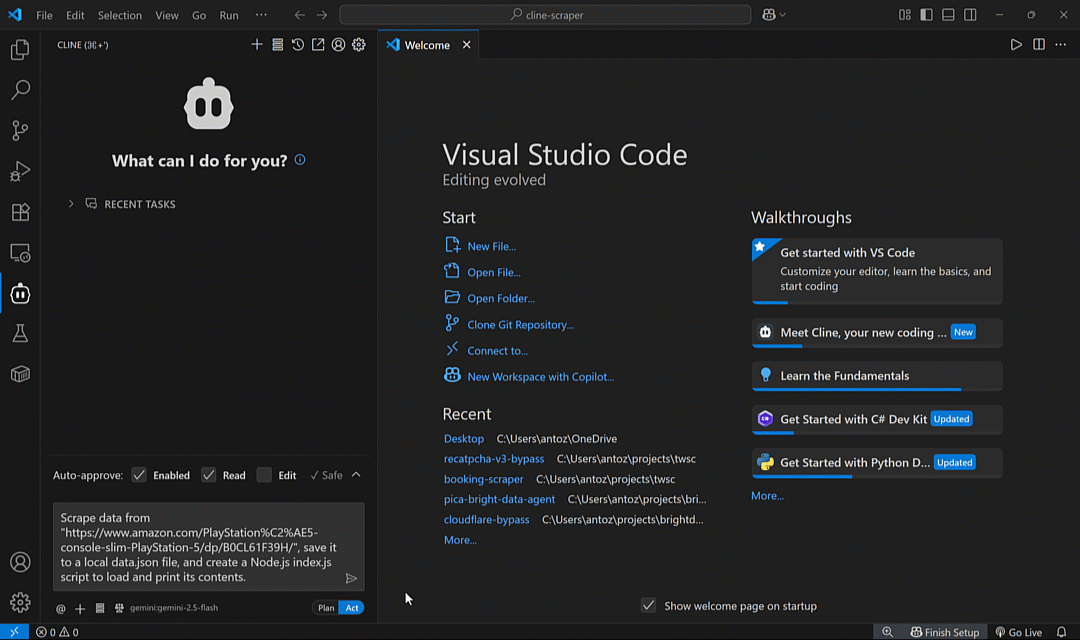
Test the data access capabilities in your AI coding agent with a prompt like this:
Scrape data from "https://www.amazon.com/PlayStation%C2%AE5-console-slim-PlayStation-5/dp/B0CL61F39H/", save it to a local data.json file, and create a Node.js index.js script to load and print its contents.This describes a potential real-world scenario, proving useful for collecting data for analysis, mocking, or testing.
Run the prompt in Cline, and you should see the following interaction:
The interaction you are supposed to see
The above GIF has been sped up, but this is what happened:
The Cline extension sends the prompt to your configured LLM (e.g.,
gemini-2.5-flash
).
The LLM identifies the right MCP tool for the job, which is
web_data_amazon_product
.
It asks your permission to run that tool via Bright Data MCP, using the Amazon product URL from the prompt (i.e.,
https://www.amazon.com/PlayStation%C2%AE5-console-slim-PlayStation-5/dp/B0CL61F39H/
)
Once you approve, the scraping task is launched on the Bright Data servers.
Cline then asks for permission to access the task result.
Behind the scenes, Bright Data performs the scraping task, and Cline receives the real product data in JSON format. That is the output of the MCP tool, which is shown by Cline.
You are asked for permission to save the data to a
data.json
file.
After approving, the file is created and populated.
You are prompted to create an
index.js
script to read and print the JSON content.
Once approved, the file is generated.
After the task completes, your project will contain these two files:

The files in your folder after Cline finishes the task
Where
data.json
stores the Amazon product data in JSON format retrieved by
Bright Data’s Amazon Scraper
:
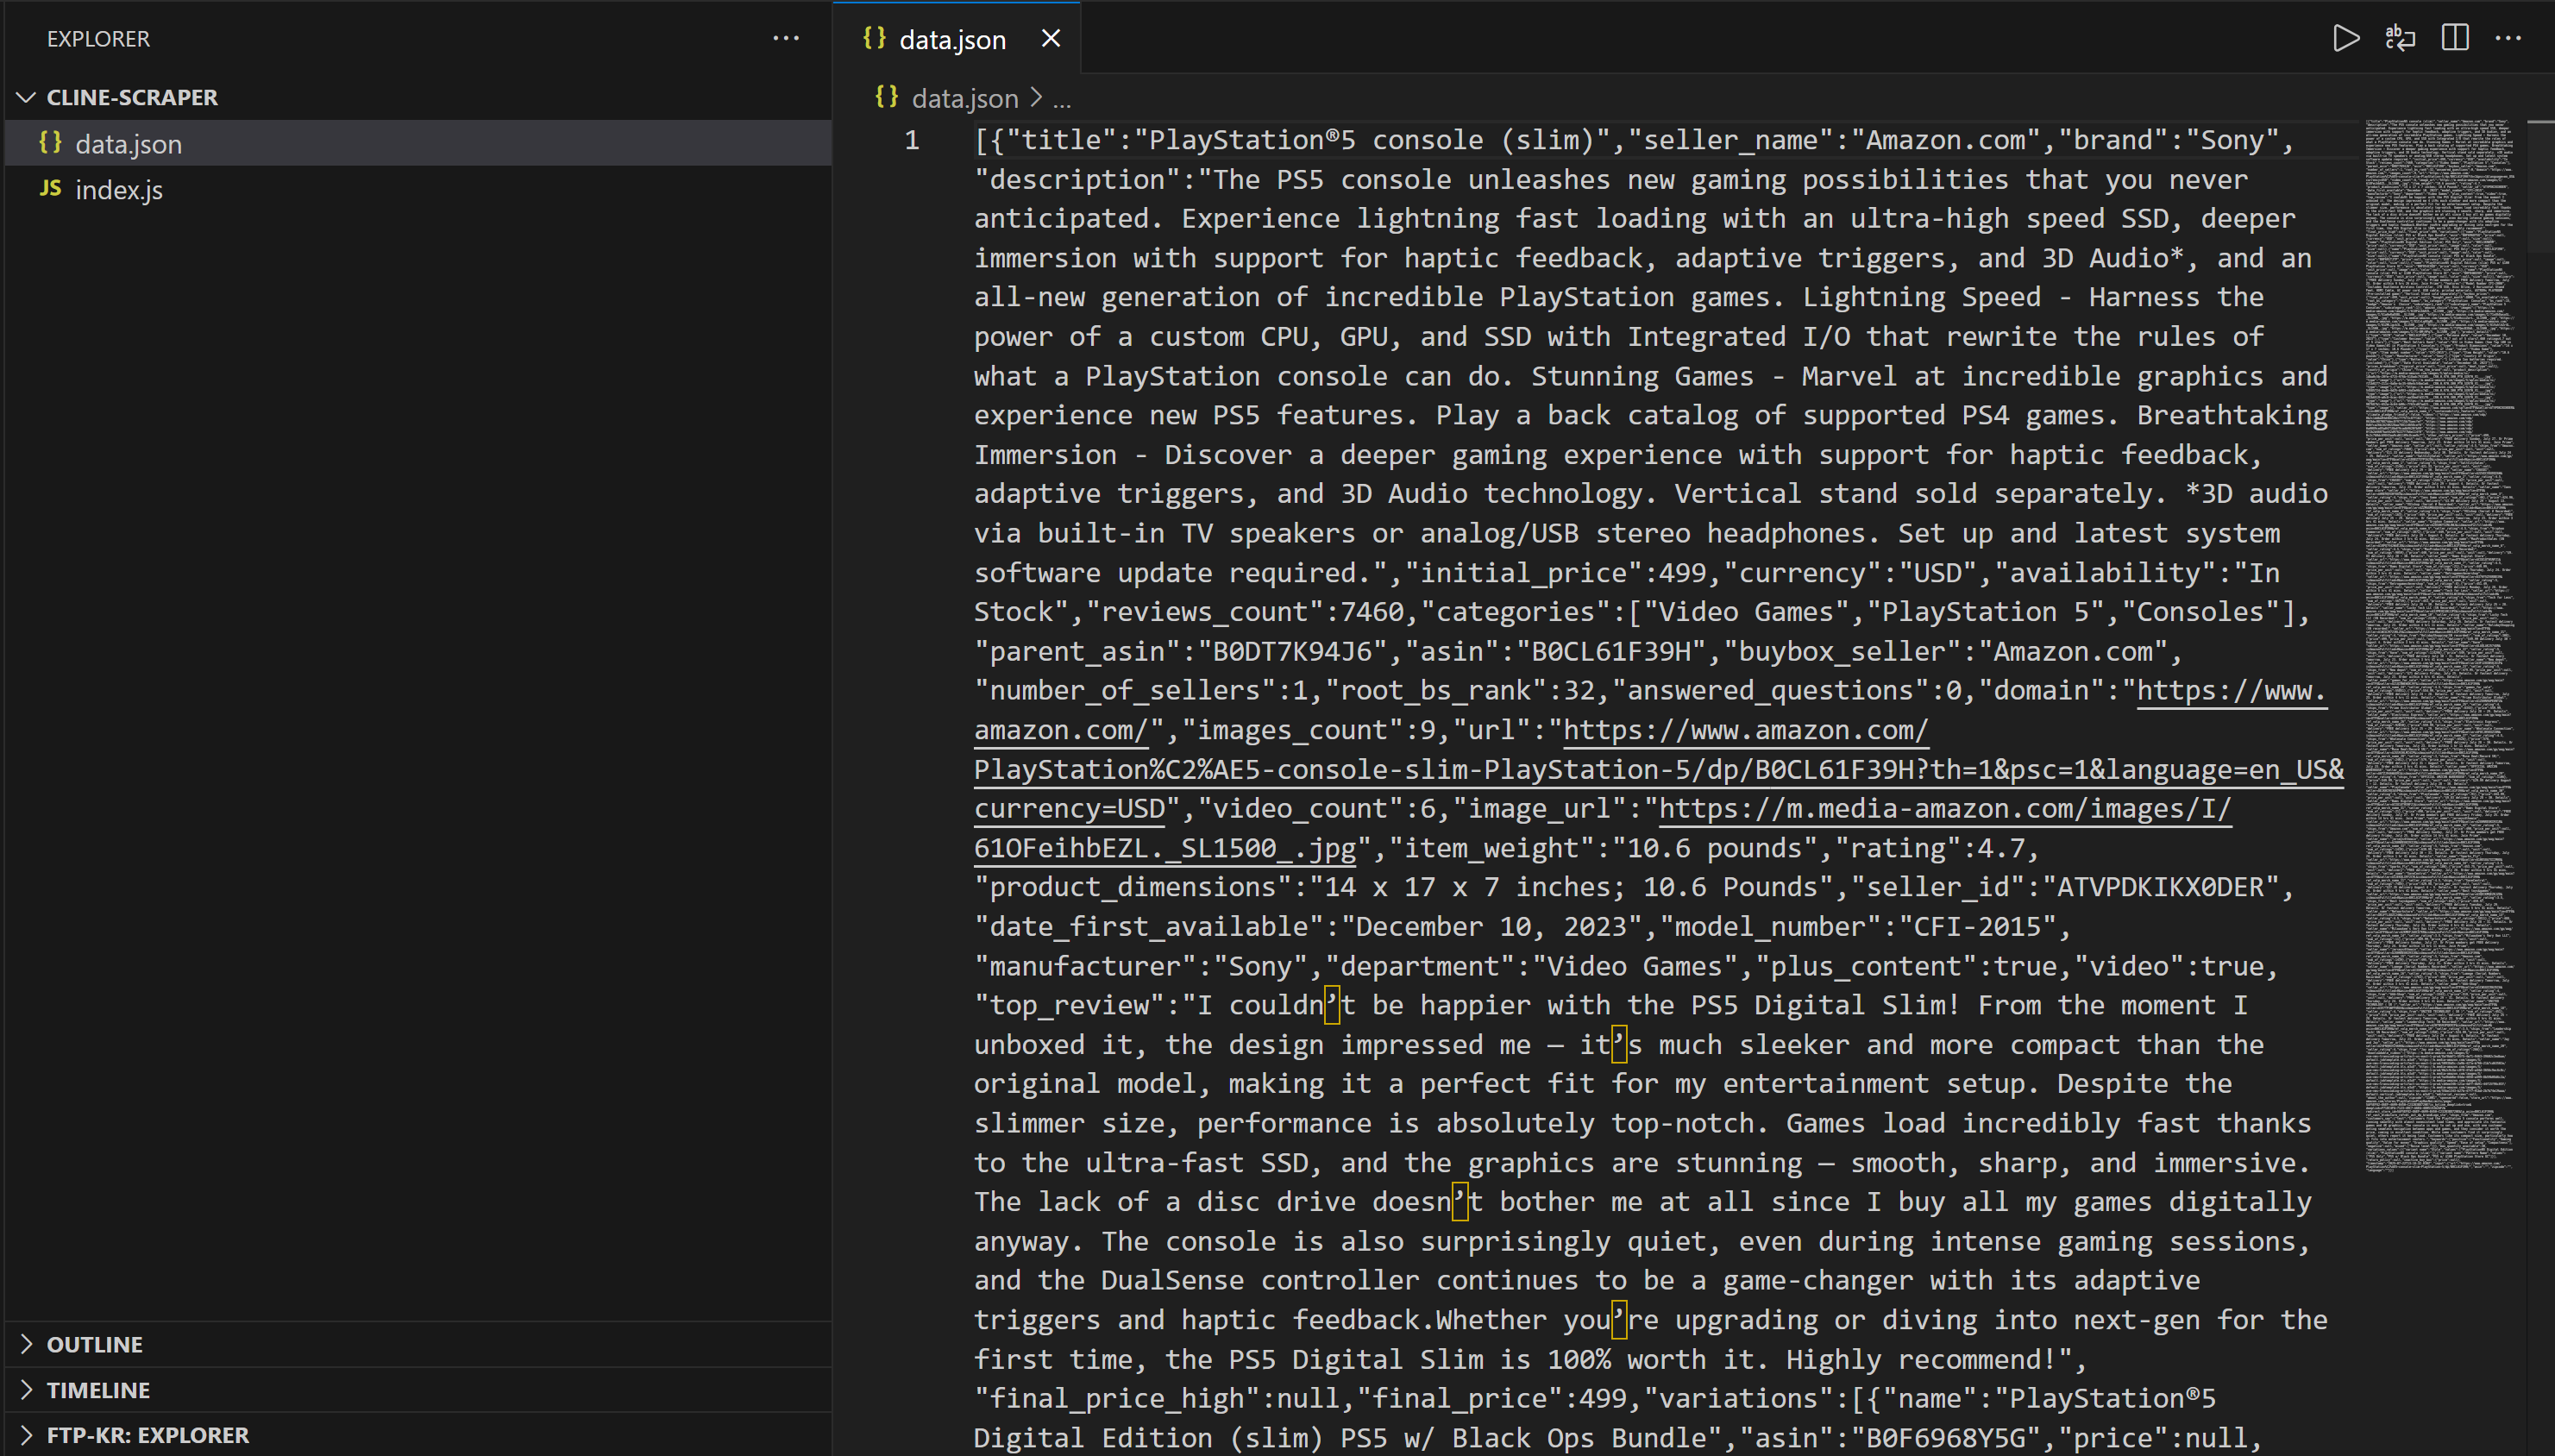
The data from the scraped Amazon page
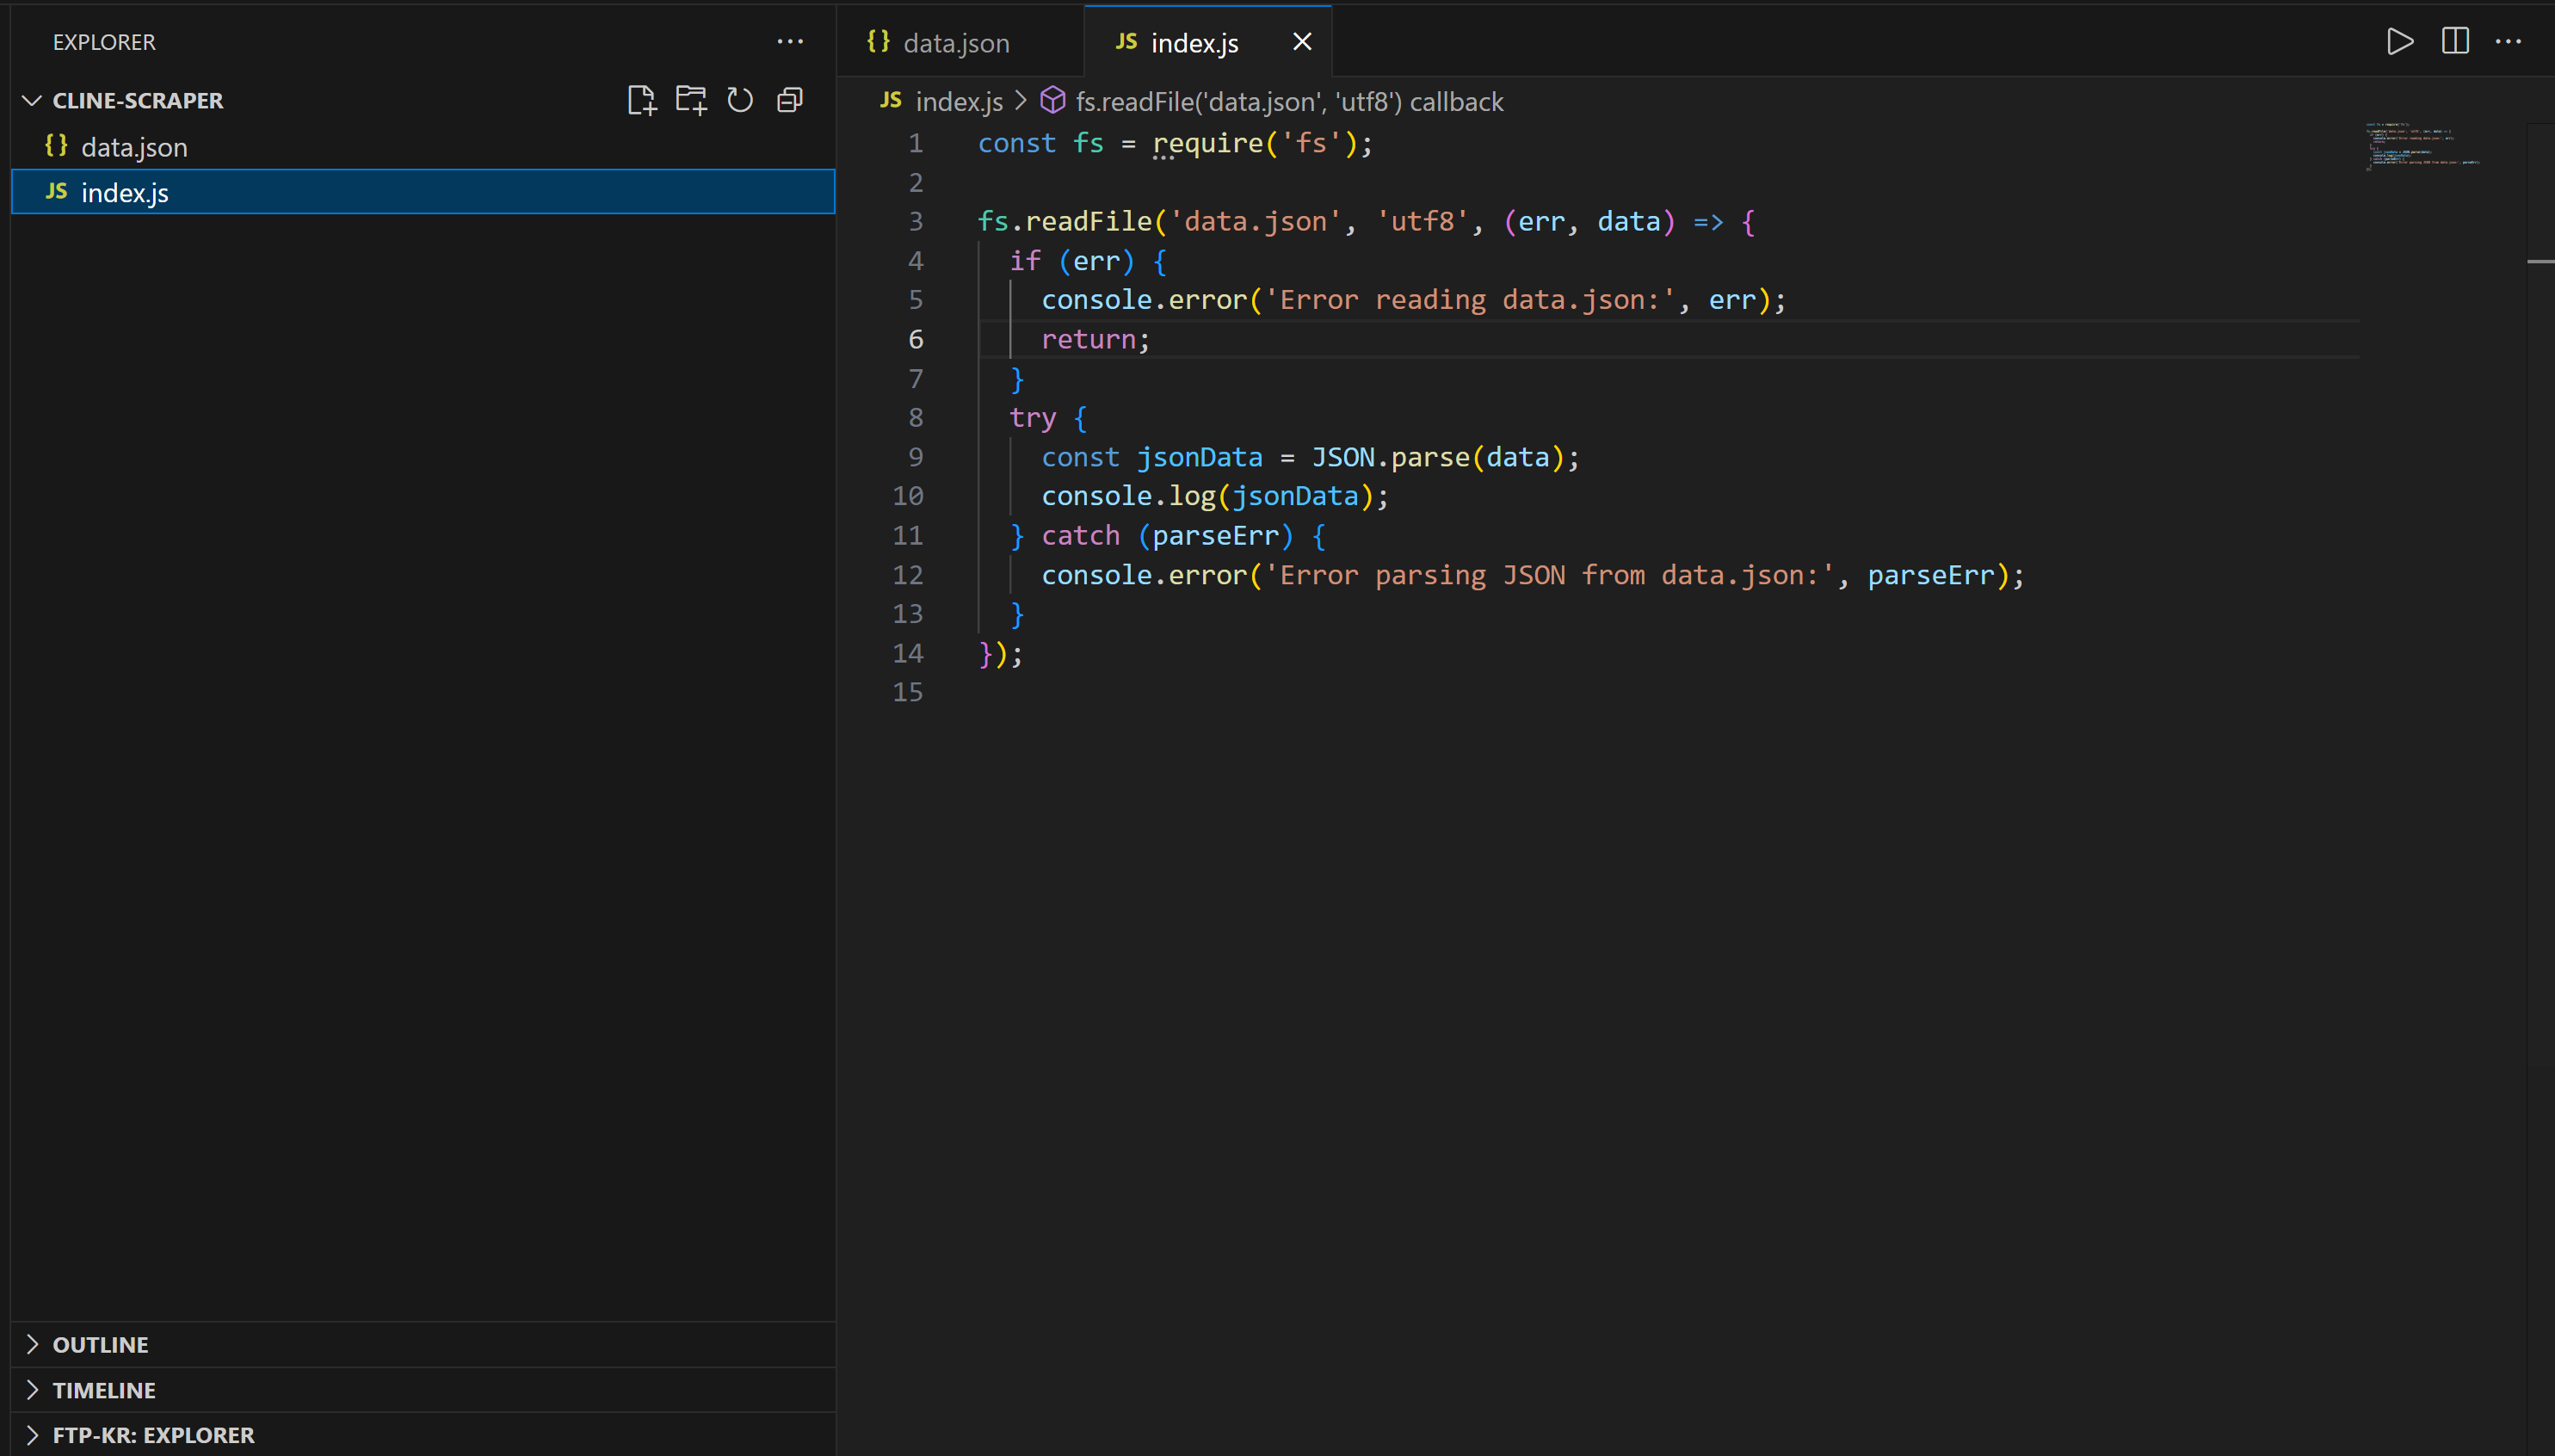
An
index.js
: contains Node.js logic to load and print its contents:
Execute the produced
index.js
script with:
node index.jsIn the terminal, you should see the product data printed:
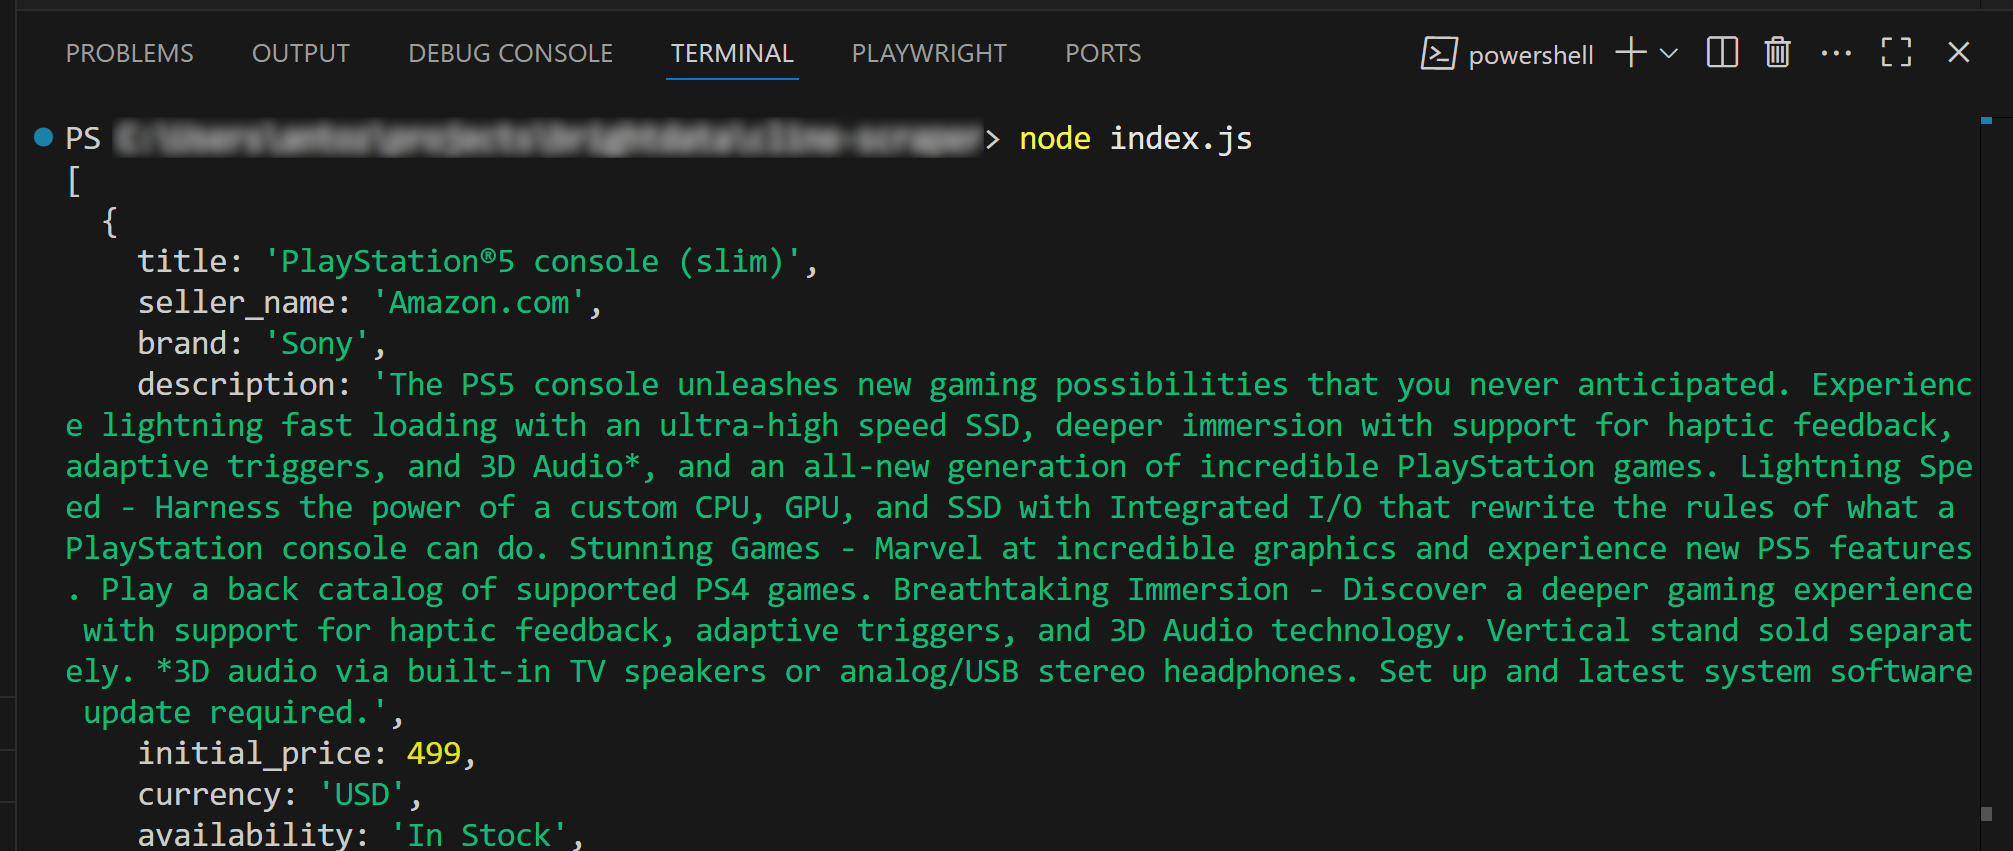
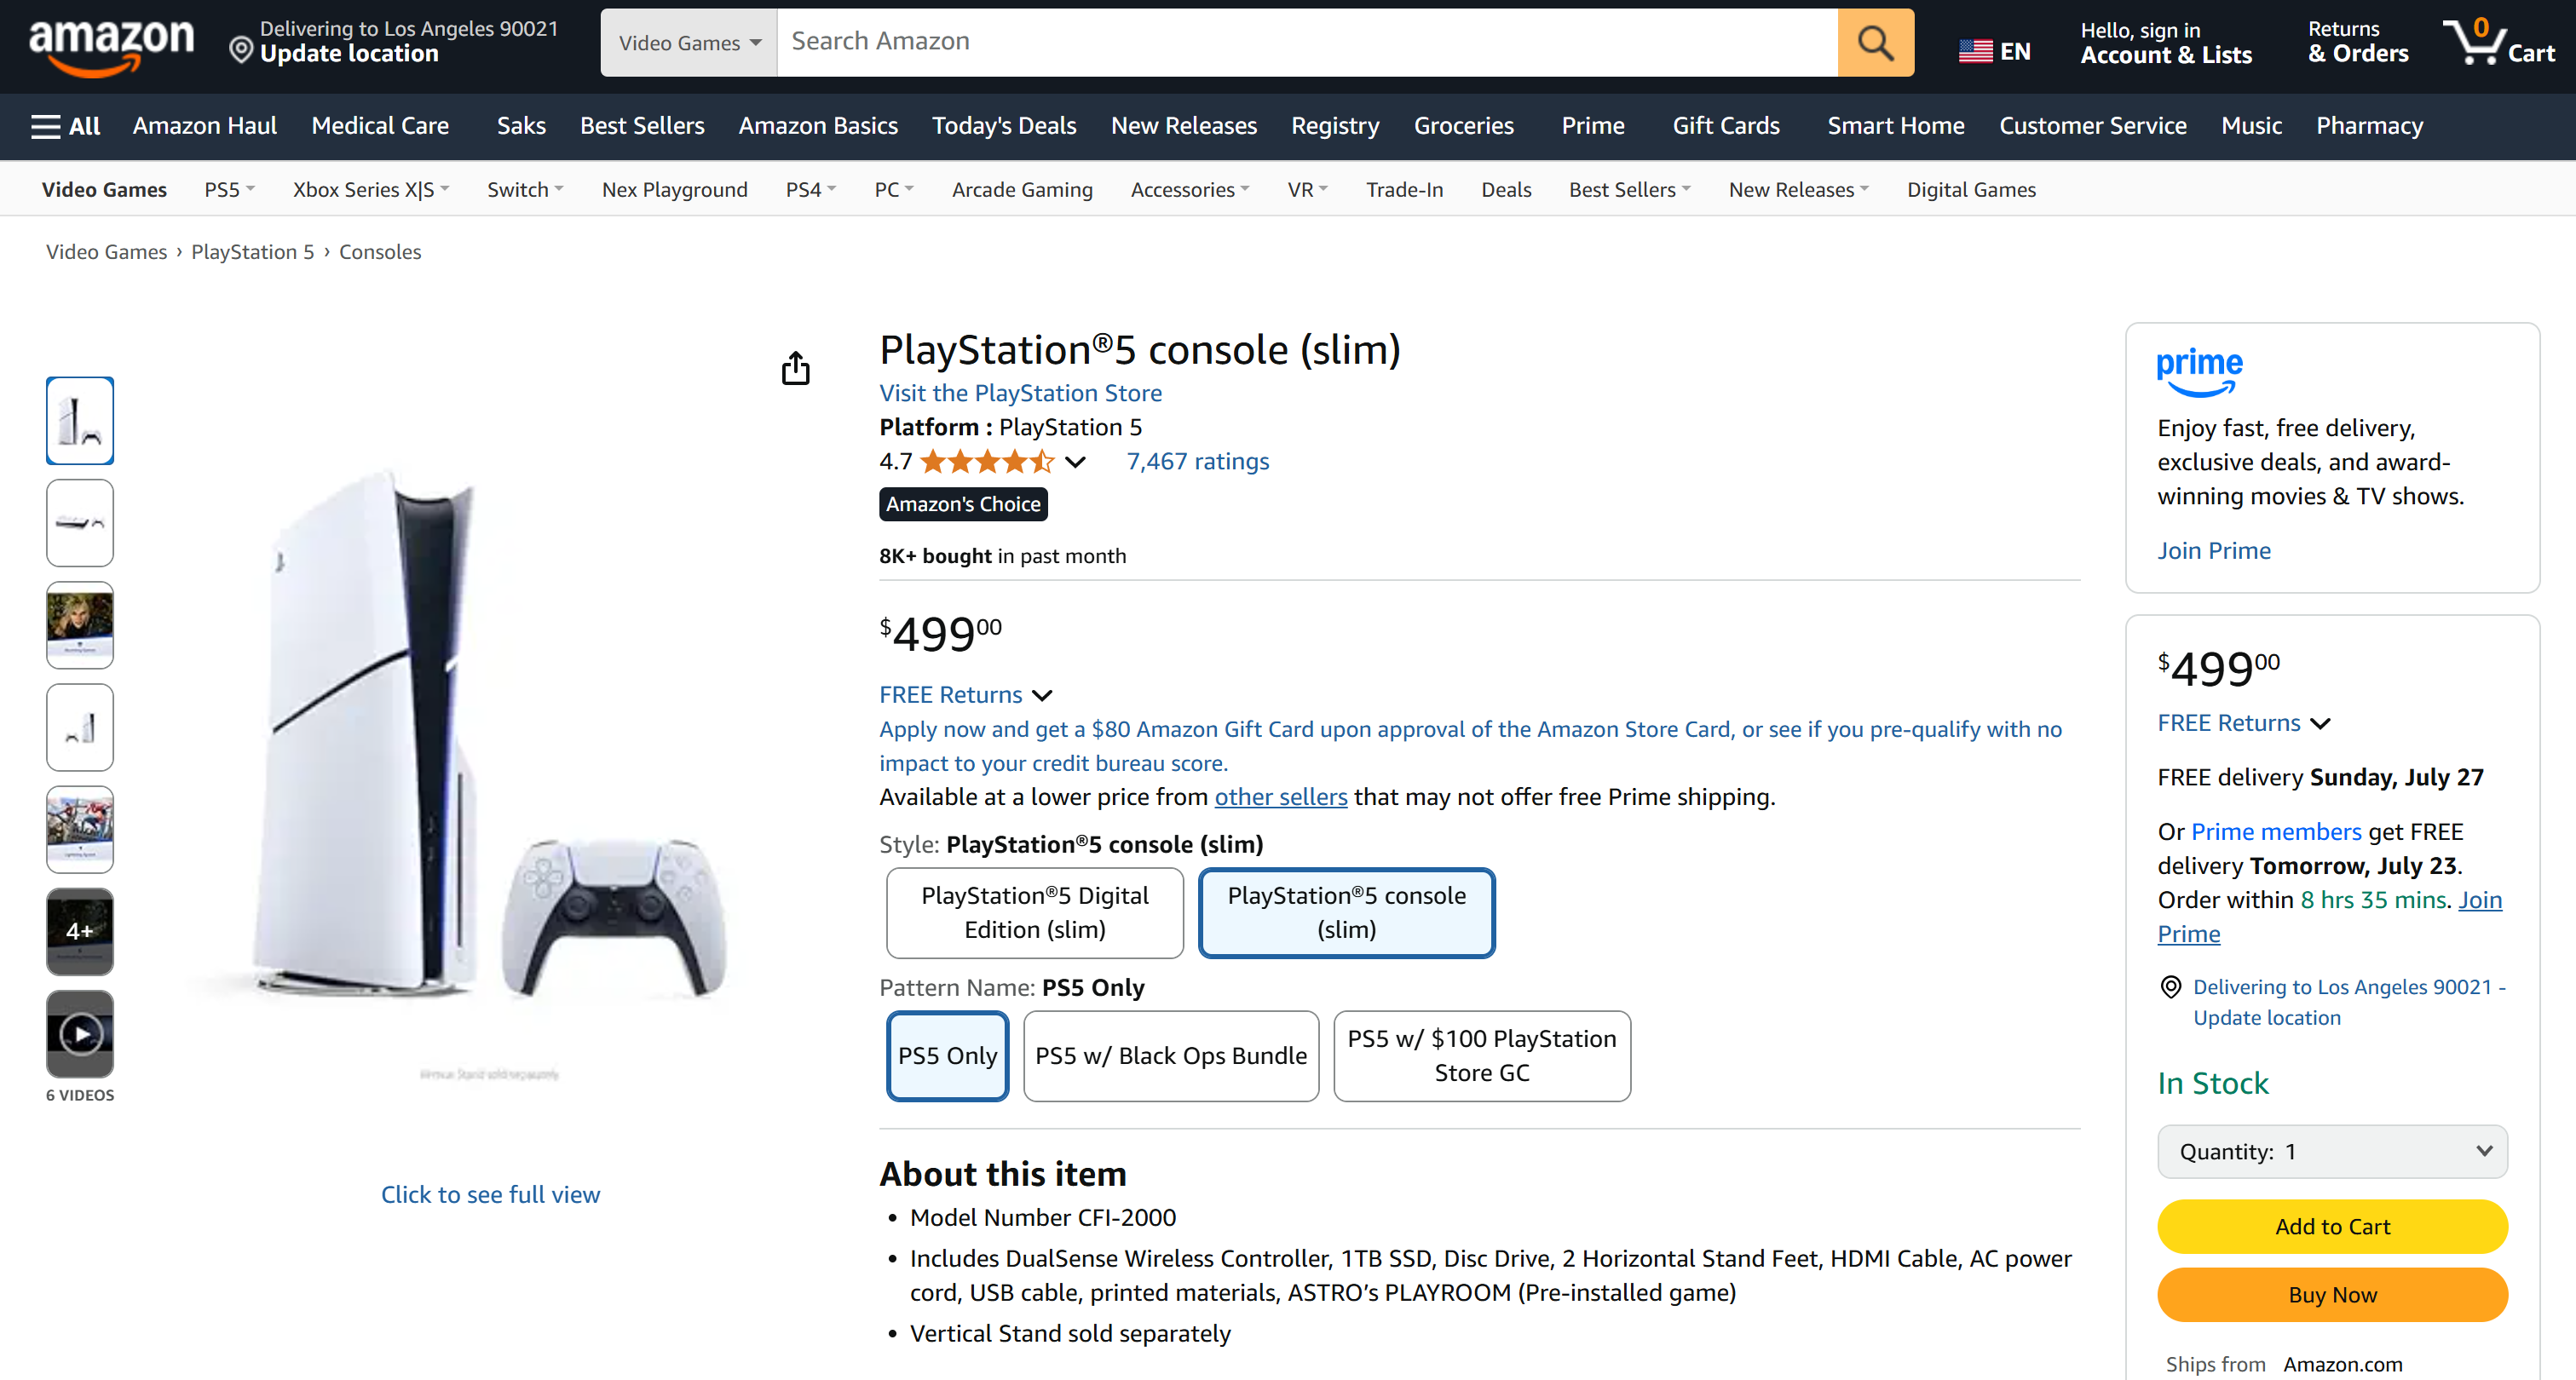
The workflows worked perfectly, as the data contained in the JSON file matches the data on the original Amazon product page:
Note that
data.json
stores real scraped data, not hallucinated content from the LLM. Also, remember that scraping Amazon is no small feat, given their strict anti-bot systems (like the notorious
Amazon CAPTCHA
).
That is the Power of Bright Data + Cline, and the one above was just a basic use case. You can now try more prompts and explore advanced LLM-driven data workflows , right inside Visual Studio Code.
Et voilà! You just witnessed seamless web data retrieval using Bright Data’s MCP integration with the Cline AI coding agent.
Conclusion
In this article, you learned how to integrate Cline with the Bright Data MCP server to build an AI coding agent that can access the web. This was made possible thanks to Cline’s support for MCP integration.
Keep in mind, this was just a simple example. To build more advanced agents, consider exploring the full range of tools available in the Bright Data MCP server . Those tools can support most of your AI-driven data use cases.
Create a free Bright Data account and start exploring our AI-ready web data tools!